Certificate Request User Guide
Certificate Request is a macOS utility app to request and install X.509 certificates from Active Directory. This user guide explains how to use Certificate Request and how to acquire generated certificates to configure common services.
Requirements
Certificate Request requires macOS 10.12 or later and a network connection to an Active Directory system (Windows Server 2003 or later). You will need Active Directory credentials to authenticate and receive a Kerberos ticket.
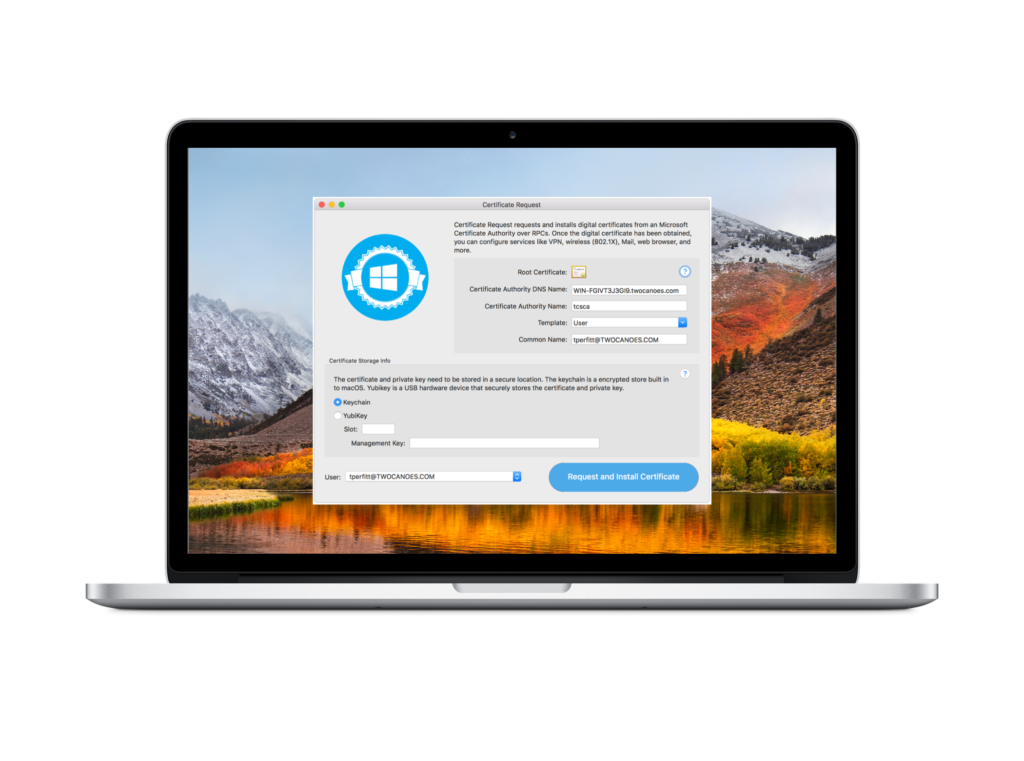
User Interface
The main interface of Certificate Request is divided into 2 sections: the Submission Information Section and the Certificate Storage Information Section.
The Submission Information Section has all the information to submit the certificate request (called a certificate signing request [CSR]).
The Certificate Storage Information section defines where the private key is generated and where the signed certificate is stored after receiving it from Active Directory.
Submission Information
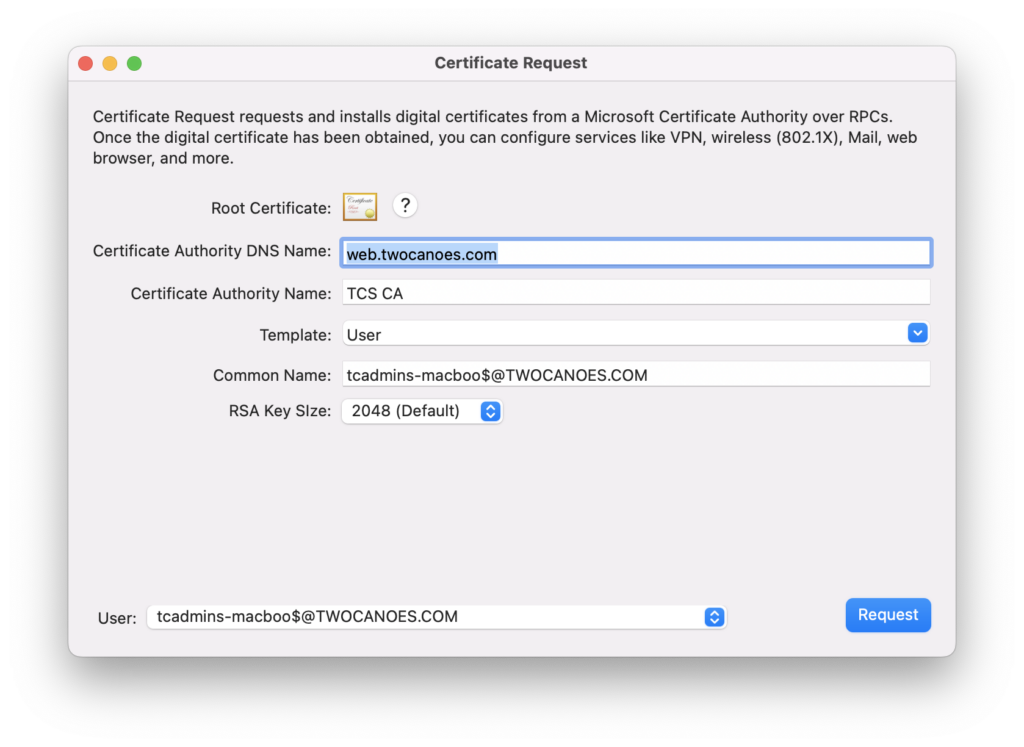
When the Certificate Request utility is launched, it will check the credential cache and prompt the user for an Active Directory username and password if the user has not authenticated already. Once there are credentials in the Kerberos credential store, Certificate Request will request and populate the Active Directory information in the Submission Information Section.
- The Root Certificate is the certificate provided by the Active Directory Certificate Authority, used to validate any certificates issued by the Certificate Authority. It is automatically downloaded from Active Directory. To install the Root Certificate into the macOS keychain, click the Root Certificate button and select the option to trust the certificate. This will add the Root Certificate to the macOS keychain.
- The Certificate Authority DNS name is the DNS name of the Active Directory Certificate Authority. All submissions will be sent to this server.
- The Certificate Authority Name is the name defined in Active Directory for the Certificate Authority. It will be automatically discovered and populated from Active Directory.
- The Template is the list of templates available on the Certificate Authority that can be used when requesting a certificate. Although all Certificate Authority templates available are shown, not all templates can be used. Template use depends on if the template has been issued by the Certificate Authority and if your credentials allow you to use that template. More information on templates can be found here.
- The Common Name is a certificate that typically contains user specific information, such as an email address. A common name is usually provided by the Certificate Authority. Note: Active Directory typically populates the common name from information about the user in Active Directory. The common name specified here is not always used.
Certificate Storage Information
macOS uses certificates to authenticate to services such as Mail, VPN, Wireless, and more, typically in enterprise environments. Configurations on macOS typically use the certificates store in the user’s default login keychain. Some services can be configured to use certificates stored in a YubiKey hardware encryption device. The Certificate Storage Information specifies where to store the certificate and private key acquired by Certificate Request.
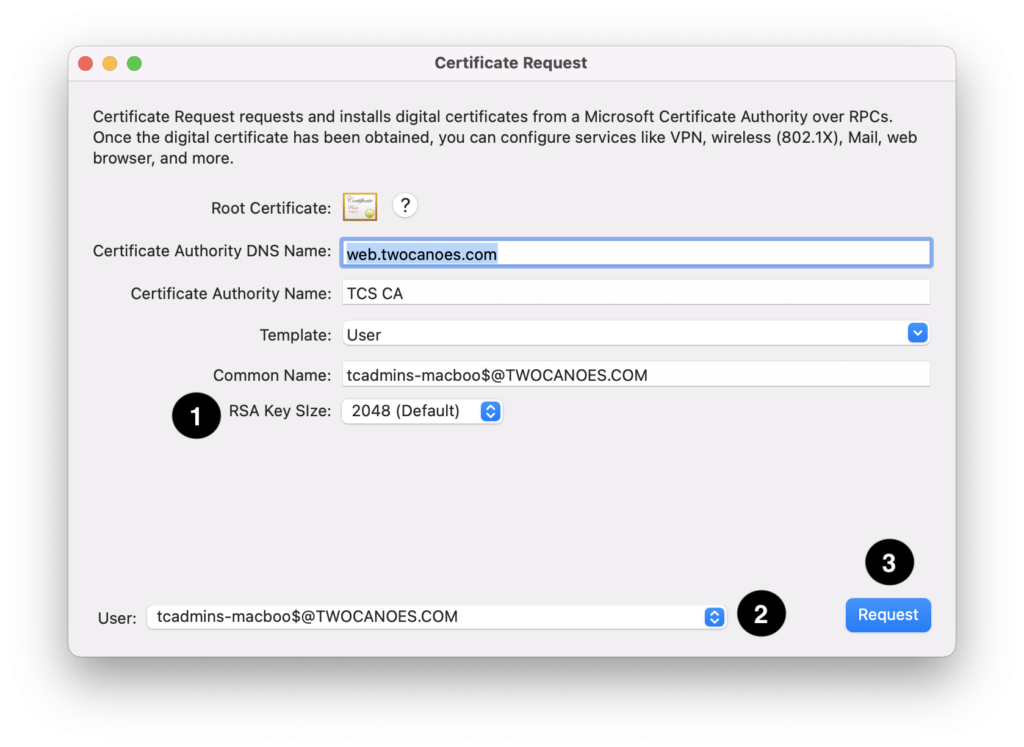
- RSA Key Size: Support for RSA2048 key sizes
- Credentials: If the user has credentials in the Kerberos cache (either by logging in at the login window or from another mechanism such as kinit), the principal names will be shown here. If there are multiple principals, select one from the pop-up menu to use for certificate submission.
- Request and Install Certificate button: Click to generate a private key, submit the certificate request, and install the signed certificate.
Authentication Menu

Use the Authentication Menu to obtain and destroy credentials. When either Obtain Credentials or Destroy Credentials is selected, a login sheet will appear:

Keychain
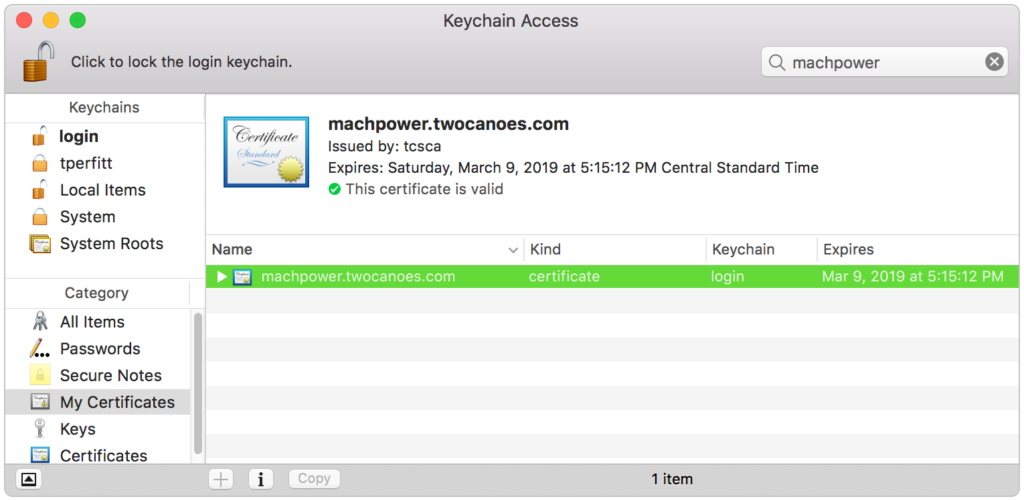
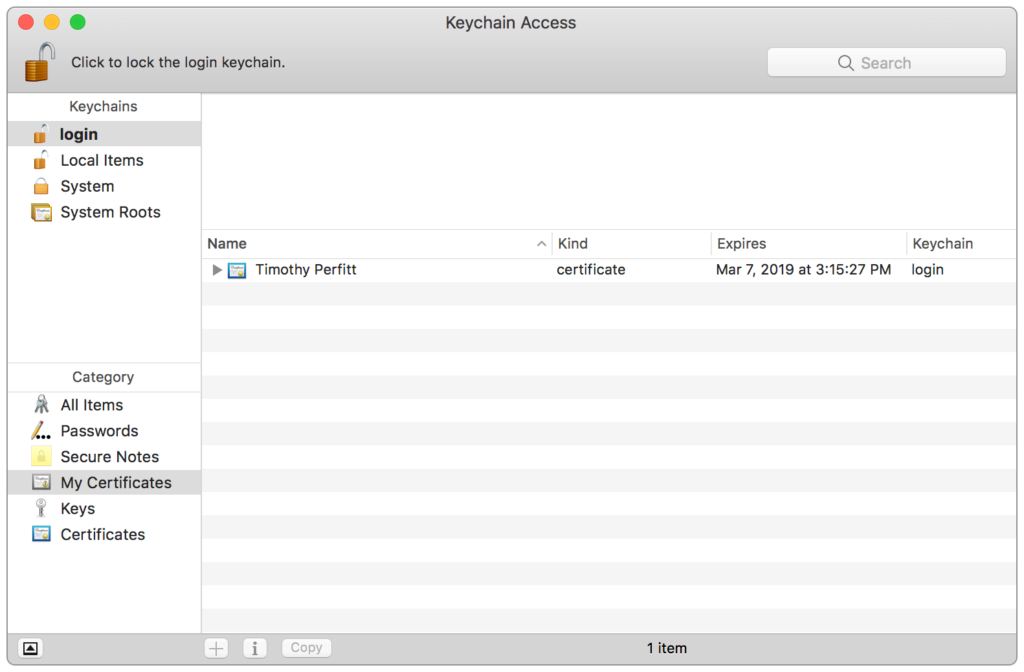
When a certificate is installed by Certificate Request, it can be viewed by opening Keychain Access in the Utilities folder. Select both the user’s keychain and My Certificates under Category as shown below:
Command Line Tool
Certificate Request also comes with a full-featured command line tool. It is located inside the app bundle at:
/Applications/Certificate Request/Contents/Resources/tcscertrequest
Running the Command Line utility without any option will give instructions on how to use the tool:
MachPower:~ tperfitt$ /Applications/Certificate Request.app/Contents/Resources/tcscertrequest -s <server dns name> -c <name of ca> -t <template name> [-r csr path] [-k <path_to_keychain>] [-y] [-m <yubikey_management_key>] [-s <yubikey slot>]
“tcscertrequest” is a command line tool to send a certificate request via RPCs to a Microsoft Certificate Authority.
Options:
-r csr path <Path to certificate signing request in binary (DER) format>
Can use
openssl req -nodes -newkey rsa:2048 -keyout domain.key -out domain.csr -subj '/CN=computername' -outform der
command to generate.
-g <Common Name>
Generate CSR with Common Name. Certificate will be generated with RSA 2048 bits (SHA512)
-n <label>
Label in keychain for imported identity
-s <server path>
CA Server DNS name.
-c <name of ca>
Name of the certificate authority. This is not the server name, rather the name used in the Common Name of the issuing authority
-k <path to keychain>
Keychain to store certificate and private key. Stores in user keychain if not specified
-y
Name of the template to use when signing the certificate. Common template names include User or Machine
-L
License Key: Open the license key profile in TextEdit and under LicenseFile copy the Base64 license between the two data tags
-v
Verbose output. For example:
/Applications/Certificate Request.app/Contents/Resources/tcscertrequest -s WIN-FGIVT3J3GI9.twocanoes.com -c "TCS CA" -t "User"
Configuring Services
Once Certificate Request has installed the certificate in the keychain or the YubiKey, said certificate can be used to configure services. Most apps have an option in Preferences to select a certificate when configuring access to a Windows service. Simply select the generated certificate from the app or configuration for the service. This section shows common macOS services to configure.
When configuring Mail, a certificate can be specified when configuring Advanced IMAP settings under Accounts for IMAP configuration. A sheet will appear to select the generated certificate: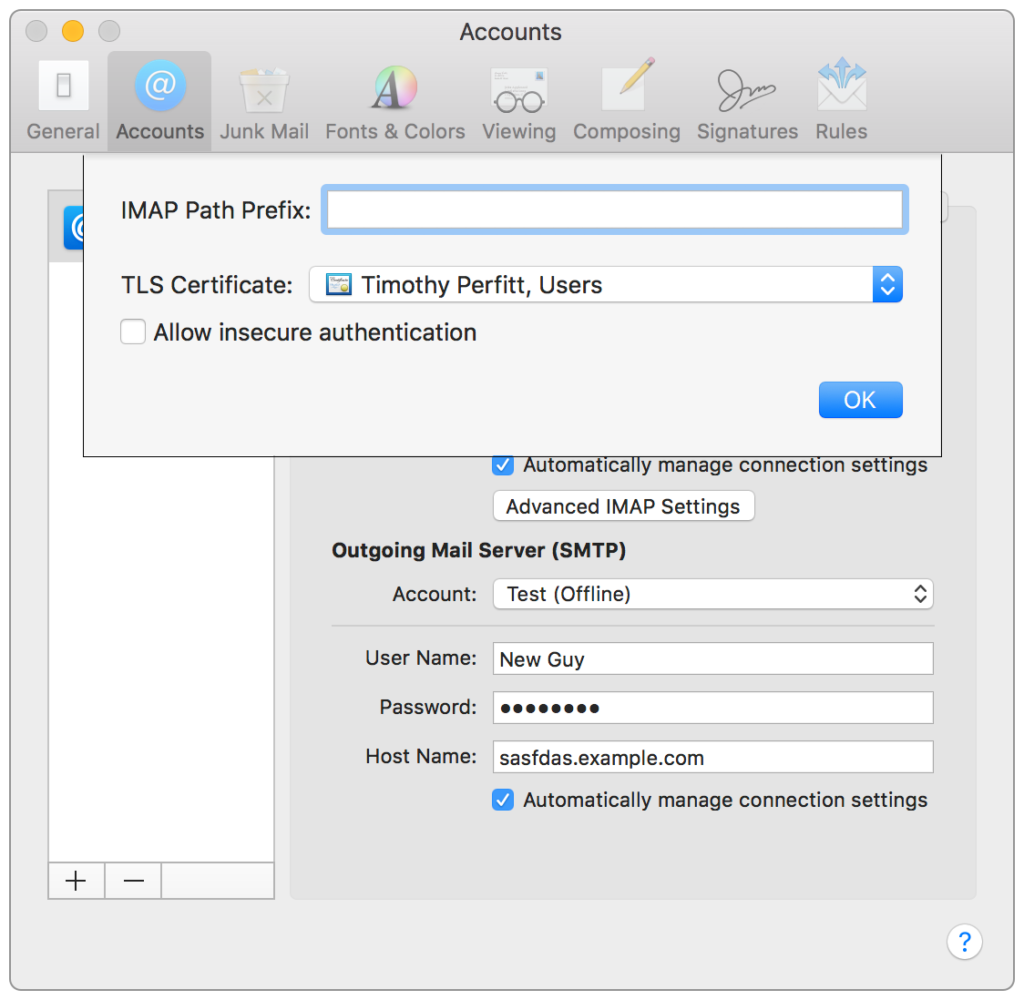
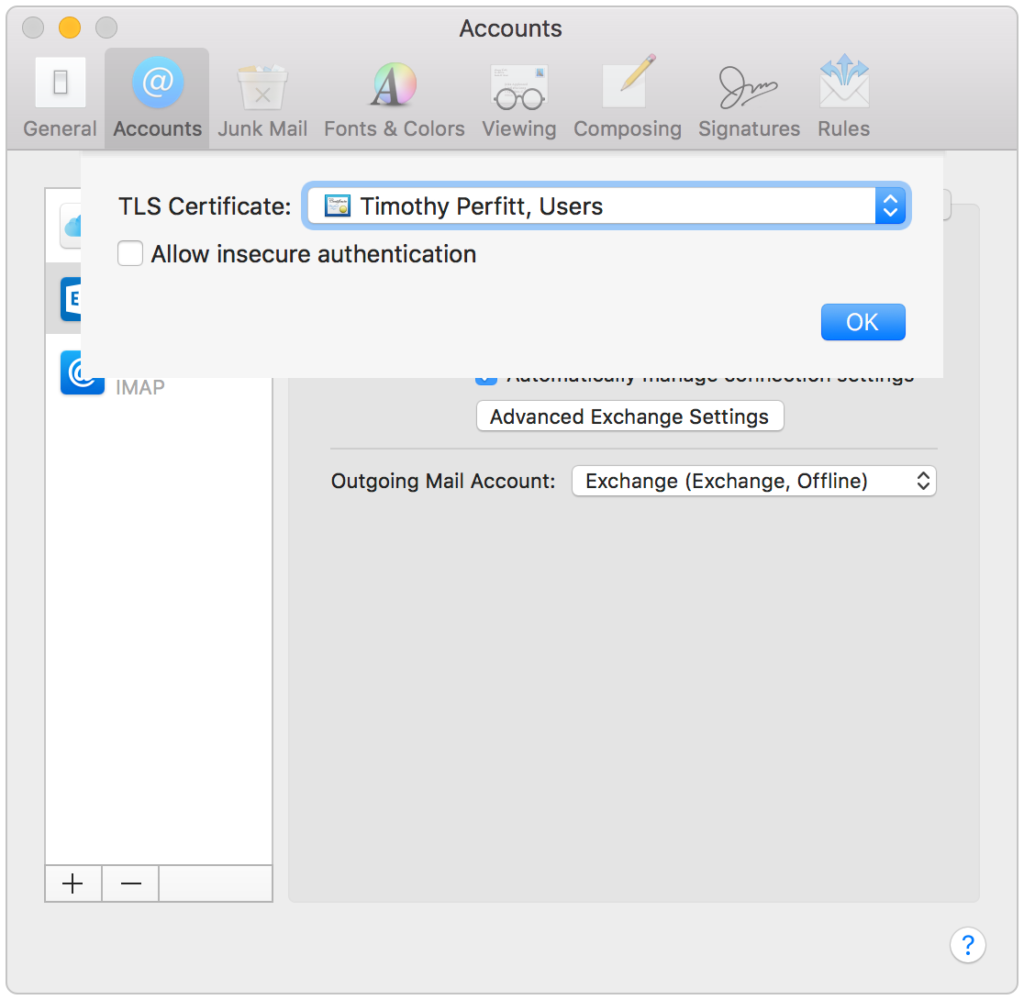
A similar setting can be specified in Mail for Exchange settings under “Advanced Exchange Settings”:
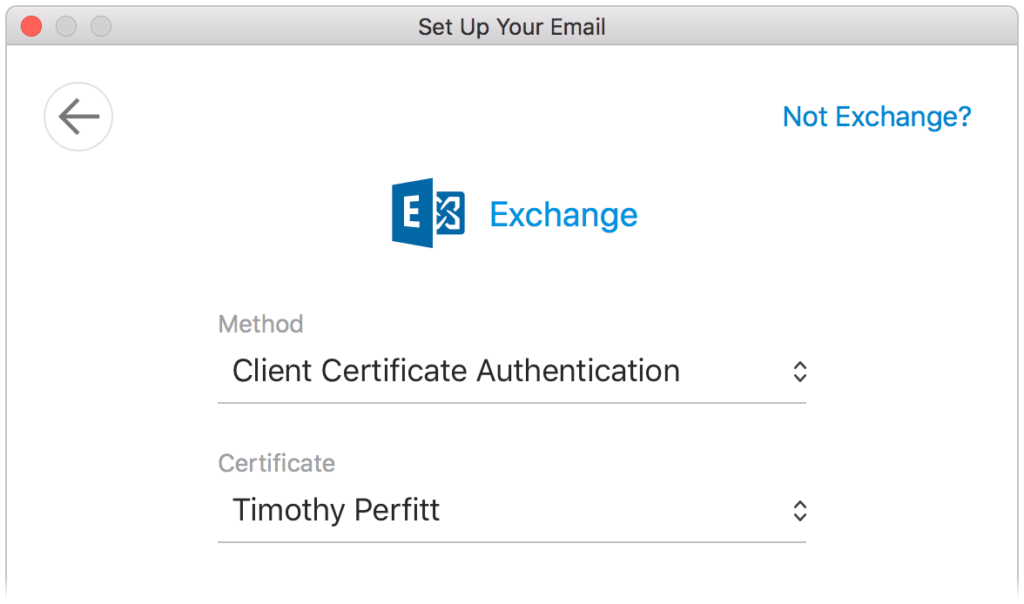
Exchange in Outlook
Outlook for macOS can be configured to use certificate based authentication (as shown below) when setting up an Exchange account:
VPN
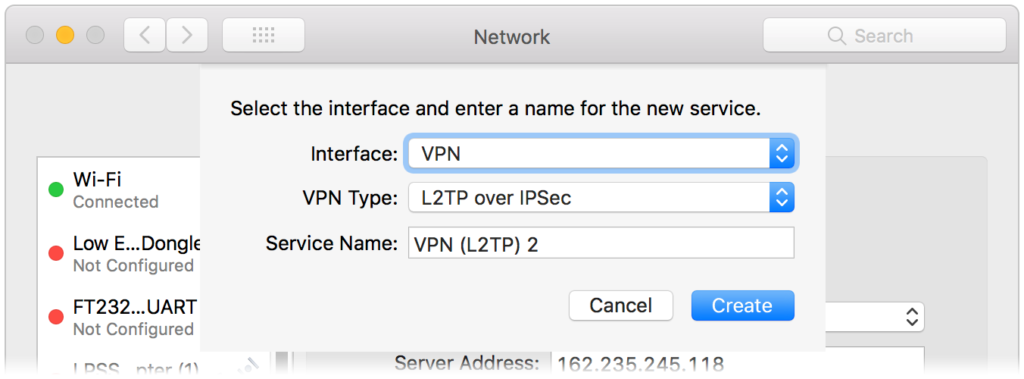
Most VPN clients support either second factor authentication with certificates or certificate-based authentication. The VPN on macOS supports second factor authentication with certificates. To set up VPN, go to System Preferences and select Network. In the Network Pane, click the “+” button in the bottom left corner; set up as shown below:
When configuring the VPN service, select the installed certificate: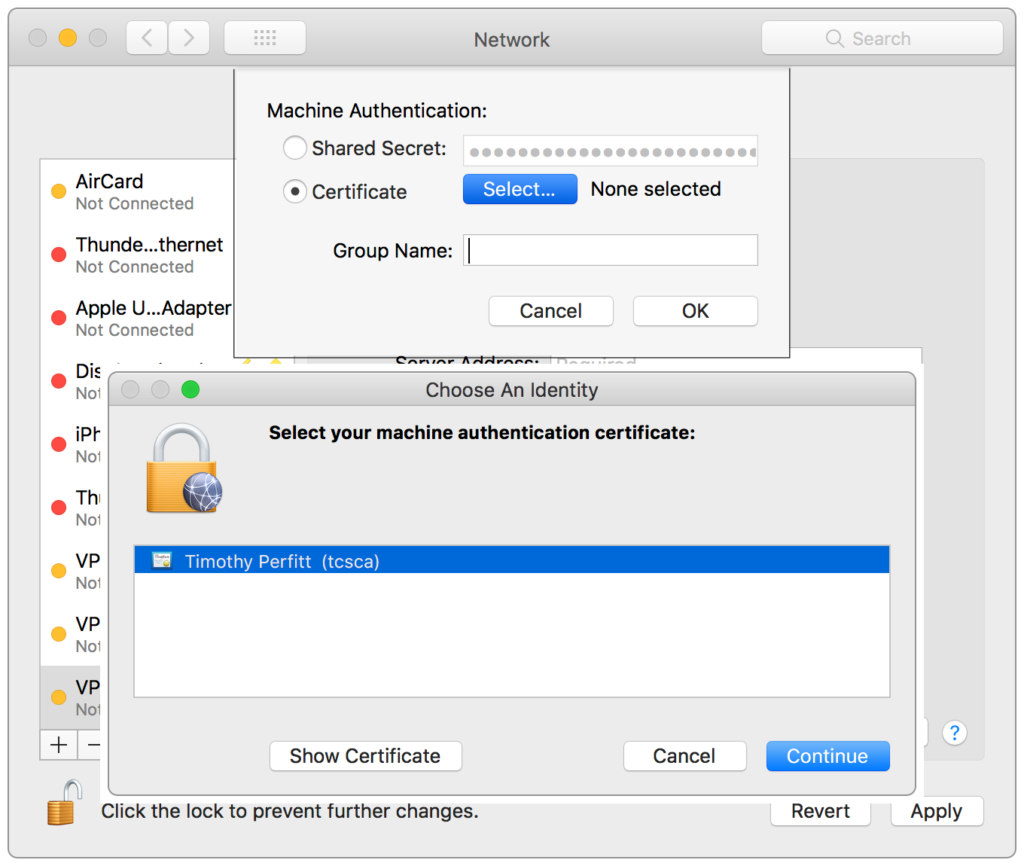
Getting a Machine Certificate
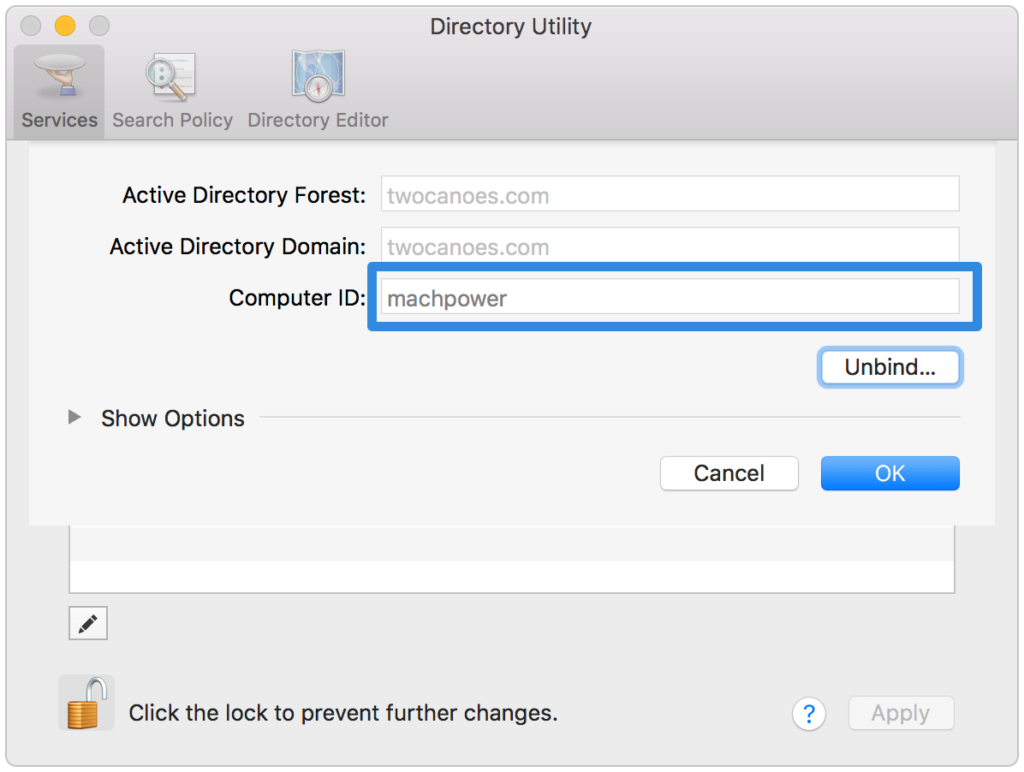
Some services on macOS require a Machine Certificate from Active Directory. The Kerberos credentials must be from a computer account in Active Directory; the correct template must also be selected (commonly a template called Machine). If the Mac is bound to Active Directory, getting a Machine Certificate is easy. Open Directory Utility by searching in Spotlight and find the Computer ID:
Now that you have the Computer ID, you will need a Kerberos ticket. To get a Kerberos ticket, run the following command in terminal:
sudo kinit -k '<machinename>'
For the example above, it would be:
sudo kinit -k 'machpower'
Launch Certificate Request; the machine credentials will be shown in the pop-up menu:
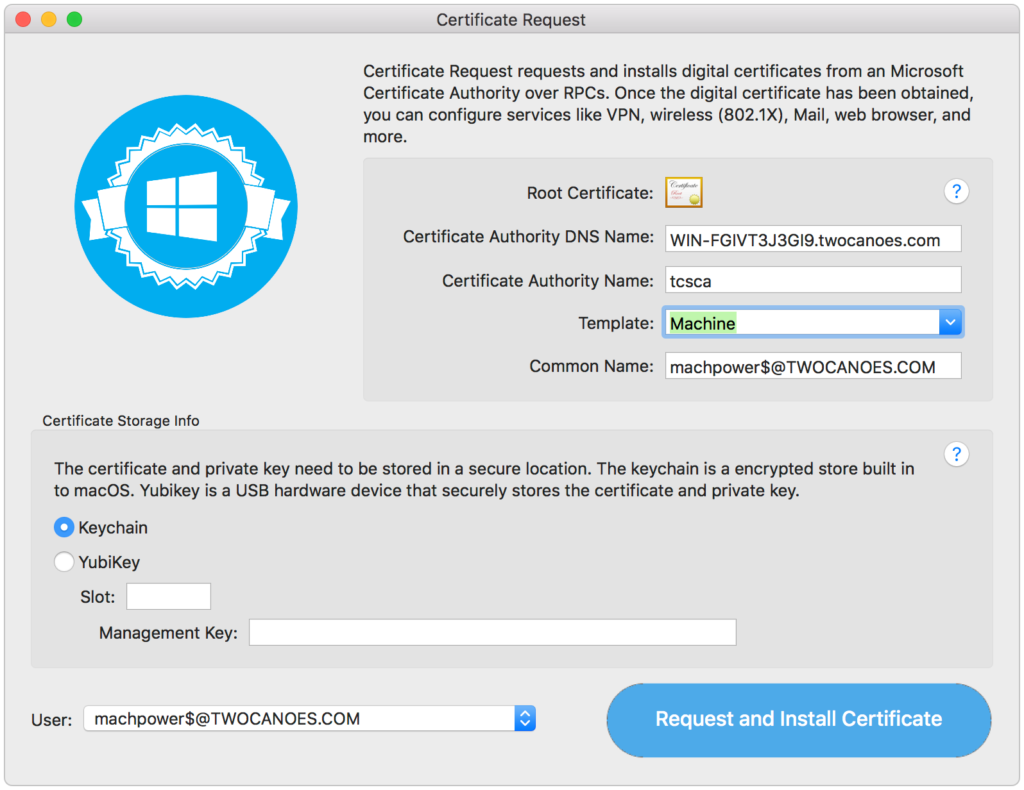
The certificate can then be requested and installed in the keychain: