Deploy Windows 10 Winclone image with JAMF Pro / Casper
Overview and Requirements
This article covers the process of creating a macOS installer package of a Winclone image and deploying the package with the JAMF Pro.
Using Winclone’s package feature, it’s easy to deploy Windows to a large number of Macs using JAMF Pro.
In this article, we cover:
- Installing Windows 10 on the Boot Camp partition and preparing using Windows tools
- Using Winclone 6 or later to clone the Boot Camp partition to a Winclone image
- Deploying using JAMF Pro
Installing Windows 10 and Preparing Windows
Follow the instructions to prepare Windows for deployment:
Preparing Windows for Deployment with Winclone Pro
Boot back into macOS, not Windows. If you boot into Windows, the setup process will start and you’ll need to re-create the boot camp partition. Once in macOS, you’ll use Winclone Pro to capture the image and create a package.
Create Winclone Image of Boot Camp partition
- Install Winclone Pro in macOS if it has not been installed already.
- It is recommend that you use block-based imaging when deploying to large number of Macs, since it is a faster process. You can select block-based image creation in Winclone Preferences prior to creating the image.
- Next, create a Winclone image of the Boot Camp partition using the steps in this support article:
Create Winclone Image from WIM in Winclone 8
Create Package
Now that the image is created, use Winclone Pro to create a package that JAMF Pro will deploy. The package can create a boot camp partition and deploy the package. Follow the steps in this article to create the package:
Test Package
On one of the target Macs, copy the Winclone package to the desktop and double-click on the package. Install the package and validate that the Boot Camp partition was created successfully (if that option was selected when creating the package); check that Windows was restored successfully. Then, verify Windows first run scripts and setup ran correctly.
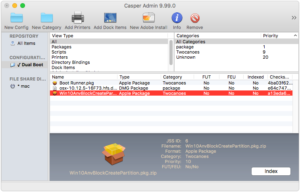
Add Package to Casper Admin
The package you created is now ready to be deployed. Follow these steps to add to Casper Admin:
- Launch Casper Admin and add the package to the distribution point by dragging the package to Casper Admin.
- Once the package has successfully copied to the distribution point, drag the package to the configuration you use to deploy the Mac image:
- Double-click on the package in your configuration and select the “Install on boot drive after imaging” checkbox:
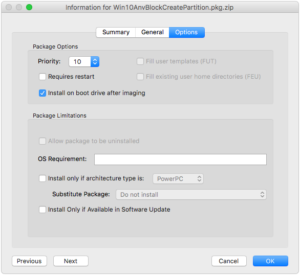
This will copy the entire Winclone package to the Mac partition after imaging the Mac side but will make the restoring much faster. Make sure that you have allocated enough space on the Mac partition for the Winclone package, as well as enough space for new Boot Camp partition. If space is a concern, do not select this option; however, restoring may be much slower.
Deploying
You can now deploy this configuration as you would any other Casper configuration. For example, if you are restoring via Target Disk mode in Casper Imaging, it would look this this:
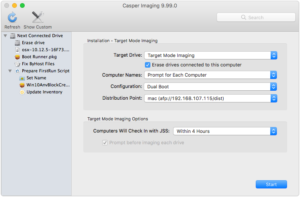
Note that order of operations for the workflow:
- Drive is erased (Mac)
- macOS is restored
- On first boot of the Mac, the Winclone package will be installed. This will create the Boot Camp partition (if that option was selected) and Windows will be restored.
- On first boot of Windows, Windows will be configured via the Answer file and the first run script you installed in Windows.
Troubleshooting
If there are any errors, this article covers troubleshooting package based installs.
Timing
To get an idea of timing, we deployed a basic macOS .dmg (created with AutoDMG) and a 8 GB Windows 10 image using target disk mode:
- Block Based image restore of macOS: 29 sec
- Copy Winclone image to restore Mac partition: 18 sec
(reboot into imaged Mac partition) - Create Boot Camp partition and restore 8GB Windows 10 image: 3 min, 1 sec