Smart Card Utility for iOS & iPadOS User Guide
Note: If you received your Twocanoes Store purchase and are looking for the Quick Hardware Setup Guide, visit the Quick Start Guide.
Overview
Smart Card Utility is an application that allows you to use and manage smart cards on your iOS or iPadOS device. The Smart Card Utility Bluetooth, Lightning, and USB-C readers, work by importing the certificates from an inserted smart card and making them available to any application that requests them. For the Smart Card Utility Desktop reader, the certificates are automatically inserted.
The built-in applications such as Safari and Mail as well as the VPN and wireless functions of your device can use these inserted certificates. If using tokens is enabled in a third-party app, certificates are also usable there. When an app selects a certificate for authentication, the extension talks to the smart card reader to perform the authentication; the app then authenticates transparently to the reader.
Why Smart Card Utility for iOS and iPadOS?
We believe that the security of a smart card shouldn’t compromise convenience and functionality. For this reason, we created Smart Card Utility for macOS in 2018, augmenting the use of, and providing easier access to, smart cards within macOS.
Smart Card Utility for iOS and iPadOS not only adds smart card authentication support for Bluetooth and other readers but also brings over some functionality from our macOS utility alongside features specific to iOS and iPadOS. Along with the benefits of portability these mobile devices bring, Smart Card Utility allows iOS and iPadOS devices to support smart cards in an easy-to-use, intuitive way.
Requirements
iOS/iPadOS Device
To run the current version of Smart Card Utility for iOS, you’ll need:
- For the Smart Card Utility Bluetooth, Lightning, or USB-C readers, an iPhone or iPad that supports iOS 14 or later.
- For the Smart Card Utility Desktop or third-party readers, an iPhone or iPad that supports iOS 16 or later.
Smart Card Hardware
Smart Card Utility also requires compatible hardware for full functionality, namely, a smart card and a smart card reader. This includes:
- One of the following compatible smart cards:
- Any PIV-compatible smart card
- A PIV-Transitional (CAC) Card. Tested on:
- Giesecke & Devrient Sm@rtCafe Expert v7.0 (G+D FIPS 201 SCE 7.0)
—and—
- One of the following compatible smart card readers:
- A Smart Card Utility Bluetooth, Lightning, USB-C, or Desktop reader from Twocanoes Software
- Third-party reader that supports CCID
For more information, see Using Compatible Devices below.
Using Compatible Devices
Whether you purchase a smart card reader from Twocanoes or a third party, it is important to know how to use your compatible devices with Smart Card Utility. Below are some instructions on how to use all smart card readers compatible with our software:
Twocanoes Store Purchases
Twocanoes offers four hardware packages for Smart Card Utility. Each hardware purchase includes a license of our Smart Card Utility software at the price of the package.
The first two packages, Smart Card Utility Bluetooth and Smart Card Utility USB-C, provide a wireless solution for iPhone/iPad and a wired solution for iPad Pro, respectively. Smart Card Utility Lightning provides a wired solution for all iOS or iPadOS devices with a Lightning port. Smart Card Utility Desktop Reader provides a TAA Compliant wired smart card reader and includes adapters for iPhone, iPad, and Mac.
Listed below are the technical specifications for hardware packages sold through the Twocanoes Store:
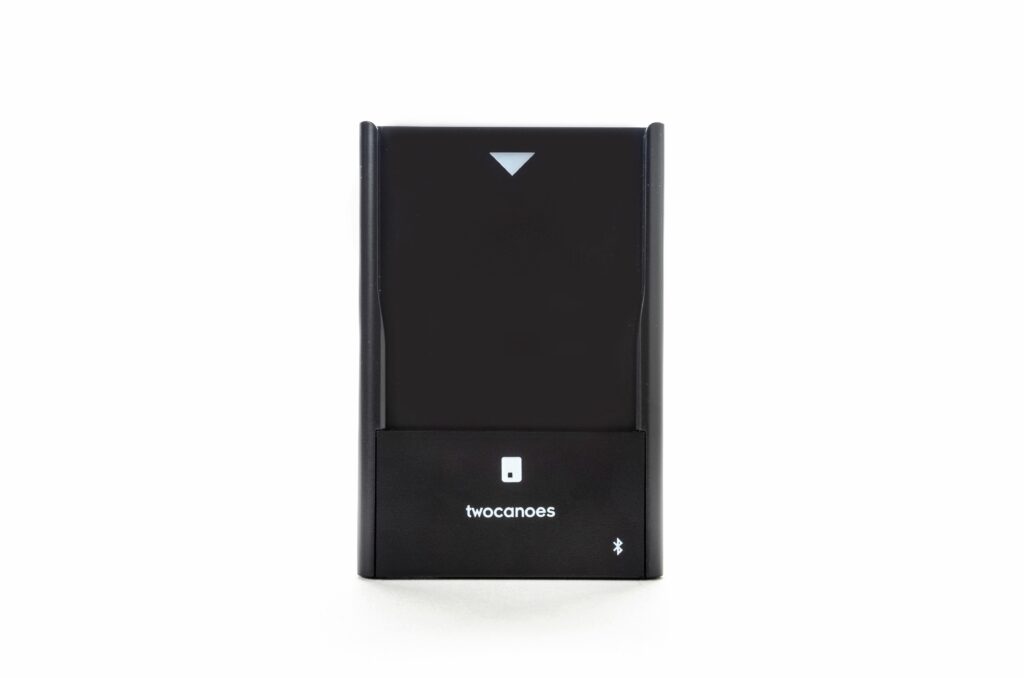
Smart Card Utility Bluetooth:
Smart Card Utility USB-C:
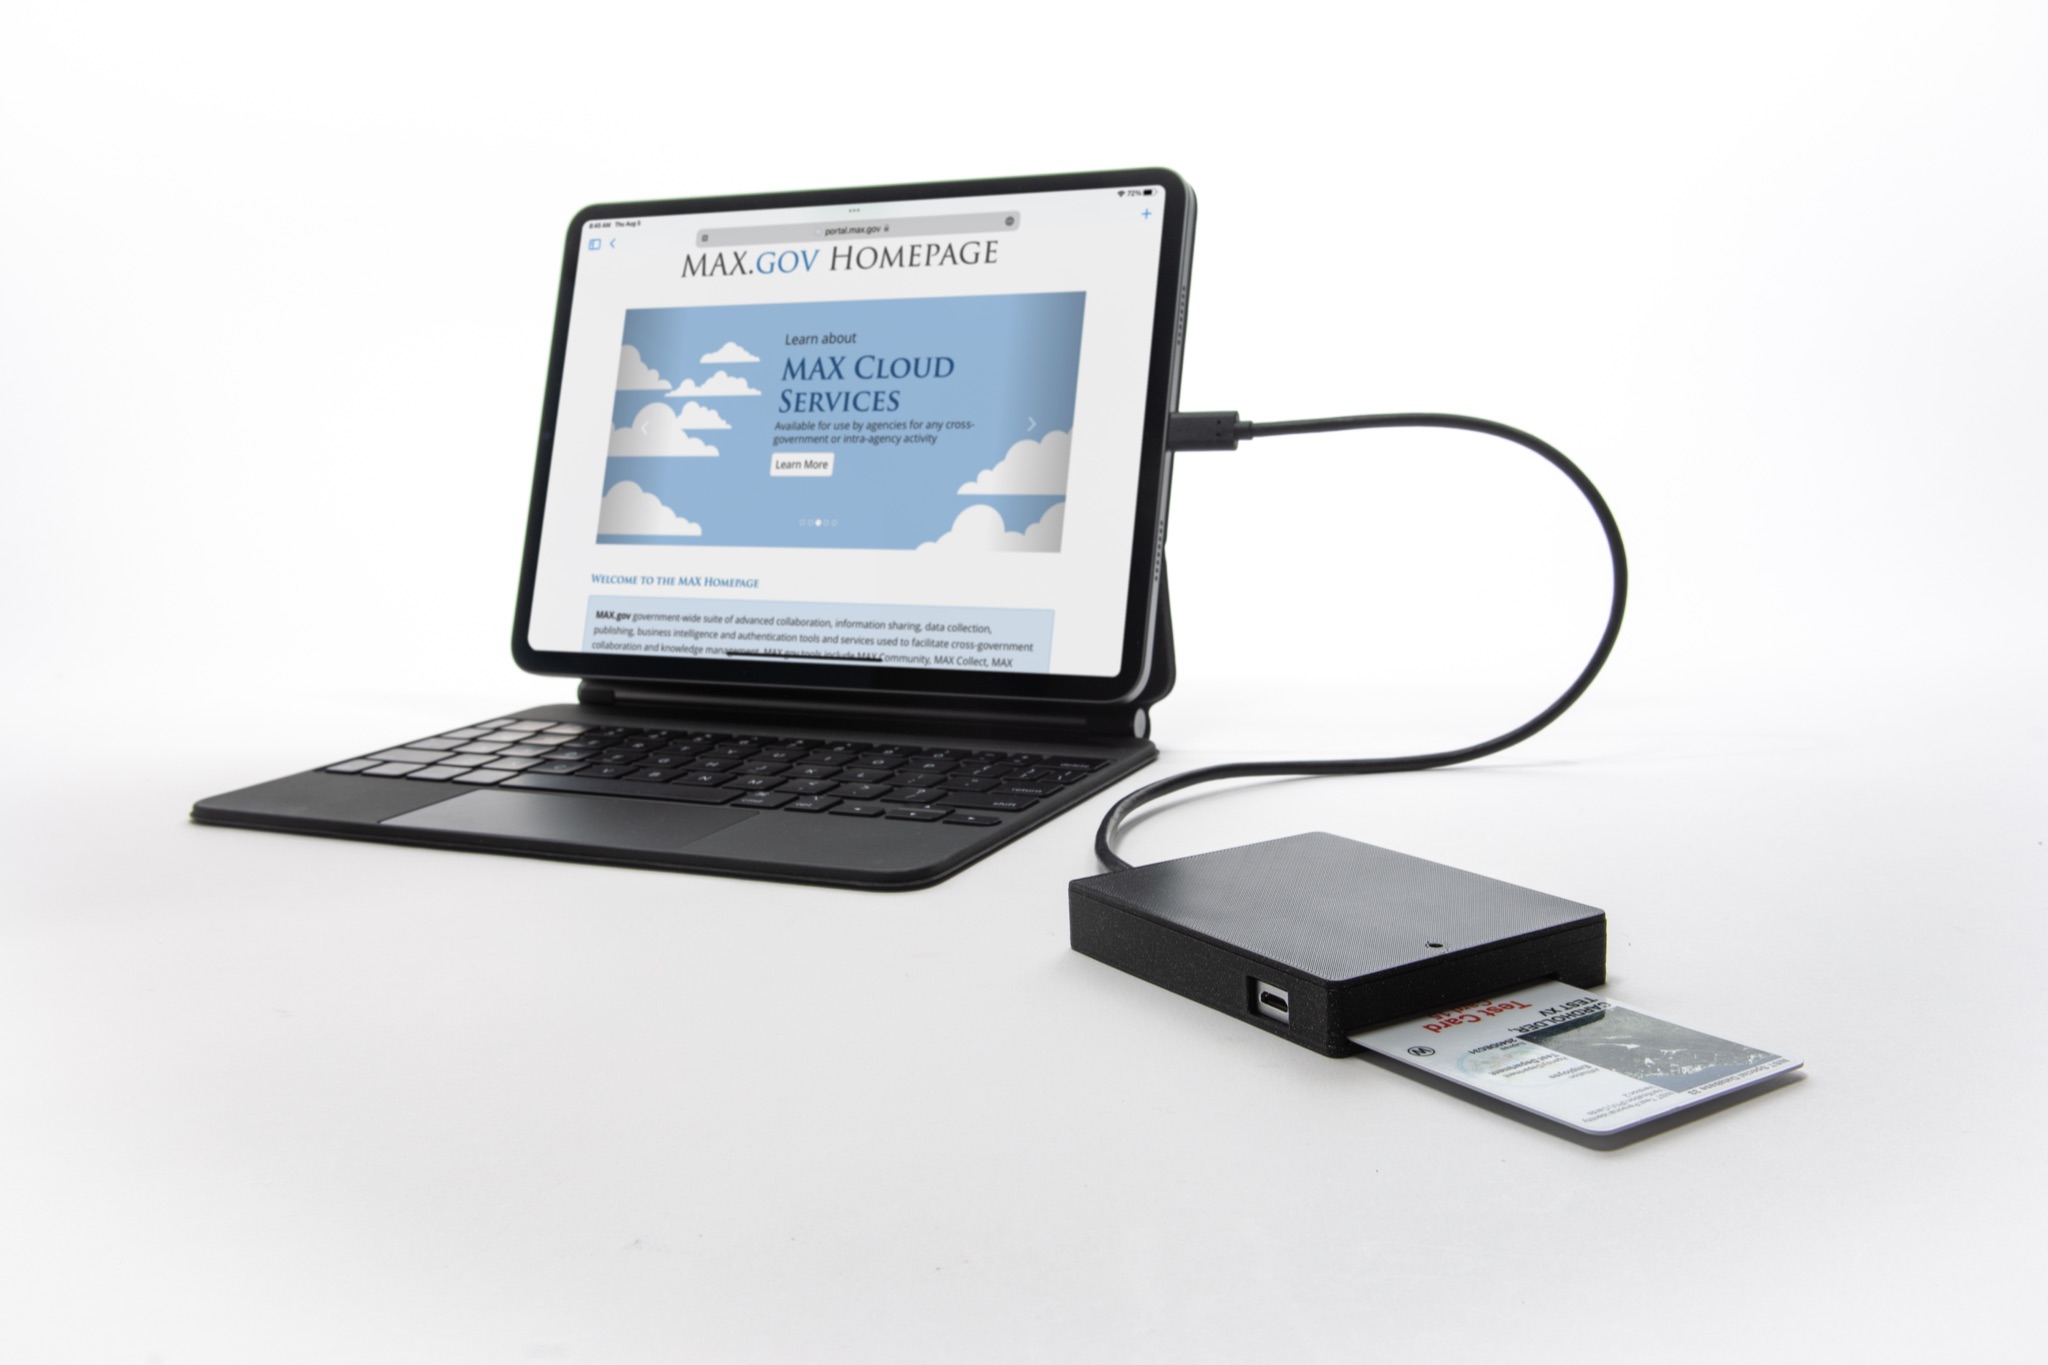
(iPad, iPad case, and keyboard not included)
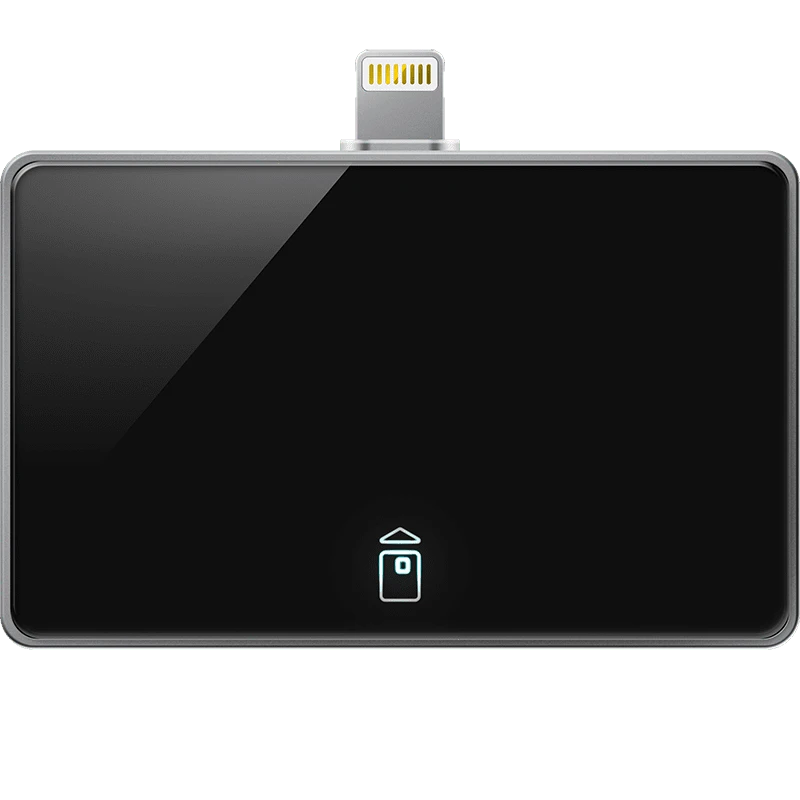
Smart Card Utility Lightning:
As Twocanoes smart card readers are FEITIAN-based, please select “FEITIAN Reader” when scanning with any Twocanoes Reader (more information in Scan below).
Setup for use with Smart Card Utility
Plug-in (Lightning or USB-C Devices)
To insert a smart card reader to your iOS or iPadOS device utilizing a Lightning port, verify that your smart card reader and your iOS/iPadOS are able to connect. If using a compatible Lightning reader, such as Smart Card Utility Lightning, you may connect it to your iOS/iPadOS device via the Lightning connector.
However, if your device has a USB-C connector, you are unable to use the Smart Card Utility Lightning Reader. Smart Card Utility USB-C is meant specifically for use on iPad Pro, which has a USB-C connector instead of Lightning.
Note: Due to the hardware limitations of your device, using a Bluetooth FEITIAN Reader via the Micro-USB cable and an adapter is not supported on iPadOS or iOS.
Bluetooth
Smart Card Utility Bluetooth is a wireless, Bluetooth reader. In order to use our Bluetooth reader on your iOS or iPadOS device make sure to enable Bluetooth on your iPhone or iPad before using Smart Card Utility.
To turn on the reader, simply press the button on the bottom, between the indicator lights and the USB connector. To turn off the reader, press and hold the same button. You may need to turn your reader on again throughout your use of Smart Card Utility, as the reader automatically turns off for security purposes when switching applications. Simply press the power button again and your reader should connect to your device. If you have any trouble, see the Troubleshooting section.

The green indicator light (second from the left) indicates power, while the blue light (third from the left) indicates Bluetooth connection. When the blue light is flashing, the Bluetooth reader is searching for a Bluetooth connection. When the green indicator light is flashing, the contents of the inserted smart card are being accessed.
App
To download Smart Card Utility on iOS or iPadOS, search for “Smart Card Utility” on the Apple App Store. Some reader devices purchased from Twocanoes Software (i.e., Smart Card Utility Bluetooth, Smart Card Utility USB-C, or Smart Card Utility Lightning) will automatically be activated. If you are using the Smart Card Utility Desktop Reader, you must scan the device serial number to activate the reader. If using your own supported hardware purchased via a third party, you must make an in-app purchase after the trial period to continue using the software. See Trial/Purchase for more details.
Initial Setup
Before using Smart Card Utility, please follow the onscreen prompts.
Notifications
When first setting up Smart Card Utility, you may see a prompt like this:

In order to maintain communication about the status of your reader or certificate authorizations as you use other apps, Smart Card Utility utilizes Notifications to send important status updates about Token Status. So that Smart Card Utility can send these status updates, please turn on Notifications when first opening up the app; also, please keep them on throughout your use to ensure proper function.
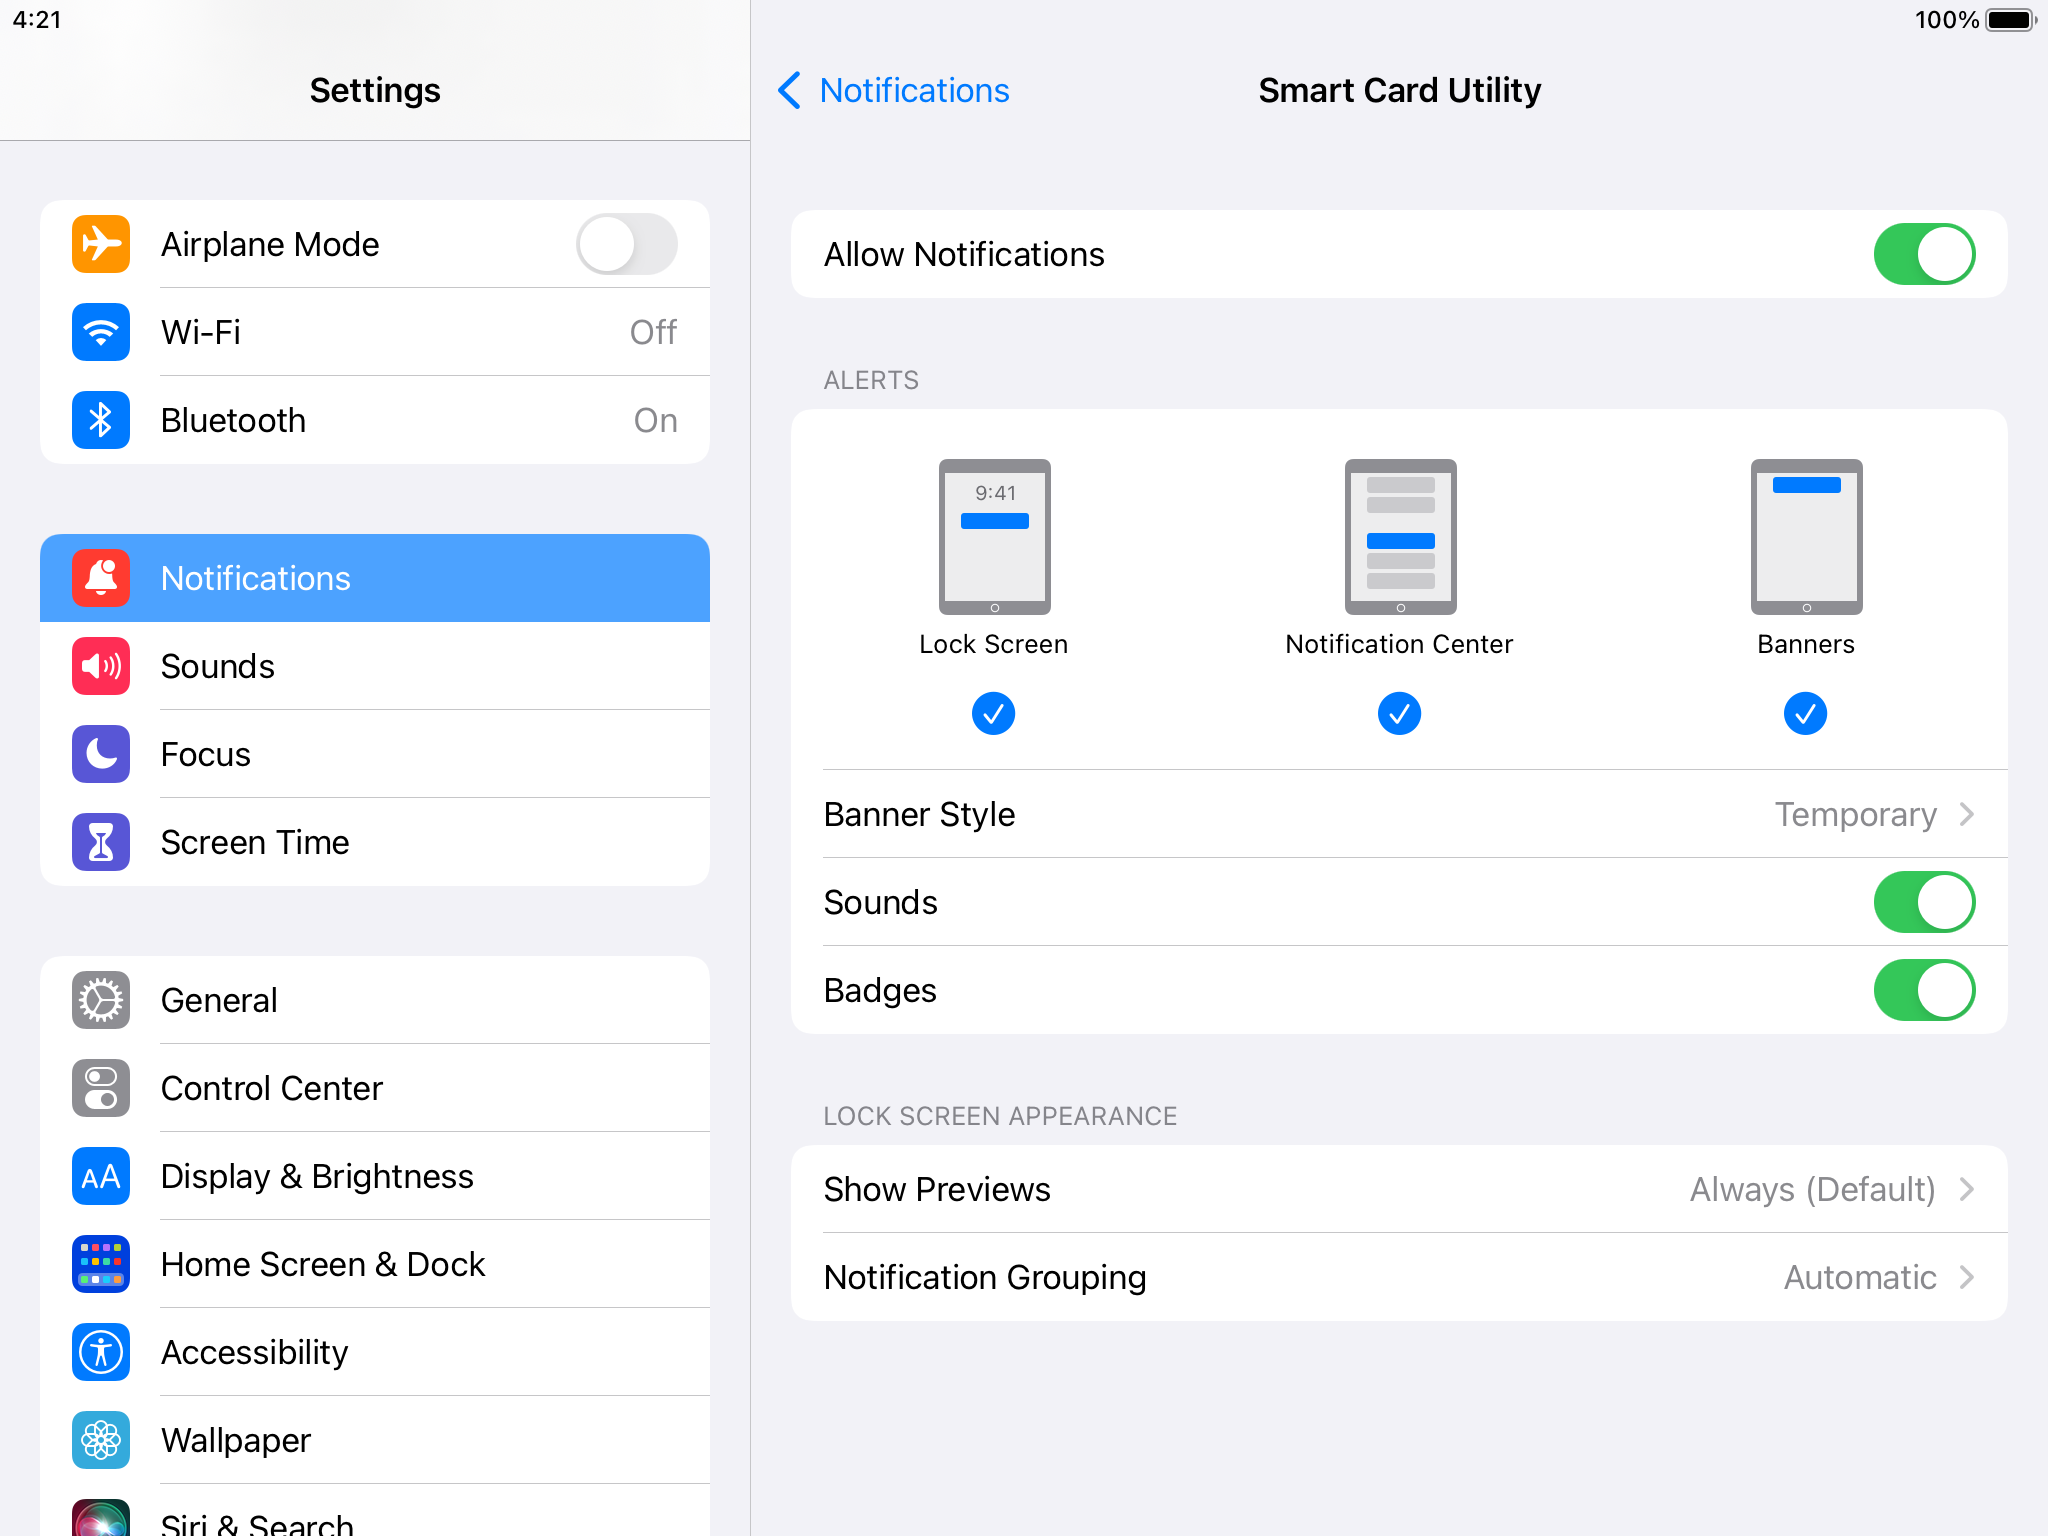
If you select “Don’t Allow” by mistake, you can always go to Settings → Notifications → Smart Card Utility → Allow Notifications to turn them on:
Opening Prompts
When first opening Smart Card Utility, you’ll see the following opening prompts:


In addition to basic information about our application, you also have the ability to access the Twocanoes Store to see purchasing options for Smart Card Utility hardware. Do so by tapping “Get Reader” in the top-right, though you also have access to store redirection once you exit the opening prompts and view the Main Interface. To exit the opening prompts, tap “Let’s Go!” at the bottom of the last prompt.
You can view these prompts anytime by selecting “Reset Prompts” in Settings, force quitting Smart Card Utility, and opening the app again. See the Settings section for more information.
Trial/Purchase
Smart Card Utility is free to download and no additional payment is required for features related to smart card readers purchased from Twocanoes Software. However, using a third party CAC reader requires an in-app purchase. Prices may vary from the information shown here. When a third-party reader is plugged in, certificates can be read from the card up to 10 times before a purchase is required. When your free trial ends, you’ll still be able to view the Main Interface, but you will be unable to read certificates from Smart Card Utility.
Activating Smart Card Utility Desktop Reader
If you purchase the Smart Card Utility Desktop Reader, the software is activated by scanning or entering in the serial number from the bottom of the reader.
Main Interface

After reading the Opening Prompts, and allowing Notifications, you will see the Main Interface.
Each element of the interface above is listed below:
- (i) Button: This button opens the quick start guide and video to get started.
- Shopping Card: The shopping card icon in the lower left corner opens the Twocanoes Store to purchase our hardware readers.
- Gear: The gear in the lower right opens the Settings view of the app. Then tap “Show Log” to view the scan log for the app. In order to view and populate the log, you must first enable logging.
- Test: Tapping Test redirects to the Smart Card Utility Test Links website for use with inserted identities without leaving the app. This is done on an in-app browser. While using the in-app browser, Logging allow you to log any issue you have with certificate authentication. See the Example Walkthrough for more information on using this test website.
- Connected and Added Readers: This section displays any connected readers or Smart Card Utility Readers that have certificates added to iOS.
- Certificates Available to iOS: This section displays any certificates inserted into iOS. This can be from Smart Card Utility readers, third party readers, or apps. Any inserted certificates can be deleted by swiping left. After the last certificate for a reader is removed, the reader is removed from the “Connected and Added Readers” section. You cannot remove certificates that have been automatically inserted by plugging in a wired reader such as the Smart Card Utility Desktop Reader.
- Activate Reader: (More Information in the Quick Hardware Setup Guide) Tapping this button will take you to an entry field. Enter your reader’s hardware code here and tap “OK” to unlock the full application. If successful prompt is not shown, tap “OK” and try again.
- Settings: Tapping settings will take you to the settings menu of Smart Card Utility (not the iOS Settings application). There, you can toggle Logging and Reset the Opening Prompts.
Reading Certificates from the Smart Card Utility Bluetooth, Lightning, or USB-C Reader from Twocanoes Software
To use the bluetooth, lightning, or USB-C reader from Twocanoes, you read in only the certificate you want to use.
Full instructions on scanning are available in the Scan section of the User Guide, but this Quick Setup guide will provide condensed instructions for scanning so you can start using Smart Card Utility right away:
1. Insert Reader & Card
Regardless of the type of device you’re using, make sure to fully connect all readers. For Lightning or USB-C readers, plug them into your device’s connector. For Bluetooth readers, turn on your device’s Bluetooth connection, but stay in the Smart Card Utility app—no configuration in Settings is needed.
Additionally, check that your smart card is fully inserted into your reader.
2. Tap Read Certificates and Select your Reader

When your hardware is all set, you may begin. Tap “Add Bluetooth or Other Reader…”.
Then, select the type of reader from the list shown.
3. Start your Scan & View Certificates
Once you tap “Read Certificates”, you’ll be prompted to select a reader from a list of nearby or plugged in readers:

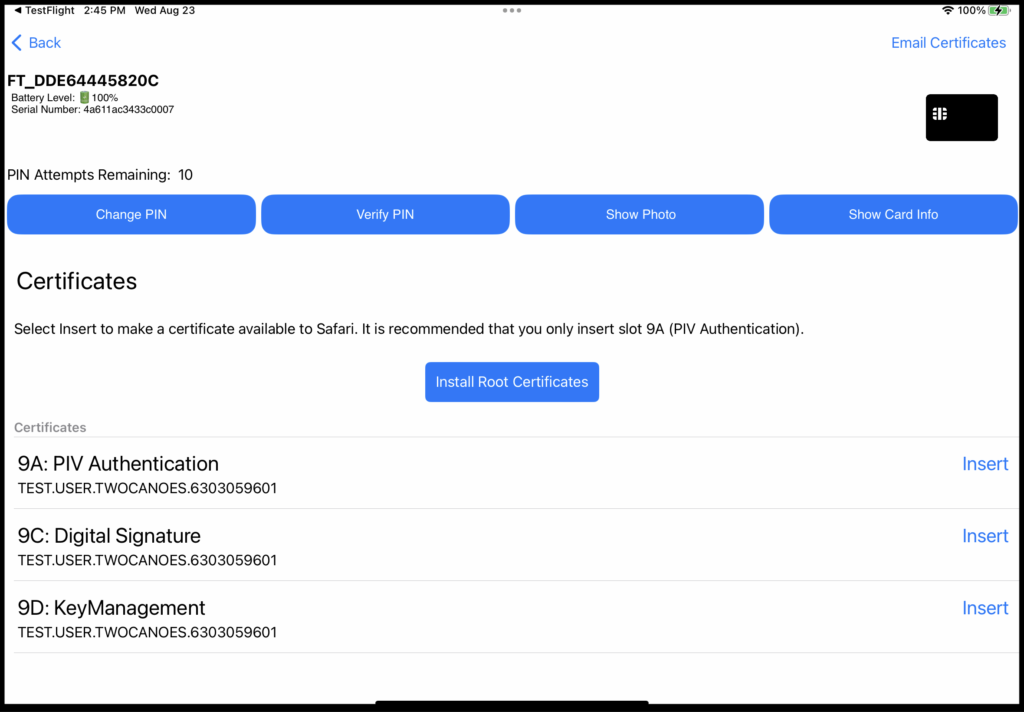
Once you’ve finished selecting your reader, initiate your scan to be taken to the “Certificates” screen. You should see a list of certificates.
It is recommended that you only select the 9a:PIV authentication certificate since this is the certificate that is used for authentication in Safari.
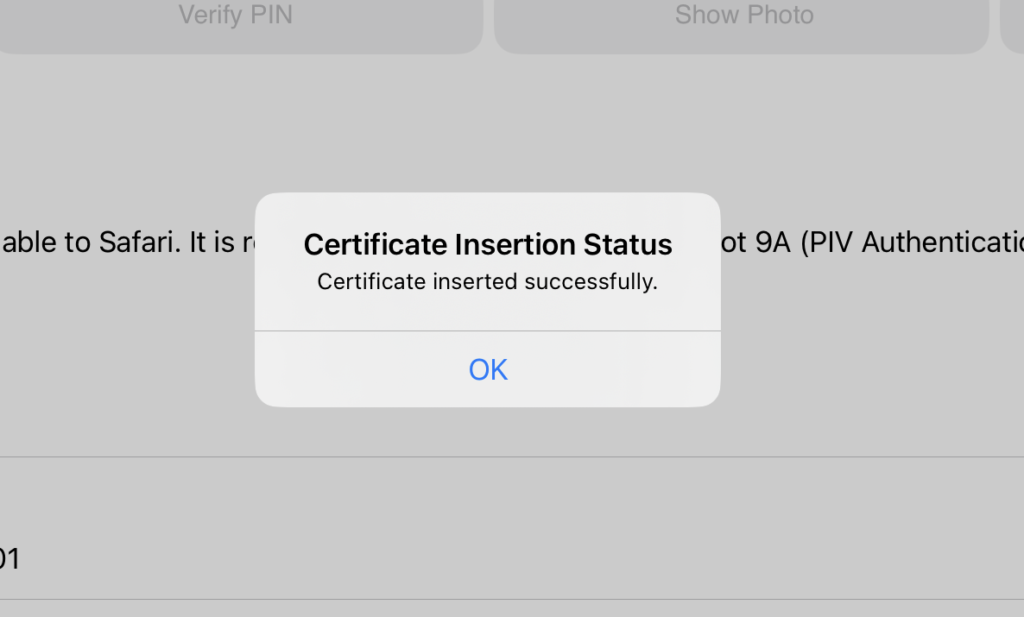
After you tap Insert, a success message should pop up.
Trusted Certificates
Like in the example above, the certificates on your smart card can appear colored red. This means they are untrusted certificates. To trust the certificates, begin by speaking with your administrator to install intermediate and/or root certificates on your iOS/iPadOS device via the Settings app as needed.
Once you’ve downloaded the intermediate and/or root certificates, use the Settings app and tap “Profile Downloaded”:

Follow the instructions to install the profile and certificates. Tap “Install” in the top right corner:

Take note of warnings and contact your administrator to ensure that your intermediate and/or root certificates are not expired. Tap “Install” in the top right again, then tap the “Install” option in the Install Profile prompt:

Refer to Apple’s documentation if you need more support after receiving the intermediate and/or root certificates to install.
Emailing Certificates
If you’d like to share a certificate from a scanned smart card either from a scan (as above) or from viewing inserted certificates via the Main Interface, you may do so by tapping “Email Certificates” in the top-right of the “Certificates” screen. Tapping “Email Certificates” when viewing the “Certificates” screen after a scan will create a draft email that includes all certificates stored on the card. Alternatively, tapping “Email Certificates” when viewing the “Certificates” screen from the Main Interface will create a draft email that includes only certificates that are currently inserted. Tap a reader on the Main Interface to view a list of certificates inserted with that reader.

Use the draft email as you would in the Mail app, using a secure email account to send when necessary. Take care to delete any certificates you do not wish to send by highlighting or moving your cursor in front of the file you wish to remove, then pressing backspace to delete the file as you would text. Any keyboard or mouse connected to your iOS or iPadOS device may also be used when editing this draft.
Make sure to set up the iOS Mail app (i.e, add an email address in the Settings app and complete setup within Mail) before emailing certificates, as this feature requires a completed setup. If Mail is not set up, you will receive an error message when tapping the “Email Certificates” button.
Certificate Details

If you select a certificate from the “Certificates” screen, you can also view its details. These details include:
- Certificate Information
- Subject
- Issuer
- Signature
- Public Key
- Extensions
Using Certificates
After inserting a certificate identity, you can use it in any capacity that requires PIV authentication. Below are some common examples:
Safari
These videos use earlier builds of Smart Card Utility, but still effectively demonstrate the process of using Safari with certificates inserted via Smart Card Utility
After inserting a certificate, you can use it for PIV authentication on websites in Safari, similar to how you would on a desktop.
With your smart card/smart card reader inserted, the website you attempt to use PIV authentication with will prompt you for a PIN. Enter your PIN as you normally would and authentication should occur as normal. View the above video for an example of how to use a PIV smart card in Safari on iOS/iPadOS. Note: your Bluetooth reader may power off for security purposes, though it is easily turned on again. See Bluetooth Setup for details.
Settings
Viewing Inserted Root Certificates
Within the iOS Settings app, inserted certificates also provide additional functionality.
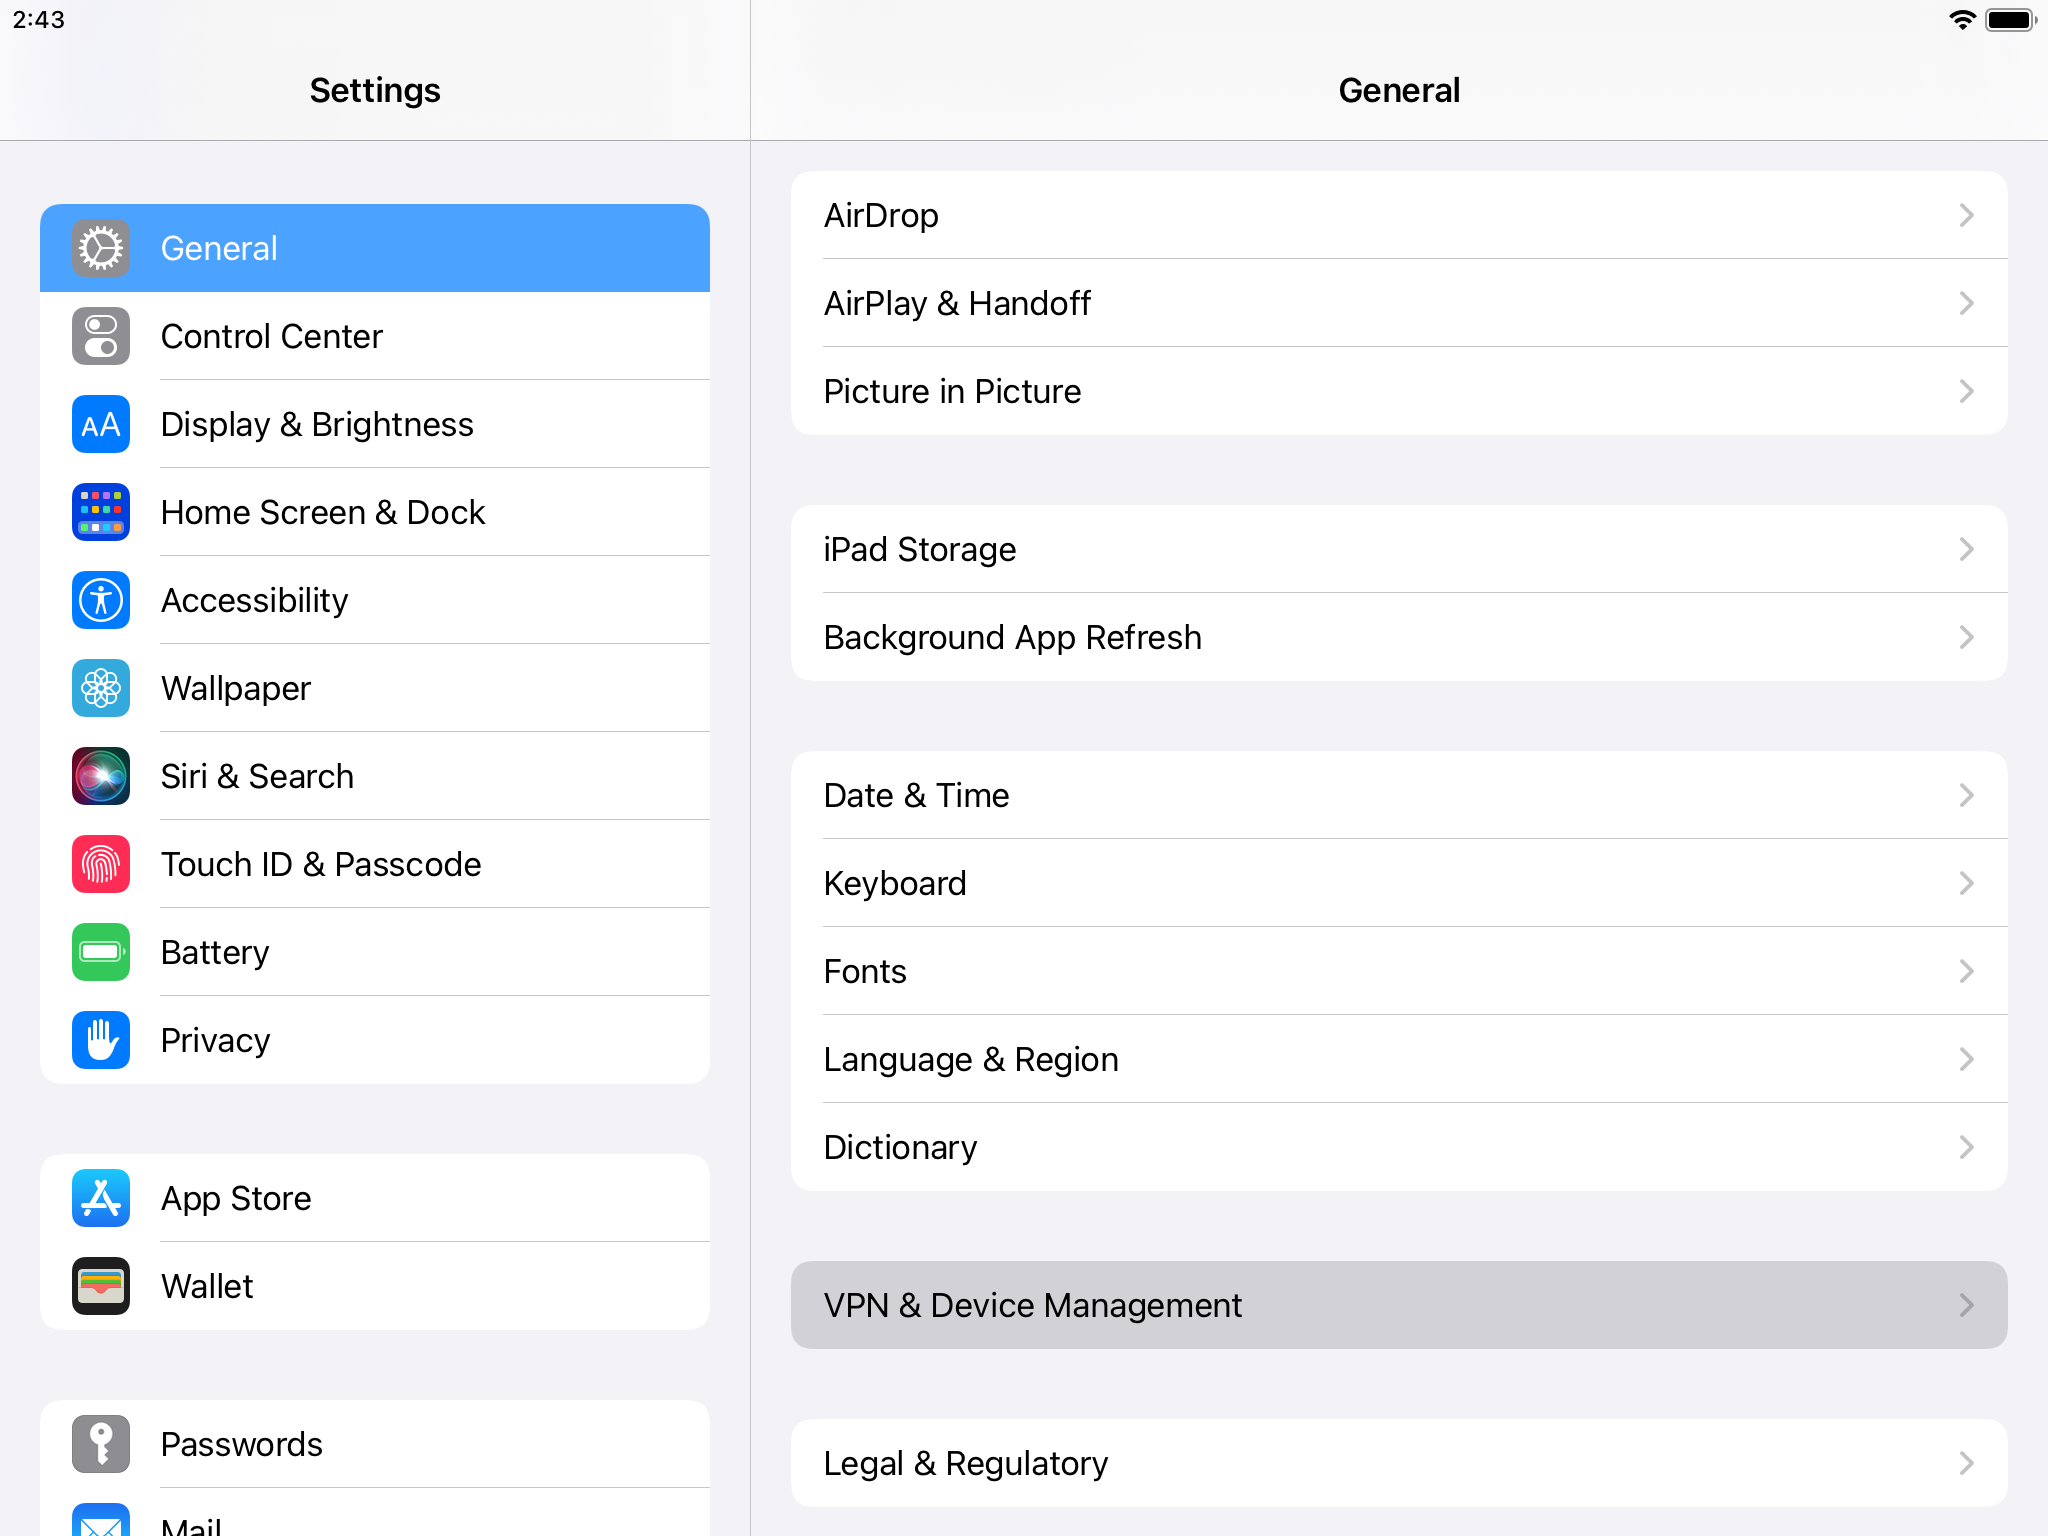
If you’ve inserted an intermediate and/or root certificate to trust certificates inserted via Smart Card Utility, you can easily view those installed certificates. To view, go to General → VPN & Device Management:
Those on iOS/iPadOS 14, go to General → Profile and Device Management:

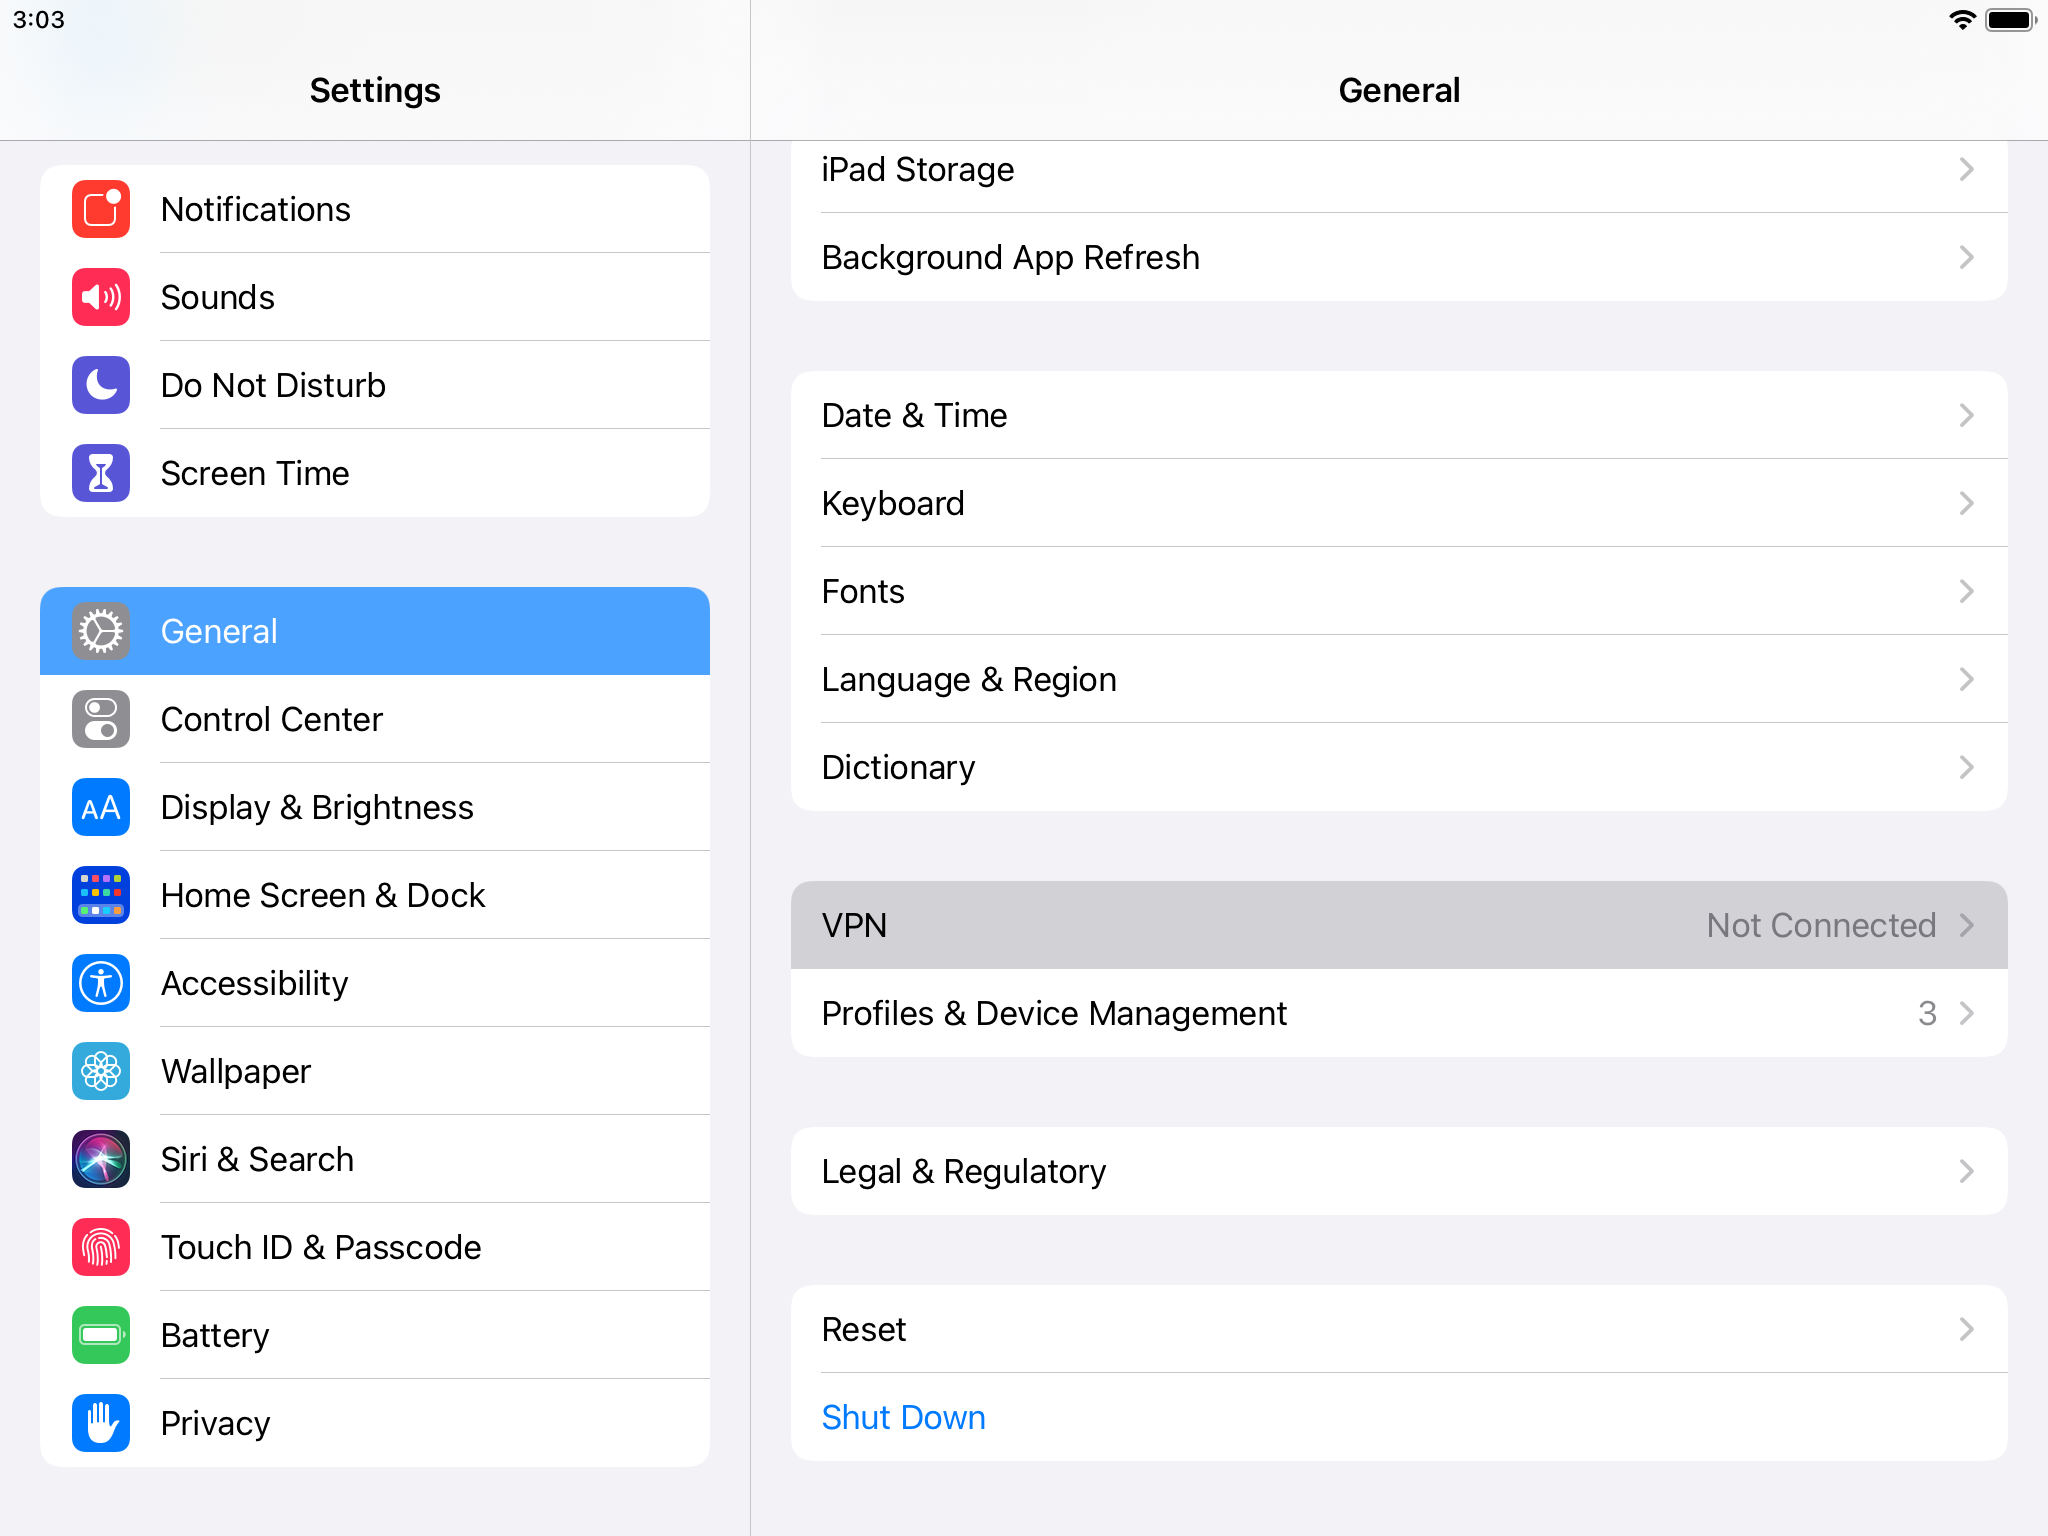
On iOS/iPadOS 15, below “VPN”, you will see any certificates that are used for authentication, separated by category if applicable:

In iOS/iPadOS 14, you’ll see the certificates alone in Profile & Device Management, separated by category if applicable:

VPN Setup
VPN configurations can also be made with the help of stored certificates, including those inserted via Smart Card Utility.
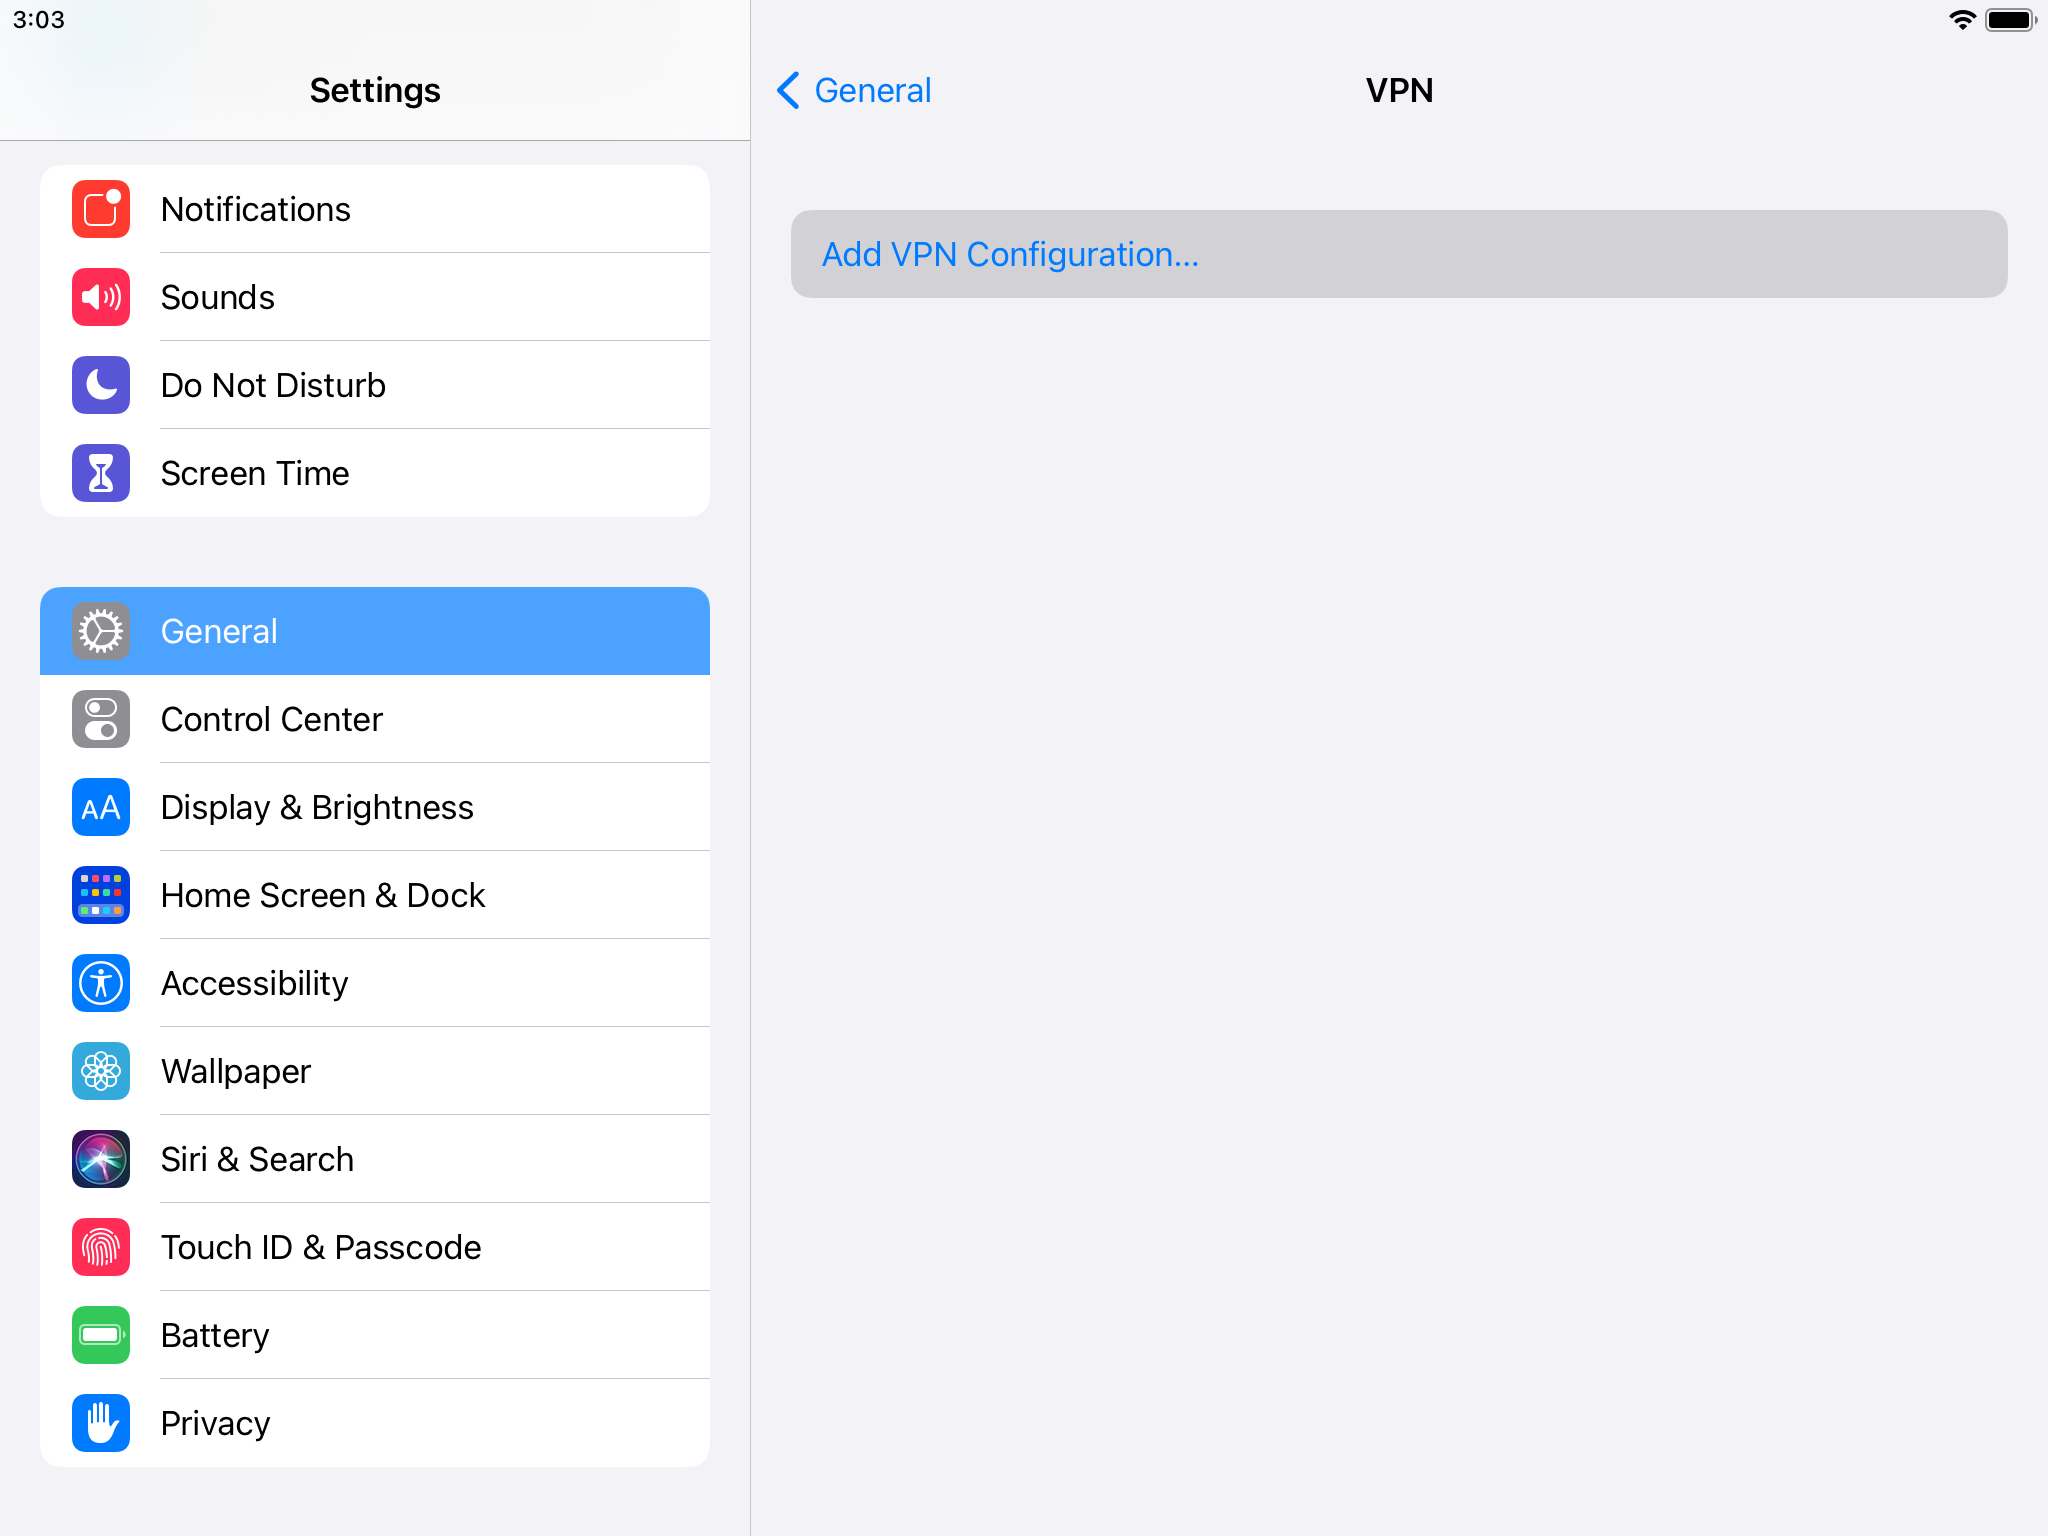
To set up a VPN in Settings on iOS/iPadOS 15 or later, go to General → VPN & Device Management → VPN → Add VPN Configuration:

Tapping “Add VPN Configuration” will redirect you to the VPN Setup screen:

On iOS/iPadOS 14, VPN and Device Management Settings are in separate sections of General Settings. Go to General → VPN → Add VPN Configuration:

Set up your VPN as you would in any other instance on iOS/iPadOS (contact your administrator for more information on setting up a VPN). Within the “Add VPN Configuration” menu, change your “User Authentication” option to “Certificate”. Return to the “Add VPN Configuration” menu, select the new “Certificate” option below “User Authentication” in the AUTHENTICATION section, and choose your previously inserted certificate from the list shown. Below is an example:

Select the certificate from the list that you’d like to use. It may be that there’s only one certificate, your inserted certificate, on the list. In this case there’s two: we’ll use “TCS PIV Auth” and not “Test Certificate”:

If you do not see your certificate in your list, it may be that the certificate was not inserted properly. Try insertion again by removing your identities, going through the scan process again, and inserting your desired certificate identities.
You may also have to browse through a list of available certificates to find the one you wish to use. To help distinguish between certificates during selection, Apple includes the “Issuer” and the “Expiration Date” of the certificate alongside the name. If your listed certificates use duplicate or similar names, view Certificate Details to match the “Issuer” and “Expiration Date” of the certificate you wish to use to your certificate on this list.
If you return to the “VPN Setup” screen by tapping “Back” in the top left of the Certificate selection, you should see your certificate selected under AUTHENTICATION:

To change your certificate during VPN Setup, click on “Certificate” again and repeat the steps above. Continue setting up your VPN as normal.
Wi-Fi
If you’d like to set up a WPA2 Enterprise or WPA3 Enterprise network connection on your iOS/iPadOS device, you may also do so with the use of an installed certificate, including those inserted with Smart Card Utility.
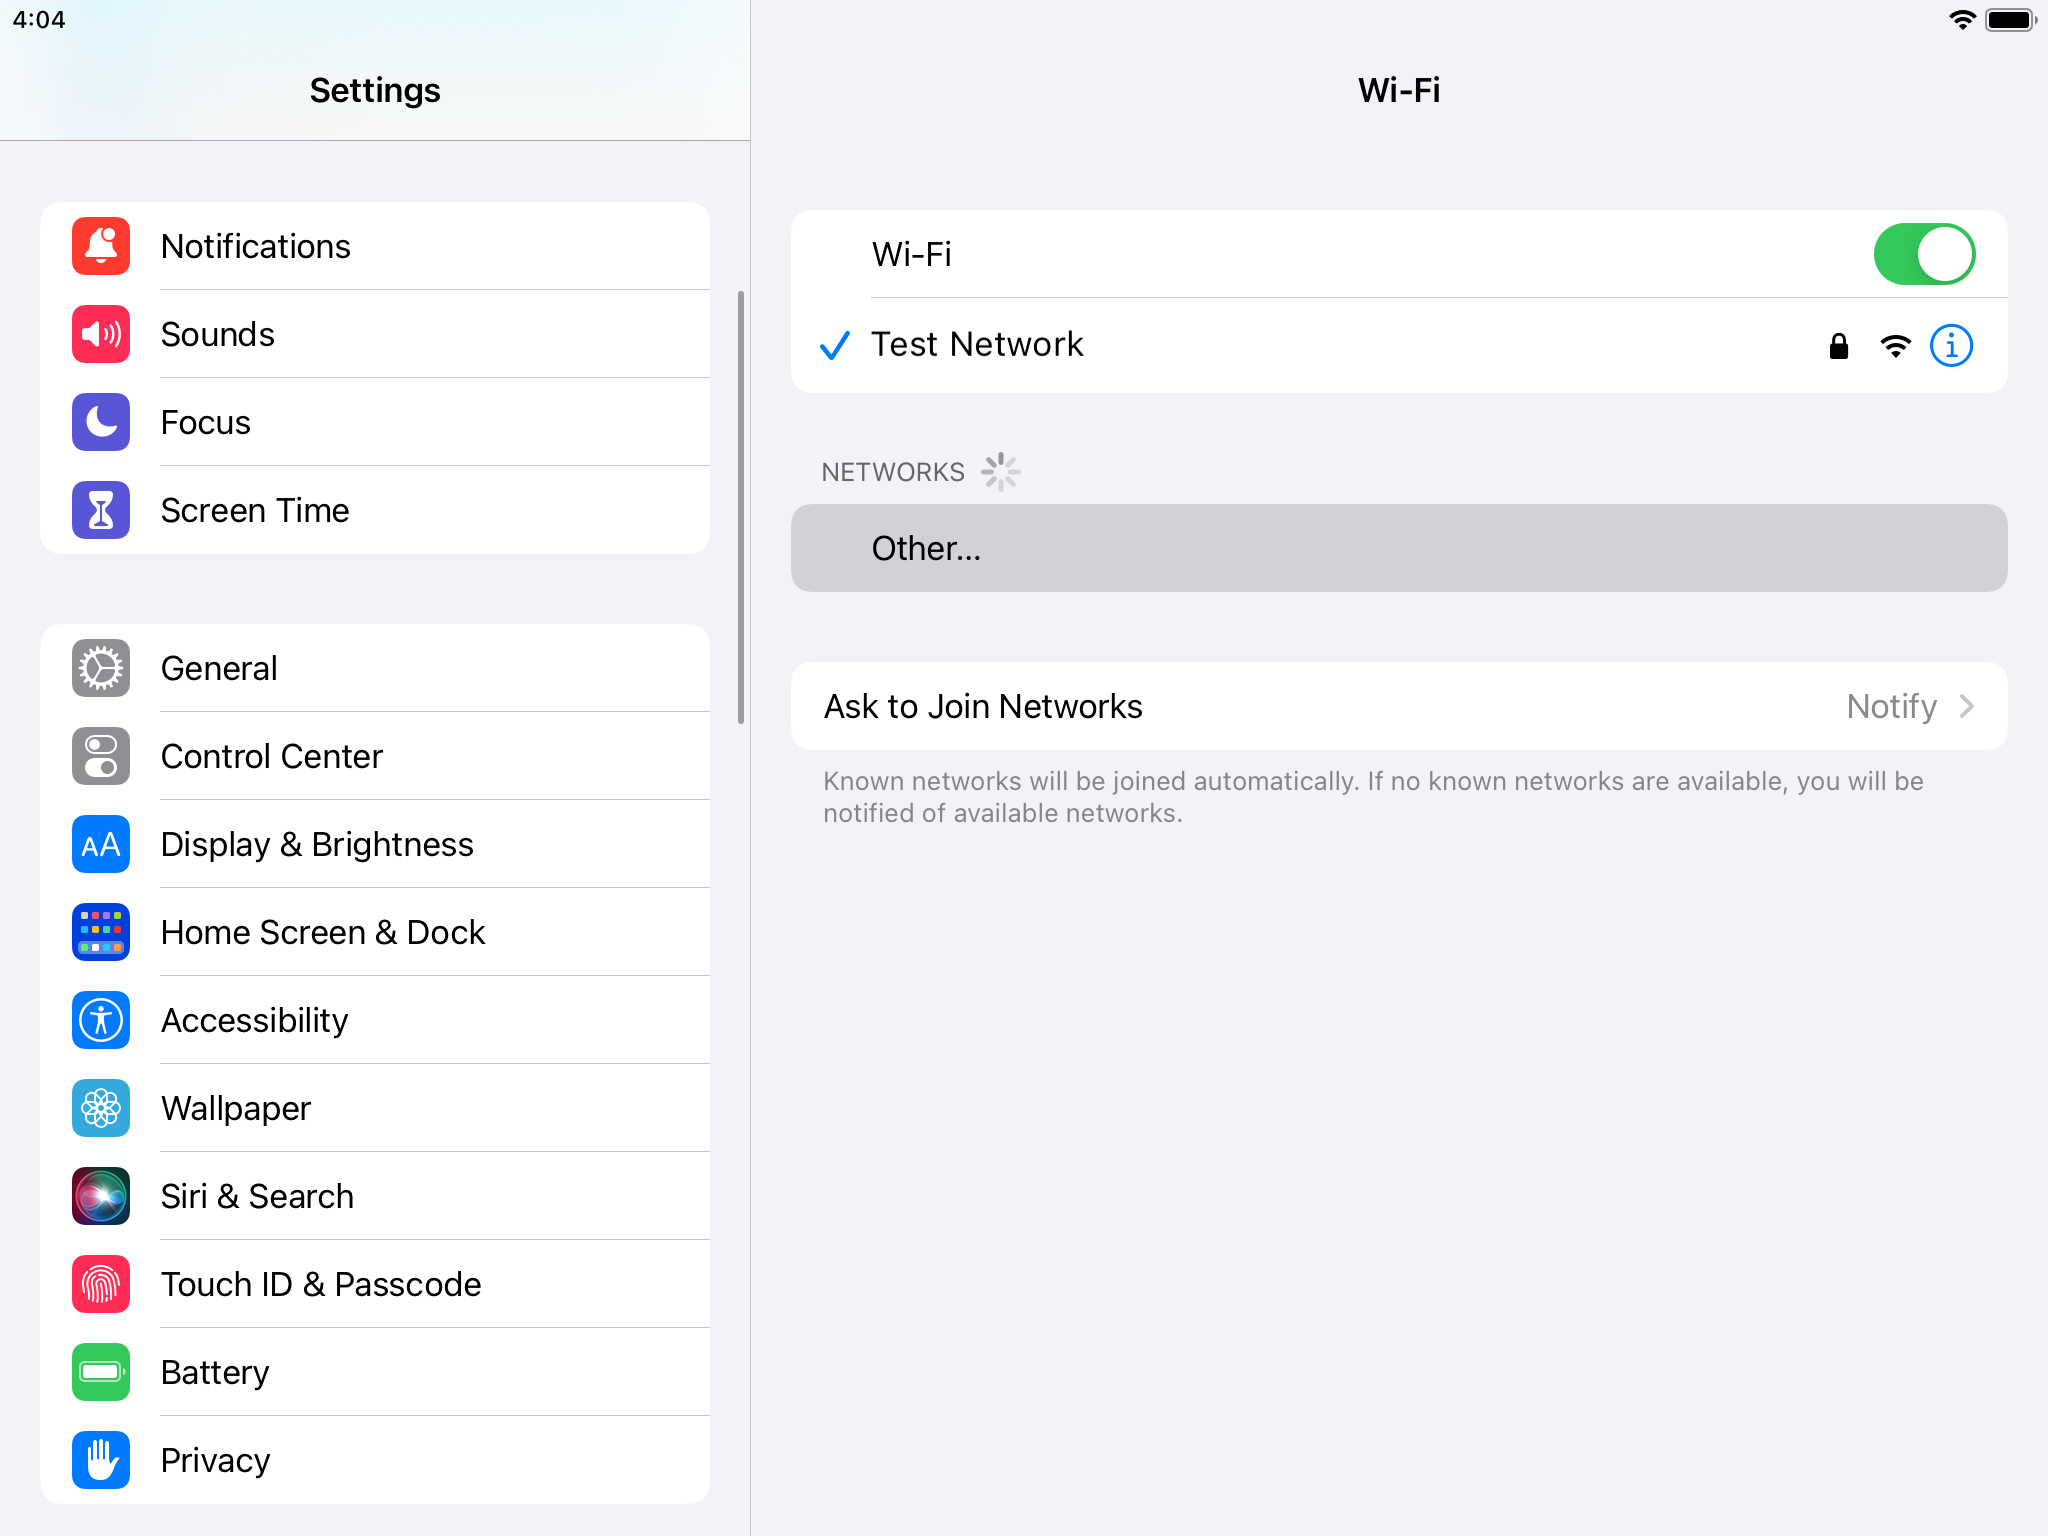
On your iOS/iPadOS device, go to Settings → Wi-Fi → Other Networks → Other… to go to the “Other Network” screen in Settings. You may have to scroll down past your current connection, “MY NETWORKS” and “PUBLIC NETWORKS”, to reach this option, which is at the bottom of the “OTHER NETWORKS” section.

Then, select the desired encryption type in Security (WPA2 Enterprise or WPA3 Enterprise). Change the Mode at the bottom to “Automatic” to “EAP-TLS”. “Identity” should appear under the “Username” field; tap “Identity” and select your inserted identity for use. Below is an example:

Select the identity from the list that you’d like to use. All considerations from the Certificate list in VPN Setup apply here as well.
Notifications
While using Smart Card Utility and other apps, you should see notifications appear at the top of the screen, such as this one:

While using other apps on your iOS or iPadOS device to authenticate with certificates, Smart Card Utility will send notifications to keep you updated on Token Status. This may include whether the reader may have powered off, as shown above, or if authentication was successful for a particular certificate.
As there is no unified interface that allows for Smart Card Utility to communicate Token Status while outside the app, save for Notifications, it’s important to make sure you turn Notifications on when setting up Smart Card Utility and leave this on when using the app. See the Notifications section of the Setup portion of this guide for more information.
Example Walkthrough
For those who wish to see a full example walkthrough, below is a demonstration video created on an earlier build of Smart Card Utility, though most instructions still apply to current builds:
For customers who would like to see an updated walkthrough of testing, you can do so by watching the Test portion of the Smart Card Utility Reader Setup video:
Support
We know that using smart cards can be tricky sometimes; that’s why we made Smart Card Utility to make this a bit easier. While we hope you don’t run into any problems with our software, we are here to help if you do!
Below you’ll find some resources that will be useful if you run into any issues when using Smart Card Utility:
Troubleshooting
To troubleshoot Twocanoes third-party smart card readers, including Bluetooth Issues, please see our article on using FEITIAN-based readers with Smart Card Utility.
For troubleshooting software, please see the issues below. This page will be updated with troubleshooting guidance upon new releases of Smart Card Utility if necessary.
Authentication Issues
If authentication with your certificate is unsuccessful, try the following steps:
- Verify you have the required certificates installed
- For US Government/Department of Defense customers, install the root and intermediate certificates by following the instructions on the Installing Intermediate Certificates page
- Toggle Bluetooth on and off on the iOS device
- Verify the reader is on when the PIN prompt is showing
- Click on “Test” and verify that the inserted certificates are seen by iOS. To do so:
- Navigate to Settings→General→VPN and Device Management→VPN→Add VPN Configuration
- Change User Authentication to “Certificate” and verify your smart card certificate is shown
- Note: you can verify that your certificate appears via the VPN menu, but a VPN does not need to be set up

- Try rebooting your device.
- If the certificates are not shown, enable logging in Smart Card Utility settings, then tap “Log” after use to identify the issue. To resolve the issue, you may either:
- View the log on your own, or
- Share this log with support@twocanoes.com
- Open Console on a Mac and click on the iOS device to show the logs.
- Use “subsystem:com.twocanoes.logger” as a filter, shown in the screenshot below:

Identifying Certificates as Trusted or Untrusted
In certain cases, your certificate may need to be trusted for authentication.
If attempting to accurately view which certificates are trusted immediately after installing an intermediate and/or root certificate, it’s best to:
- Refresh the Main Interface by pulling down (if examining inserted certificates), or
- Re-scan your smart card (to view which certificates are trusted if not yet inserted)
Free Trial Troubleshooting
If running into issues with your free trial length, make sure your time is set to “Automatic” in the iOS Settings app.
Knowledge Base
While this User Guide is updated regularly, we frequently add articles about all our products to the Twocanoes Knowledge Base to guide users through specific concerns. Visit our Knowledge Base page or the Smart Card Utility Category for specific help.
Customer Support
All customers who purchase Smart Card Utility Bluetooth, Smart Card Utility USB-C, or Smart Card Utility Lightning receive a 90-Day Support Package; use the information in your purchase email to access both email and phone support. Additionally, customers can purchase additional Assessment Support to help you assess the needs of your organization. If you’d like to inquire further about what Assessment Support includes, or would like to contact us for Support Inquiries as part of your Support Plan, please contact us. If you are interested in purchasing support for yourself or for your organization, you may also contact us for information on support plans. For information on quotes, please visit our quotes page.