I was creating a Raspberry Pi project and needed to make a bunch of SD cards to install in over 30 Raspberry Pi’s. I had been using the command line tool “dd” to make an image of our SD card, and would then restore it to a new SD card. That worked fine, except that it was very slow. So I create SD Clone.
I was using 8 GB SD Cards, and it was taking about 22 minutes per cards to restore. We were doing a deployment of 30 Raspberry Pi 2 B+’s, so I started looking around for ways to create copies of SD cards, but all the dedicated hardware options were expensive ($1000+). At the same time, we were having issues with an image restoring to an SD card that was slightly smaller than image created with dd. Since dd makes a block-by-block copy of the SD card, the new card needs to be the same size or larger, and that was causing errors.
So I created an MacOS app that lets to create an image of an SD card and then easily restores that image to multiple cards at once. I can now crank out 8 SD cards in about 15 minutes. I also added in a feature that shrinks the last Linux EXT2/¾ partition, so the image only has the used space. When the image is restored, it is much faster since much less data is copied. I also added a feature that automatically expands the last Linux EXT2/¾ partition when a restore is done, so if you restore on to a larger SD card, all the available space is used. You can also use it to restore images you get from raspberrypi.org or elsewhere.
Step 1: Download SD Clone
Head over and download SD Clone from Twocanoes Software. There is a full functional trial and I made it a “pay what you want” app.
Install SD Clone on your Mac.

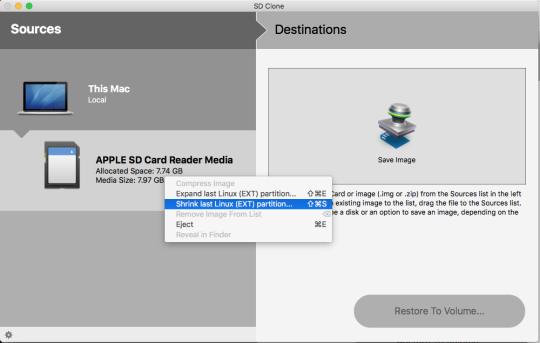
Step 2: Shrink Last Linux Partition
Insert your SD card into the SD card reader on your Mac, and it should show up in the sources in SD Clone. Select the SD card in the Sources, and In the gear menu, select Shrink Last Linux Partition in the gear menu.
Step 3: Create Image
Now you can create the image. Select the SD Card as the source, and select Save Image from the Destination. Enter in a filename, and click Save. The image will now be created and added to the Sources column.
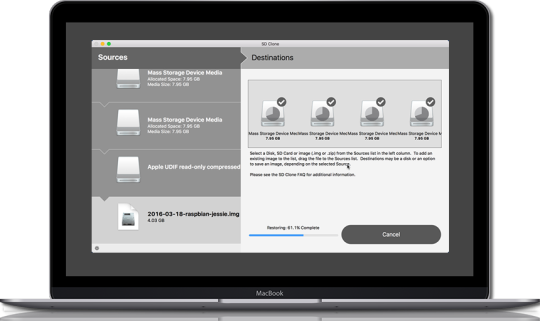
Step 4: Restore 8 SD Cards at once
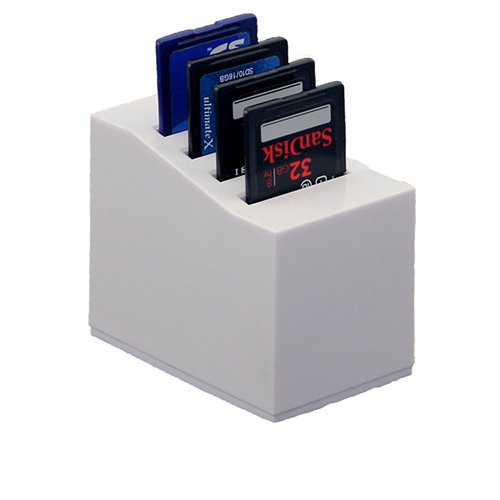
I needed to find a way to hook up lots of SD cards at once, and while I could have used a USB hub and lots of readers, I found a 4 SD card reader on amazon:
Insert all the SD cards at once, and connect the reader to your Mac. You should see all of them show up in the Destination. Select the source, and then select all the destinations (or press command-a to select them all). You’ll see a checkbox on each of the destinations. Click Restore, and the image will be cloned to all 8 SD cards at once. Once the image is restored, the last Linux partition will be expanded to take up all used space on the cards so when you boot to it in the Raspberry Pi, you’ll have all the available space.
USB Speed Considerations
I did a bunch of tests and found that more than 4 SD cards on a single USB bus did not help, since the USB bus became the speed bottleneck. My Mac has 2 USB buses (one for each USB port) so I stuck to create 8 images at a time. I also played around with USB 3, but since the 4 USB card reader was USB 2 only, using USB 3 ports didn’t make a difference. I could use a bunch of USB 3 readers and a USB 3 hub, but that was prohibitively expensive.
I made a video of the restores that you can see here: