Automaton User Guide
Overview
This guide will show how to set up an Automaton device and then run workflows to automate keyboard actions.
Getting Started
To set up an Automaton first connect it to a computer using the provided USB cable. Next download the Automaton app and install it.
Create a Workflow
Open the Automaton app from the Applications folder in Finder. Add a new workflow by clicking the “+” button near the lower left corner of the app window. Click on the name of new workflow where it is shown in the list on the left side of the app window. Next add a workflow name and description near the upper right corner of the app window to document what the workflow is for and any setup is expected before it is run.
Add Workflow Steps
After adding a new workflow and clicking on it in the left side of the app window, add a workflow step by clicking one of the step-type buttons in the upper right of the app window. There are several step types.
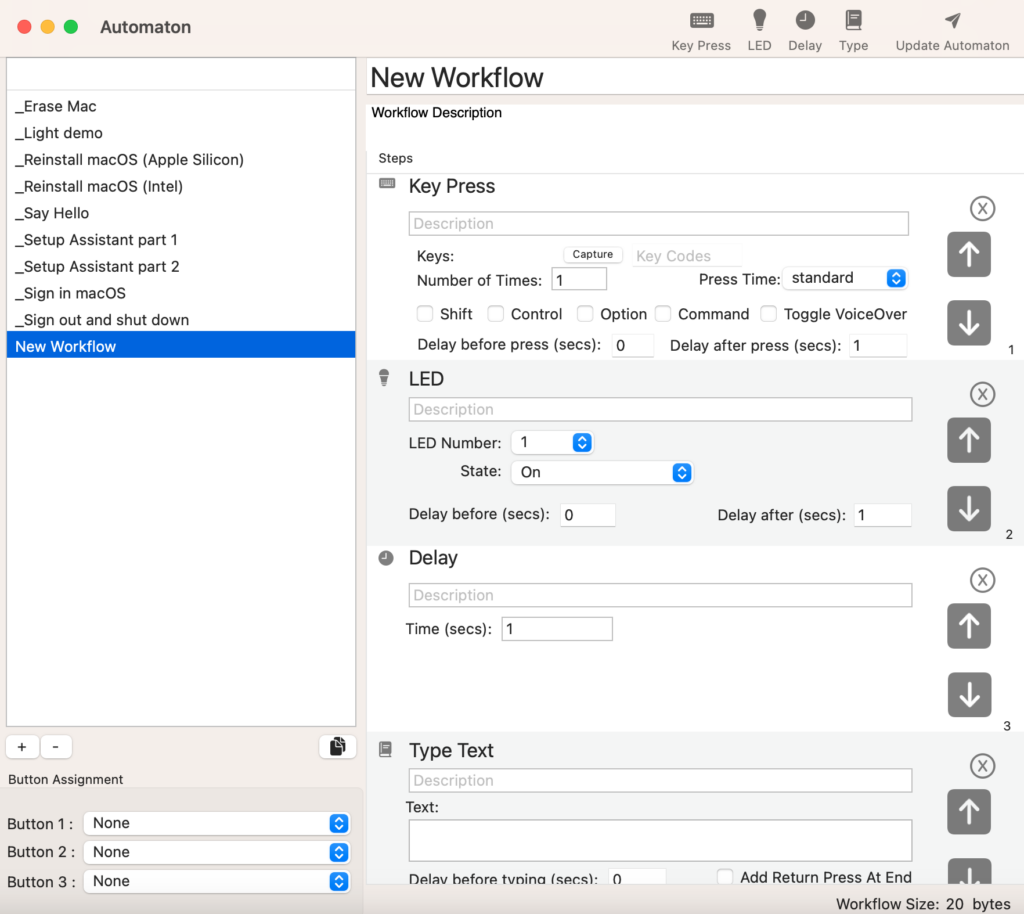
Key Press: This step-type can be used to type a single key or a single key with modifiers, for example Command-N, Control-Option-Right-Arrow, etc. Click the “Capture” button and then press the key to be typed. Then click any options for modifier keys if needed. If the step should be performed more than once, change the value for “Number of Times”. See the section below called VoiceOver if need for more information on the Key Press option called “Toggle Voiceover”.
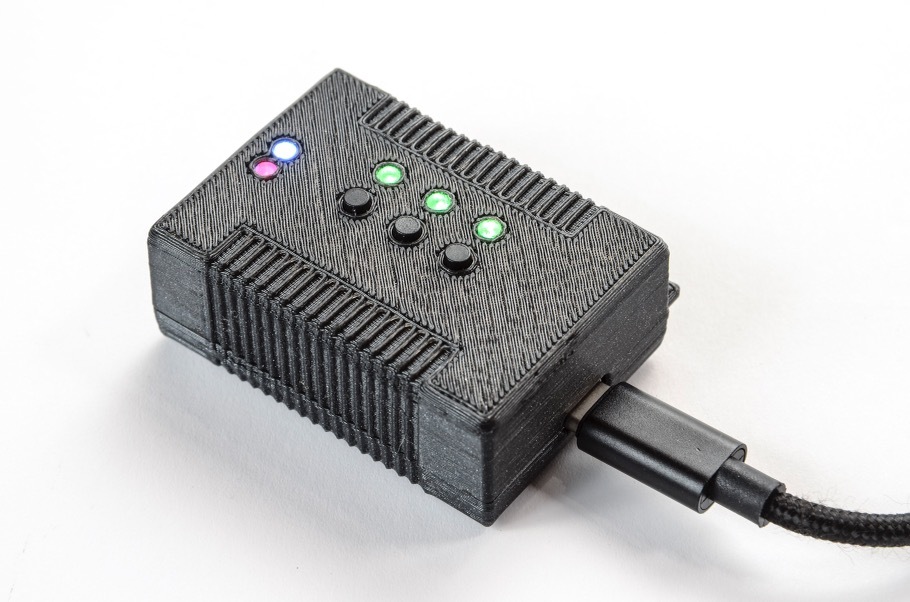
LED: This step-type can be used to control one of the LED lights on the Automaton device. This can be helpful to show status when running a workflow, such as if it is currently waiting or if it is currently on a certain step in the sequence. The LED step can turn one of the LEDs on, off, or have it flash one of several patterns. LEDs 1 to 3 are in the middle of the Automaton device and are numbered from left to right when viewing the Automaton with the LEDs above the buttons. LEDs 4 and 5 are to the left of the middle LEDS, with LED 4 on top and 5 on the bottom.
Delay: This step-type can be used if the workflow should wait before proceeding to the next step, such as if waiting for something to be done after the previous action. It can be good to add a delay if needed after turning on an LED to ensure it is shown for a minimum time.
Type: This step-type can be used to type a string of text, such as typing a name in a form or typing a command into Terminal.
Steps can optionally be given a description if helpful to communicate what is to be done but this is only for reference. Some steps can also be given additional delay time if needed to wait for something to happen either before or after the step is performed.
Assign Workflow to a Button
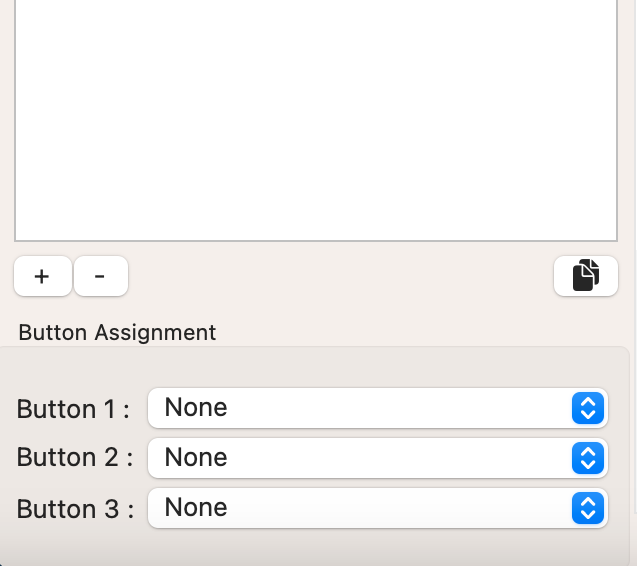
After adding steps to a workflow, assign the workflow to a button on the Automaton device by choosing it in the Button Assignment area near the lower right corner of the app window. The Automaton provides 3 buttons that can be assigned to run different workflows chosen.
Update Automaton
After assigning a workflow to an Automaton button, confirm that the Automaton device is connected to the computer with the provided USB cable. Then click the Update Automaton button in the upper right corner of the app window. This will show a dialog to confirm sending the workflow to the device. Click “Update” and then wait for the dialog panel to be closed. When this is done the Automaton is now ready to run the selected workflow.
Run Workflow
After updating the Automaton device with a selected workflow, connect it to a computer using the provided USB cable to run the workflow. Buttons are numbered from left to right when viewing the Automaton with the middle LEDs above the buttons. Press the button assigned when updating the Automaton to run the selected workflow. The Automaton will perform the keyboard actions and LED statuses entered. When the workflow completes it will turn off all LEDs and do nothing until another button is pressed or it is disconnected from the USB cable.
More Options
Move or Remove Steps
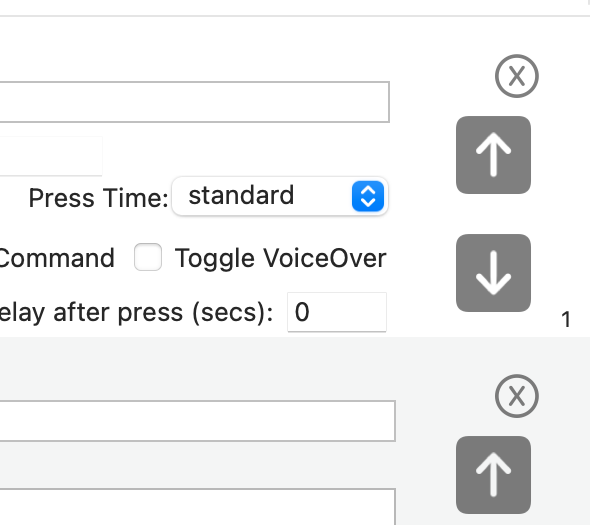
To rearrange steps in a workflow use the up arrow and down arrow buttons shown on the step. Or click the step and click the Edit menu for options to move the step up, down, to the top, or to the bottom. Note keyboard shortcuts shown in the Edit menu for these actions to make rearranging a workflow easier.
A step can be removed by clicking the “X” button shown on the step or by clicking the step and then pressing the Delete key on the keyboard.
Copy and Paste Steps
Steps can be either duplicated or copied to a different workflow if needed. To do this first select one or more steps and then press Command-C or click on the Edit menu and select Copy. Next click on the workflow or step where the copied content should be added and press Command-V or from the Edit menu select Paste.
Add Multiple Workflows
Additional workflows can be added by clicking the “+” button near the lower left corner of the app window. Workflows will be listed on the left side. Click a workflow in this list to select it. After selecting a workflow it can be removed if necessary by clicking the “-” button near the lower left corner. To create multiple versions of a workflow, click the Duplicate button to the right of the “+” and “-” workflow buttons. Or from the Edit menu select “Duplicate Workflow”.
Import/Export Workflows
One or more workflows can be exported to a file to either archive for later use or to send to another computer running the Automaton app. Click on a workflow to select it, or hold down the Command key and click to select multiple workflows, then from the File menu select “Export Workflow…” and give the file a name. Export can also be done by pressing Command-Shift-E. To later import workflows click the File menu and select “Import Workflow…” and choose the file saved previously.
Default Workflows
The Automaton app includes several default workflows to show some ideas of what Automaton can do. These workflows are shown in the workflow list when the app is first launched. These workflows can be edited, duplicated, or deleted. They can also later be restored using the command in the File menu.
Maximum Workflow Size
When sending a workflow to an Automaton there is a maximum size of workflow that can be sent based on memory available on the Automaton unit (currently 10,000 bytes for each workflow assigned to a button). The app will show a workflow size estimate in the lower right corner of the app window. When updating an Automaton there will be a warning shown if the size limitation is exceeded.
View App Version and History
When necessary check the app version by clicking on the Automaton menu and selecting “About Automaton”. To view a history of app changes, click the Automaton menu and select “History…”.
Update Firmware
Periodically there may be new firmware released for Automaton. When relevant the Automaton app will notify that firmware must be updated before workflows can be sent to an Automaton unit. Or to manually confirm that an Automaton is updated with the latest firmware there a command for this in the File menu.
Keyboard Shortcuts
The Automaton app provides several keyboard shortcuts to help manipulate workflows and workflow steps.
Add Key Press Step: Command-Shift-K
Add LED Step: Command-Shift-L
Add Delay Step: Command-Shift-D
Add Type String Step: Command-Shift-T
Import Workflow: Command-Shift-I
Export Workflow: Command-Shift-E
Upload to Automaton: Command-Shift-U
Flash Automaton Firmware: Command-Shift-F
Add Default Workflows: Command-Shift-A
Undo Delete Workflow or Step: Command-Z
Copy Steps: Command-C
Paste Steps: Command-V
Duplicate Workflow: Command-D
Delete Workflow: Delete key
Select All Steps: Command-A
Move Step Up: Command-Up-Arrow
Move Step Down: Command-Down-Arrow
Move Step to Top: Command-Alt-Shift-Up-Arrow
Move Step to Bottom: Command-Alt-Shift-Down-Arrow
Tips and Reference
Check Output
After creating a workflow it can be helpful to check that it is performing the intended steps. This can be done by opening a text editor and running the workflow to observe the keyboard output that is typed. It can be helpful to use the app Pages and clicking on the View menu to select the option “Show Invisibles”. This will show a visible character for things like a space or tab that might otherwise be difficult to see.
When using a text editor to check the output of a workflow it can also be helpful to check the timing and delay values used in workflow steps to see if more or less time is needed when a step is run to wait for the computer to respond to what is done before proceeding with further steps.
Use LEDs to Show Status
It can be helpful to add an LED step in a workflow to show when their is a programmed delay. For example if at one point in a workflow it is necessary to wait for 20 seconds before proceeding it can be helpful to set an LED to flash slowly before the wait begins and then turn it off afterward.
Descriptions
It can be helpful to add a description to a workflow or to a single step to explain what it is doing or any setup that is expected before something is done. For example it can be good to have a workflow description state which macOS version is expected if the steps performed will need to be different for a different OS version. Or state that the workflow expects to be run from Recovery, from the login screen, from Setup Assistant, or when signed into the regular macOS desktop.
For a step description it can be helpful to state what is expected to happen when the step is run, for example “Close window” or “Force immediate user sign out”.
VoiceOver
VoiceOver is a mode in macOS that is provided to assist users with disabilities. Using VoiceOver can be helpful for designing a workflow since it can perform some steps with keyboard commands that otherwise would not be possible. For example when booted to macOS Recovery, VoiceOver can be used to move around the UI and select items from menus or windows using only keyboard commands.
To use VoiceOver in a workflow, add a Key Press step and click the option “Toggle Voiceover”. Once VoiceOver is turned on, add additional steps to move around the UI or select items using Apple reference documentation.
There are a few VoiceOver commands that are particularly helpful for Automaton workflows:
Move to menu bar in Recovery: Control-Option-M (repeat to move to sections of menu bar)
Move to section: Control-Option-Arrow-Key
Select currently focused item: Control-Option-Space
Note that VoiceOver reference information refers to commands such as “VO-“. In this context “VO-” represents “Control-Option” followed by the remaining command shown. For example if reference information states “VO-Right-Arrow” this could be added as a Key Press step by clicking the Capture button, then pressing the right arrow key, then clicking the checkboxes for both Control and Option. For an example like “VO-Command-F8” this could be added as a Key Press step by clicking the Capture button and pressing the F8 key, then clicking the checkboxes for Control, Option, and Command.
If necessary remember to add another Key Press step after a workflow section requiring VoiceOver and select “Toggle Voiceover” again to turn VoiceOver off. It may be necessary for some workflows to turn VoiceOver off before proceeding to other actions needed.
Keyboard Shortcuts Useful for Workflows
Open Spotlight: Command-Spacebar
Select Apple menu: Control-Function-F2 (VoiceOver not required but helpful for keyboard-only navigation)
Move to next form item: Tab
Move to previous form item: Shift-Tab
New item or window: Command-N
Close window: Command-W
See more in Apple documentation.
Keep In Touch
Sign Up for Automaton security and product updates
Automaton 2: