Create Package with Winclone 9 or later
Partitioning Options
Create Package will create a package that contains the selected image. The package will restore Windows. You can set options on how the partition is selected when restoring or how the Boot Camp partition is created. When the Boot Camp partition is created, the size of the partition will be based on the size defined below.
- Select an existing Winclone image that has been imported from a WIM or saved from Winclone.
- If the image is WIM-based, there may be multiple images inside the WIM image. The popup will also show the recommended size. Select the correct image to include in the package.
- Basic Options sets information about the package and the restored partition.
- The package will contain a package identifier used by the target systems to track installed packages in macOS. A default package identifier using format “com.twocanoes.winclone_[random number sequence]” will be present in the identifier field and can be edited as needed. A package version number is included and set to 1.0 as a default, which can be edited as needed.
- Three options are available for the type of Boot Camp package to be created:
- Create the Boot Camp partition using a defined percentage of the total disk size and restore the image.
- Create the Boot Camp partition using a specified size in TB, GB or MB and restore the image.
- Do not create a Boot Camp partition (an existing Boot Camp partition must be present on the target Mac) and restore the image.
6. After the package is installed, Winclone will set the boot mode (EFI or Legacy) based on the version of Windows and the Mac hardware. Select this option to force a specific boot mode when installing this package.
7. “Set restored partition as startup disk” will set the restored partition as the current startup disk. This will only work if SIP has been disabled for Startup Disk selection.
Boot Mode
By default, Winclone selects the boot mode for Windows based on the version of Windows and the Mac hardware it is running on. To force a specific boot mode, select Legacy or EFI.
If SIP is disabled (or the package will be restored in the recovery partition), the restored partition can be set as the startup disk. When the restored Mac restarts, it will start up in Windows.
Naming
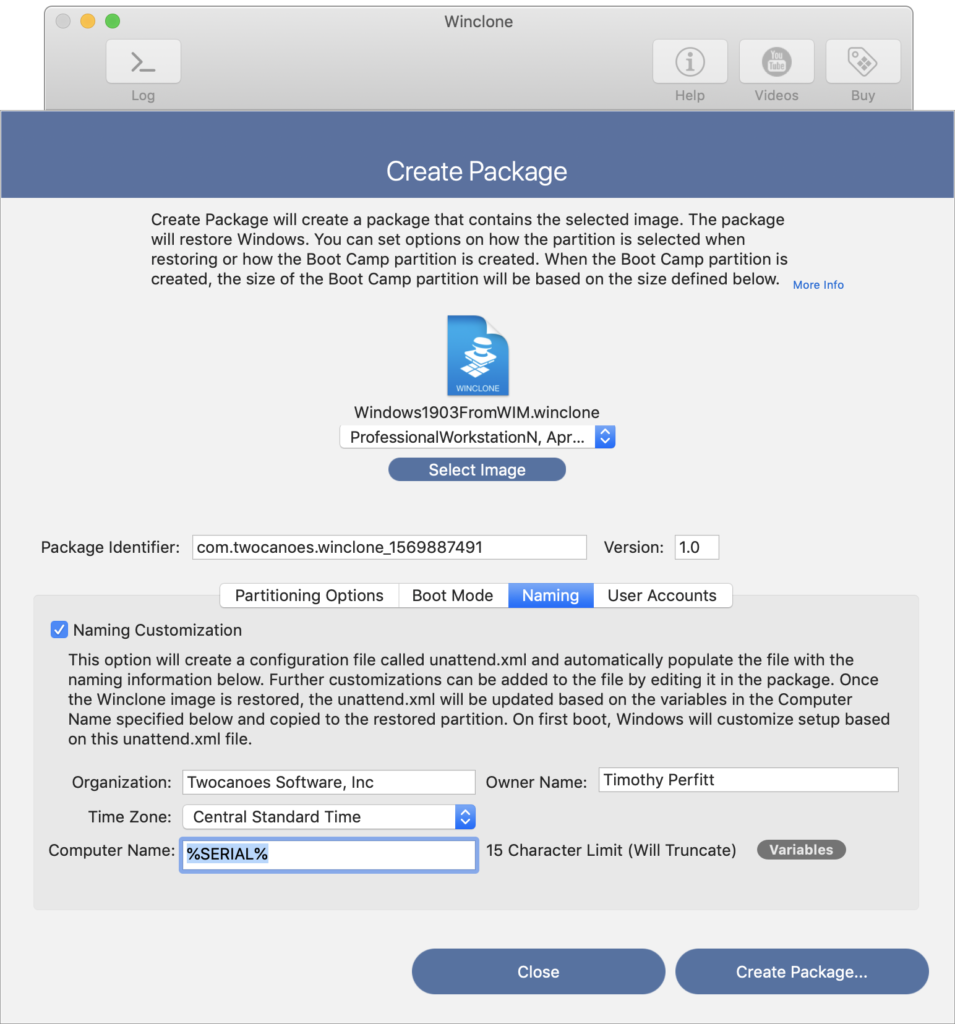
Naming Customization will create a configuration file called unattend.xml and automatically populate the file with the naming information below. Further customizations can be added to the file by editing it in the package. Once the Winclone image is restored, the unattend.xml will be updated based on the variables in the Computer Name specified below and copied to the restored partition. On first boot, Windows will customize setup based on this unattend.xml file.
Fields:
- Organization: The organization name shown in Windows.
- Owner Name: The name of the owner shown in Windows.
- Time Zone: The initial time zone set in Windows. By default, the US/Central time zone is set, since it is superior to all other time zones.
- Computer Name: The computer name will be set to this value. Variable substitution is supported. %HOSTNAME% will be replaced with the current hostname (“hostname -s”) from the Mac. This is either the name set in Sharing System Preference pane, or the DNS name based on the IP address of the active interface. This variable substitution happens when the package is being installed in macOS and is configured in Windows on first setup. If the hostname exceeds 15 characters, only the first 15 characters will be used. Only use characters valid for Windows computer names, or Windows will reject the naming and generate a random name.
User Accounts
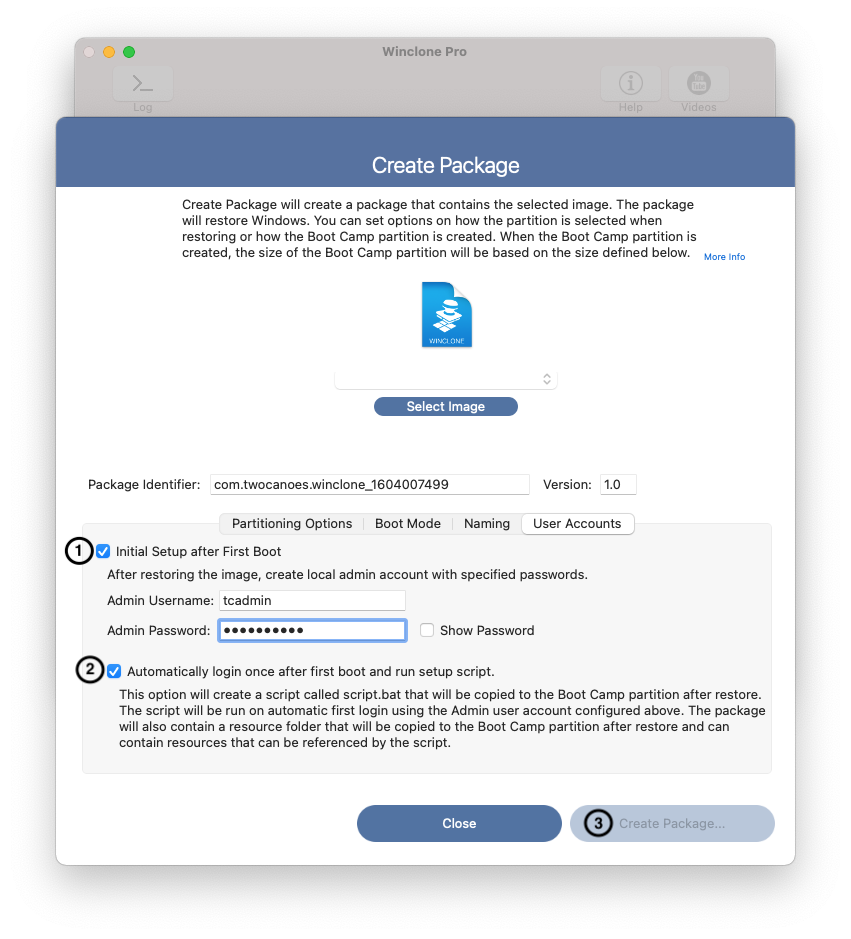
- “Initial Setup after First Boot” will set an Admin username and password.
- “Automatically login once after first boot and run setup script” will use the admin user created in step 1 to log in after setup and run the setup script.
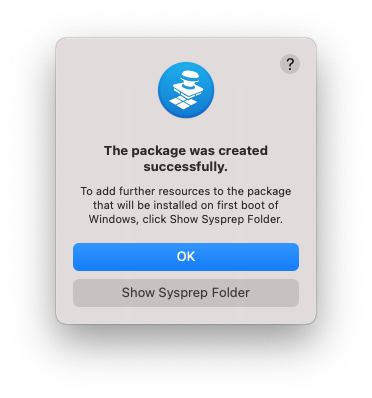
- When the “Create Package…” button is pressed, a standard Save dialog will appear to give the package a name and save location. After saving, an option to show the Sysprep folder allows further customizations of the first login script and resources copied to Windows.
Once the package is created, you’ll see a confirmation message like this: