Creating a Contact Card in Passbook with Bleu Meetings
Contact Card in Passbook
Business cards are handy, but since we all have smartphones, it makes more sense to share your contact info in electronic form. Using a passbook pass from Bleu Meetings is a great way to share your contact info, and also be able to update the info whenever it changes. In this article we will show how you can create your own contact card in Bleu Meetings and share your contact card with others.
The basic process is:
- Create a meeting to that will be used to keep track of the pass.
- Create and customize a pass so that it matches your branding and has your contact information on the back.
- Invite an generic user to the meeting and grab the URL of the pass from the email.
- Use this URL to create a QR code to share your contact card pass!
Below is what our contact pass looks like. It is a great way to share your info to folks you meet!

Step One: Create a Meeting
To learn how to create a meeting in Bleu Meetings, you can view ourquick setup documenthere: Getting Started with Bleu Meetings
For this meeting, you will need to set the start date as today, and the end date at least a few years in the future in order to ensure that your contact card remains active. You can enter in your Company Name and upload a logo (optional).
Step Two:Edit Your Pass
In the original example, we utilized a background image and our logo as a thumbnail image. You can view the pass requirements for images here:Creating Passes in Bleu Meetings
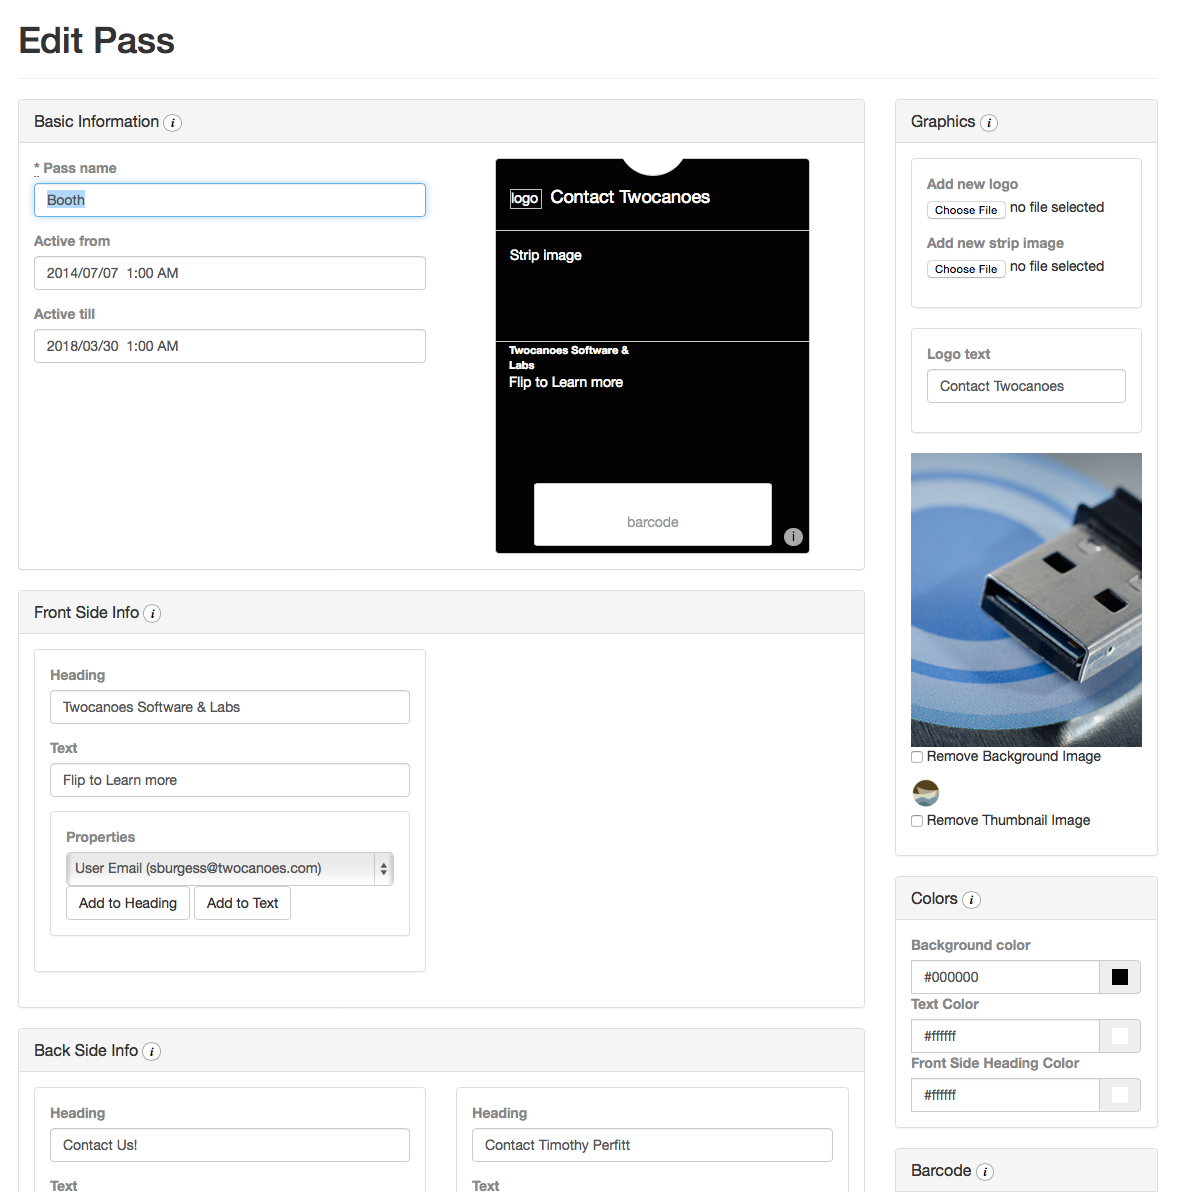
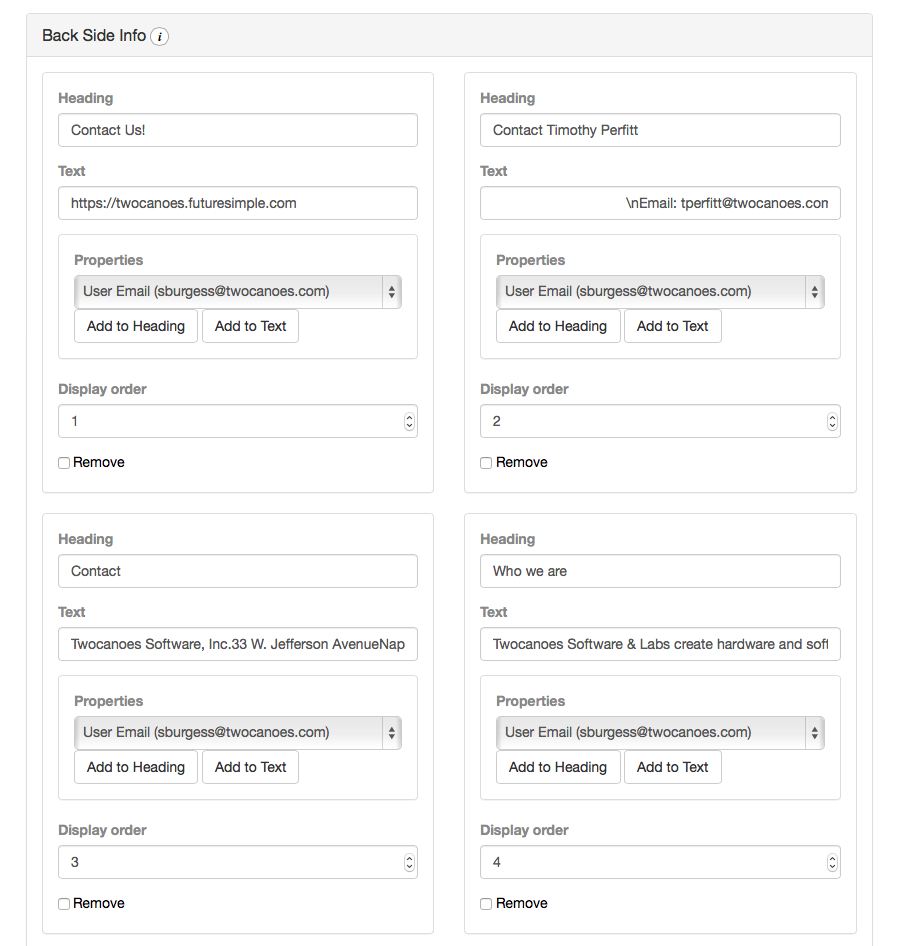
You will need to add information to the back of the pass. In our example, we have our website, email address, and social media links.
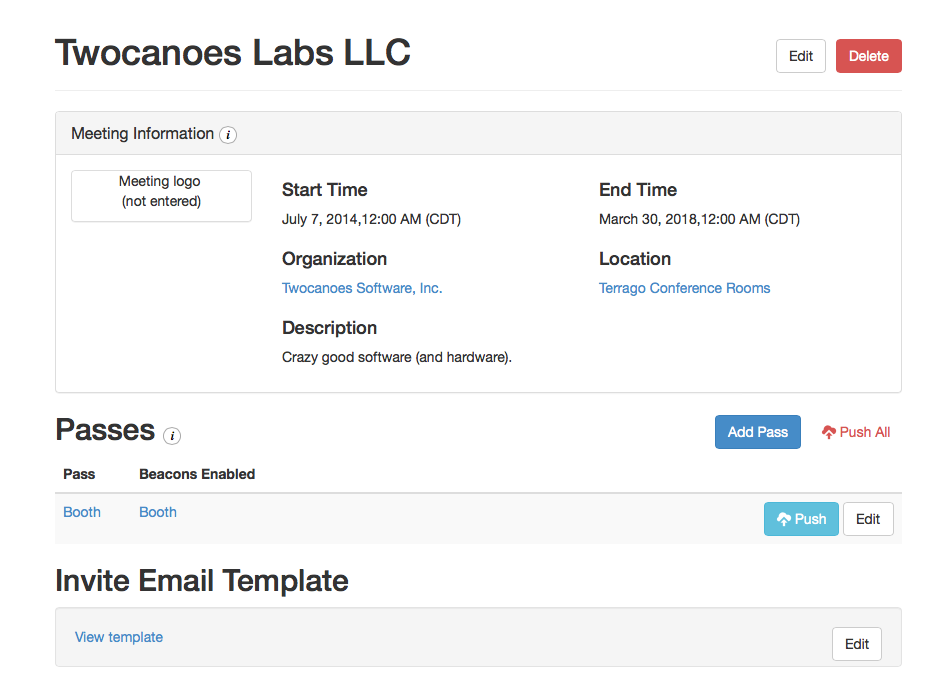
You will need to save your pass and you will see the pass dashboard.
StepThree:Add newParticipant for Pass
After saving, you will be redirected to the pass download page. Visit the dashboard of your meeting to view the participants section.
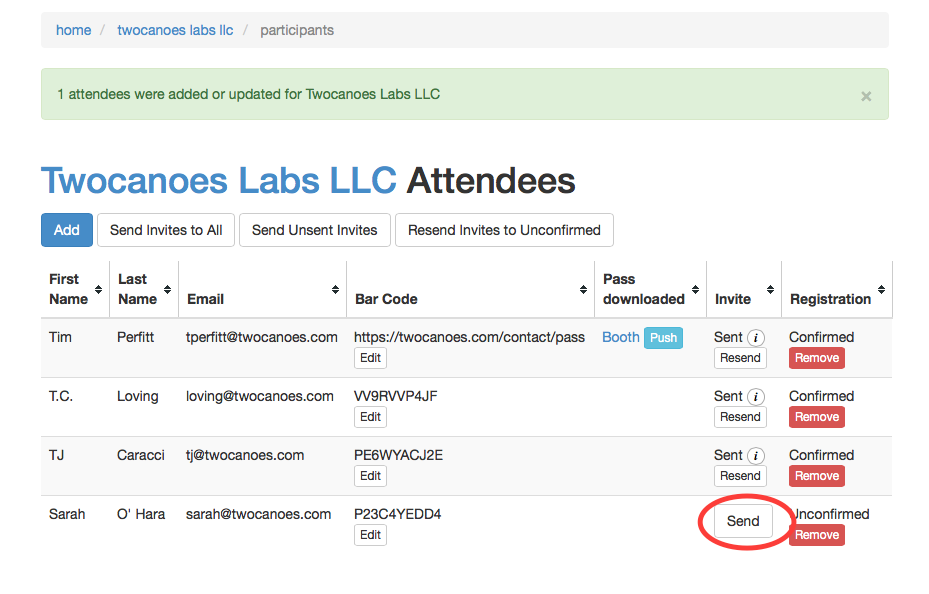
We will need to add a new participant to the meeting and then use the participant’s download link to share the pass with others. Since you may have dozens or even hundreds of people downloading this pass, it makes sense to invite a generic user and associate the pass with that user.
You can use another email address you own or create a new email and send yourself an invitation.

Next we are going to send a download link to the email you entered, and save the download link and associate that download link with the same participant.
Next, we’re going to copy the link that was sent to your email to make a QR code to share on the front of the pass and on other things like business cards or signs.
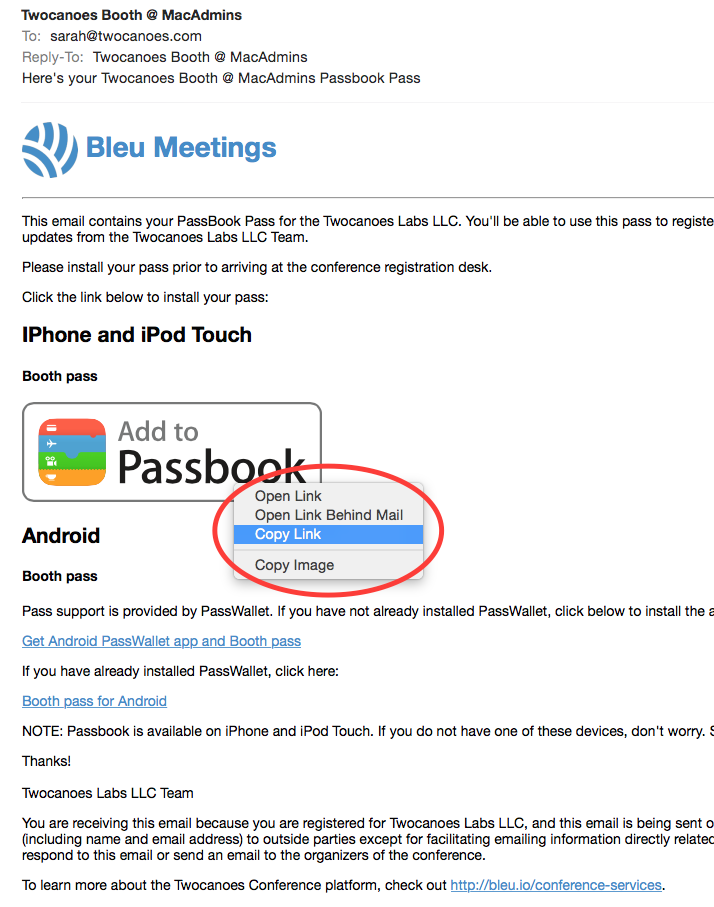
After copying the link from your email, visit the participants section of your meeting and click to edit the bar code associated with the participant we created. This will make the QR code on the front of the pass be scannable by passbook, and allow others to scan it and download your pass by scanning your pass.
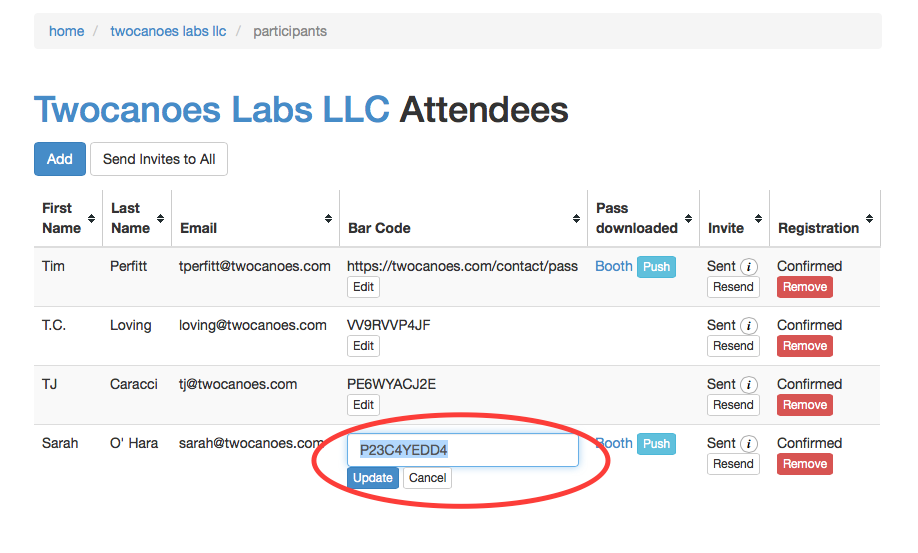
Paste the link that you copied from the email and click update.
Step Four:Download Pass and Share QR Code
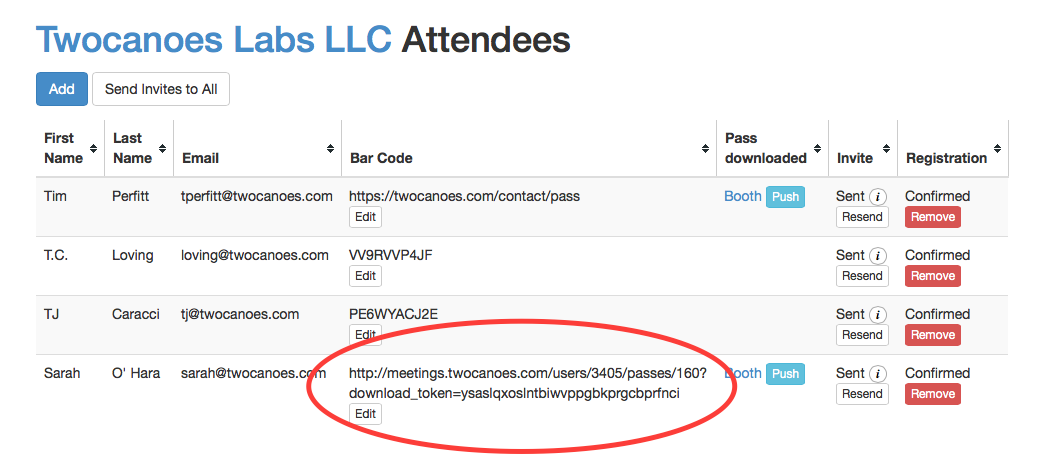
Next, you can share the URL to your pass in order for new contacts to download to their phones.
Your link should look something like this:
http://meetings.twocanoes.com/users/3405/passes/160?download_token=ysaslqxoslntbiwvppgbkprgcbprfnci
You can share this link with others or download the pass/contact card and take a screenshot:

This QR code can be placed onto marketing materials.
