Mac mini Setup
The following instructions provide the initial setup for the admin computer that contains the apps and resources to restore Apple Silicon and Intel Macs.
Items Required
The following items should be gathered ahead of time.
- M4 Mac mini with 1 TB SSD
- Ethernet network connection
- 1 GB or larger USB flash drive formatted as FAT32
- Apple ID to download software from App Store
- Software Licenses
- Acroname Hub3c
- Six (6) USB-C to USB-C cables labeled 0 through 5 on each end.
Download Workflow
To prepare for setup, the following resources need to be copied to the USB flash drive.
- Format the USB flash drive as FAT32 and name it DEPLOY.
From a Mac or PC, download the disk image at the following URL and copy to the USB flash drive:
https://setup-twocanoes.s3.amazonaws.com/mini.dmg - Copy the software license keys that were provided to you for DFU Blaster and MDS to the USB flash drive.
Mac mini Initial Setup
The Mac mini requires specific configuration and software installed.
- Connect the Mac mini to power using the provided power cable.
- Connect the display, keyboard, mouse and ethernet cable to the Mac mini.
- With the Mac mini in a powered off state, power on the Mac mini by pressing and holding the power button on the Mac Mini until Macintosh HD and Options appear on the screen.
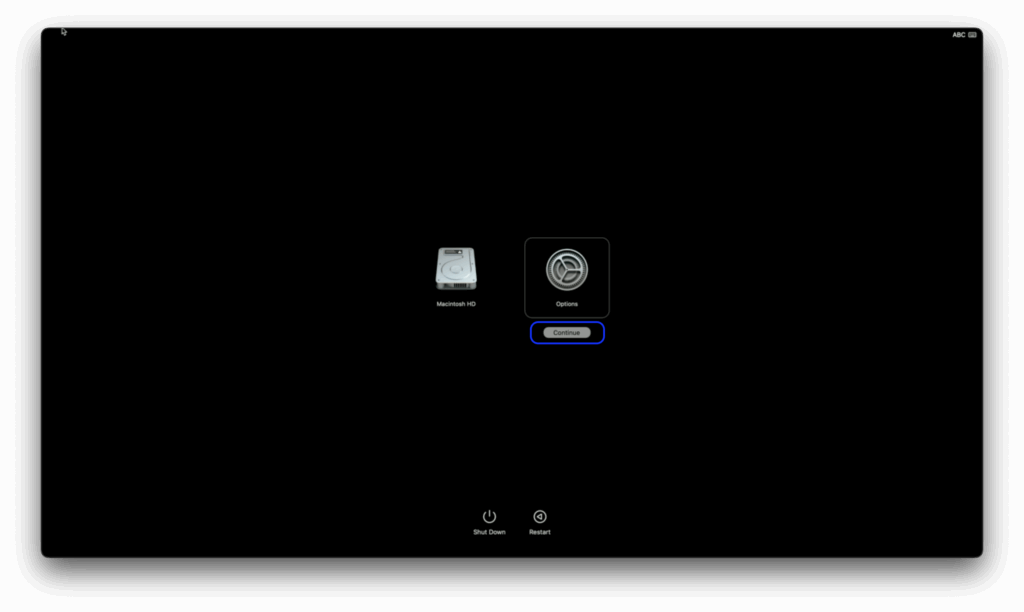
- Select Options > Continue to boot into macOS Recovery.
- Plug in the DEPLOY USB flash drive into a USB port on the Mac mini.
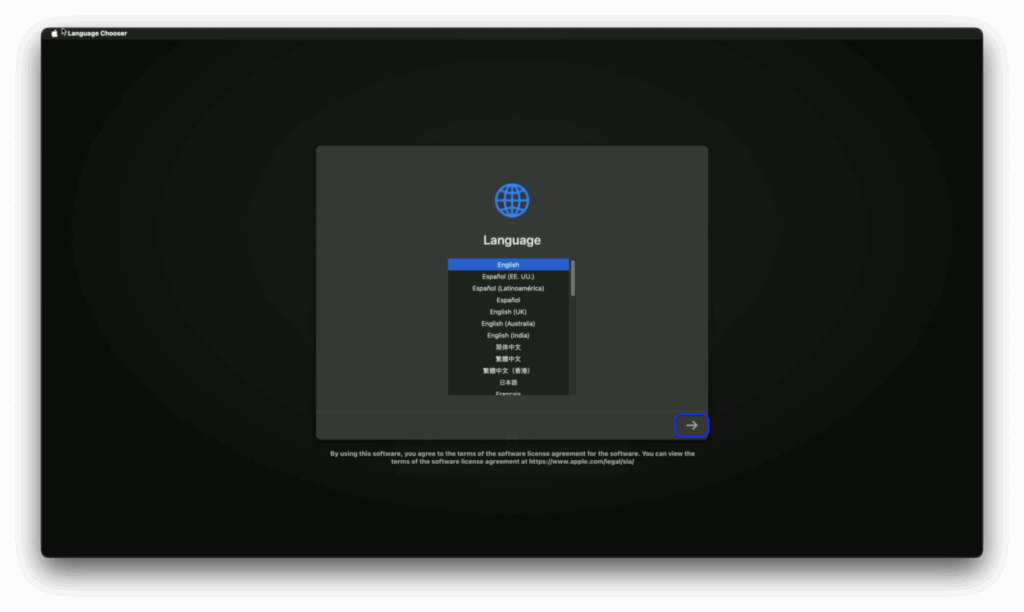
- Select English on the Language setup screen.
- Go to the Utilities menu and select Terminal.

- Run the following command to mount the disk image from the USB flash drive:
hdiutil mount /Volumes/DEPLOY/mini.dmg - Run the following command to open the MDS workflow runner:
/Volumes/mdsresources/runMDS Deploy window will appear.
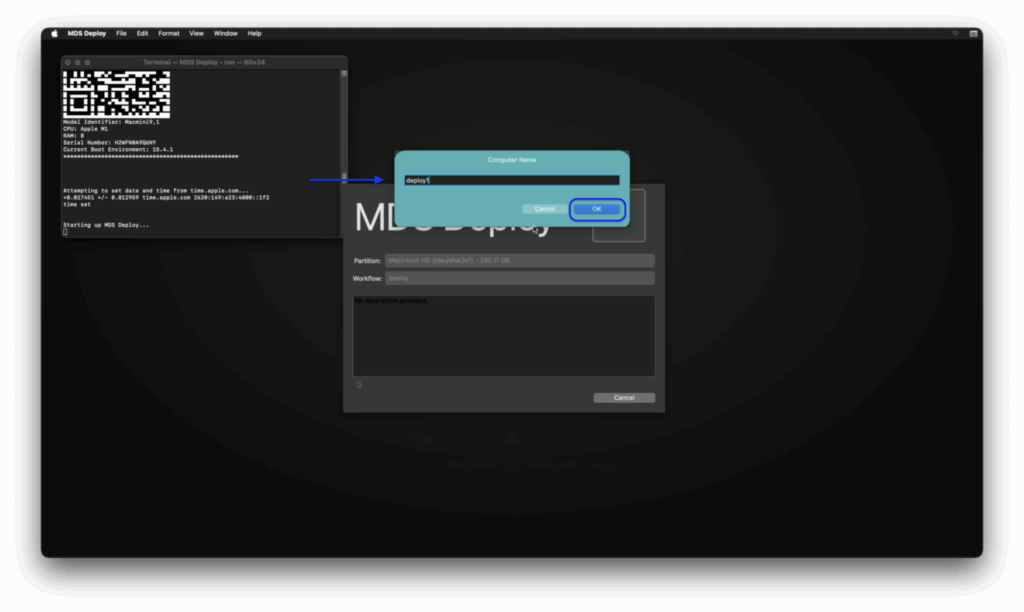
- Click Run Workflow, then OK to confirm to run the workflow.

- When prompted, enter the computer name. The computer name is the word “deploy” and a unique sequential number after it. If this is the first Mac mini you are setting up, name the computer
deploy1. If it is the second Mac mini, name itdeploy2. - Click OK to proceed. Note that this will be referred to as the computer name in later steps.
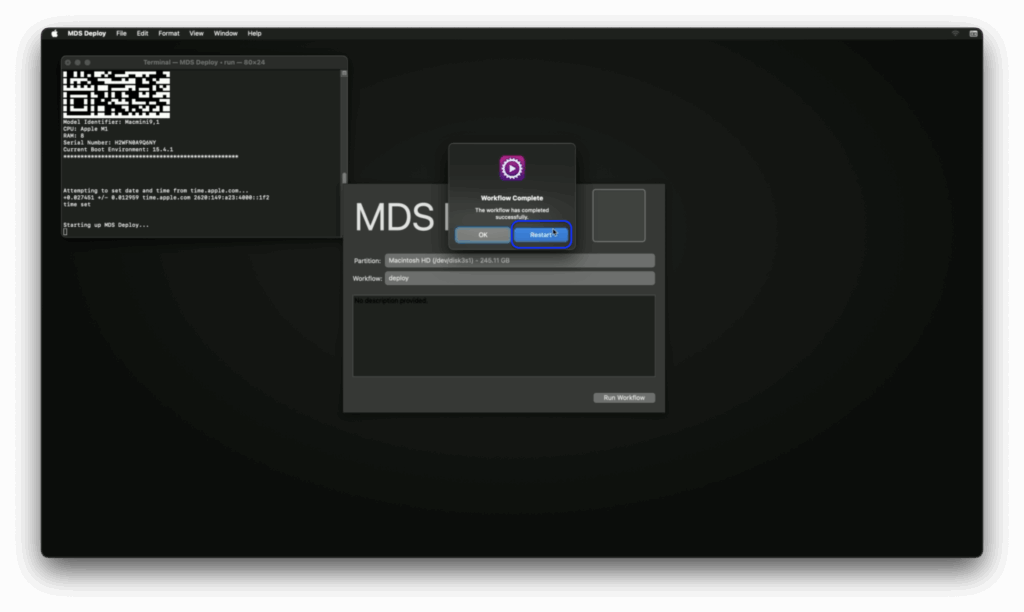
- Select Restart when the workflow finishes.
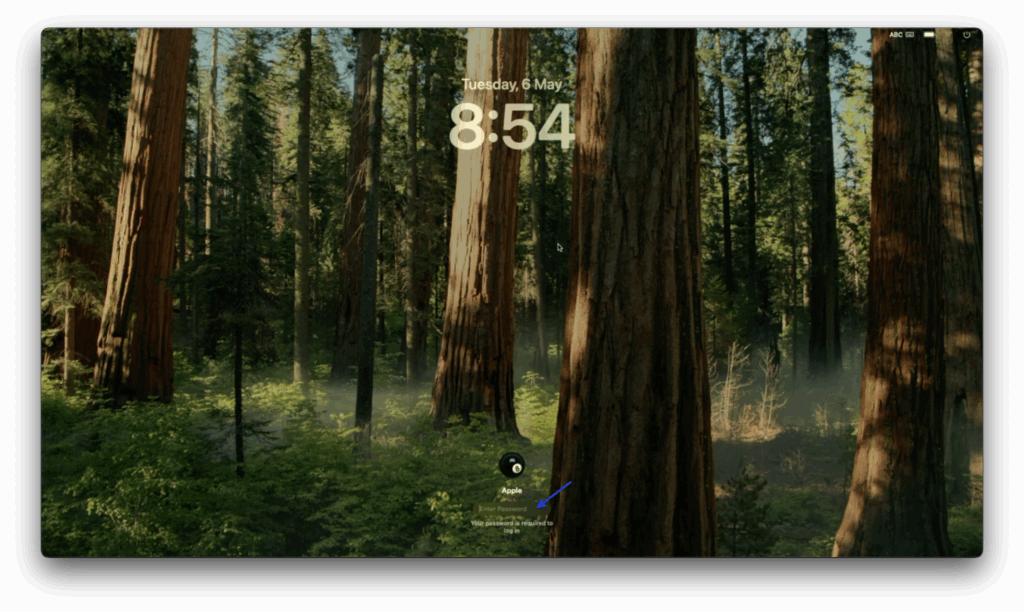
Your computer will restart, install applications, and then restart again. When restarted the second time, you should be automatically logged into the Mac mini and your software installed. The account created on the Mac will have a username ofAppleand the password isapple.
Check for Software Updates
Install updates and upgrades for macOS.
- Go to Apple Menu and select System Settings.
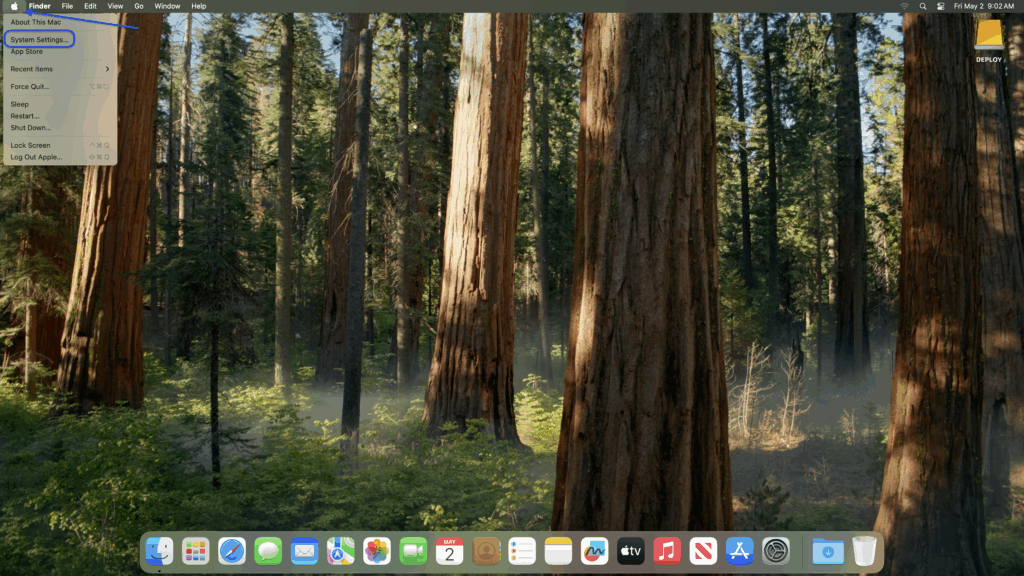
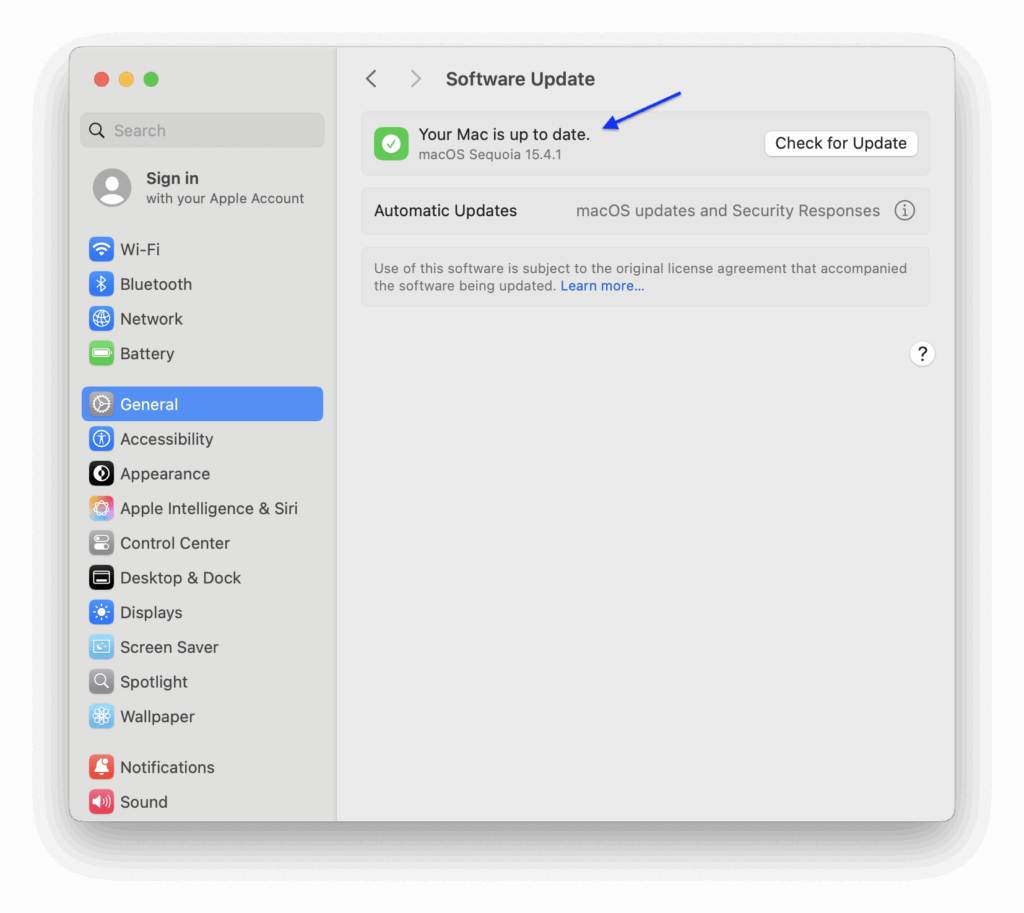
- Select General in the left column and then Software Update on the right.

- If the Mac is up-to-date, skip the software updates steps below and go to the Install Software License section.
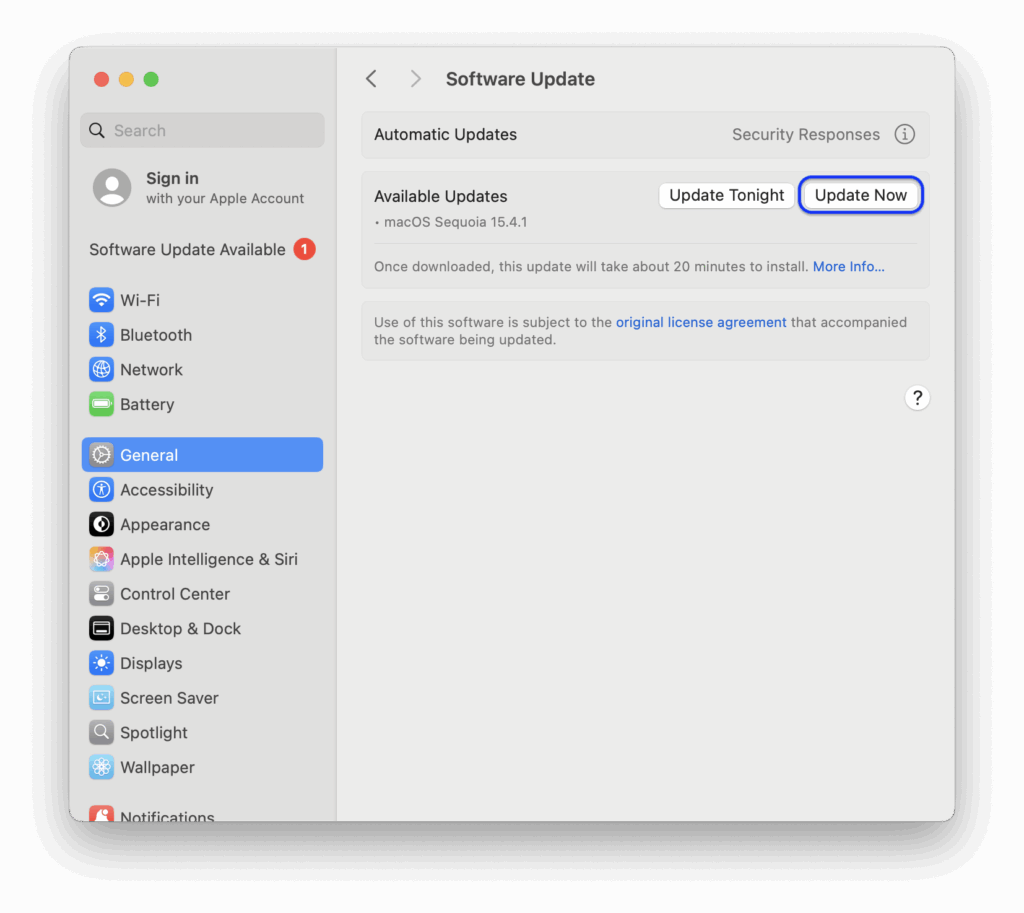
- Select Update Now to start the macOS update.
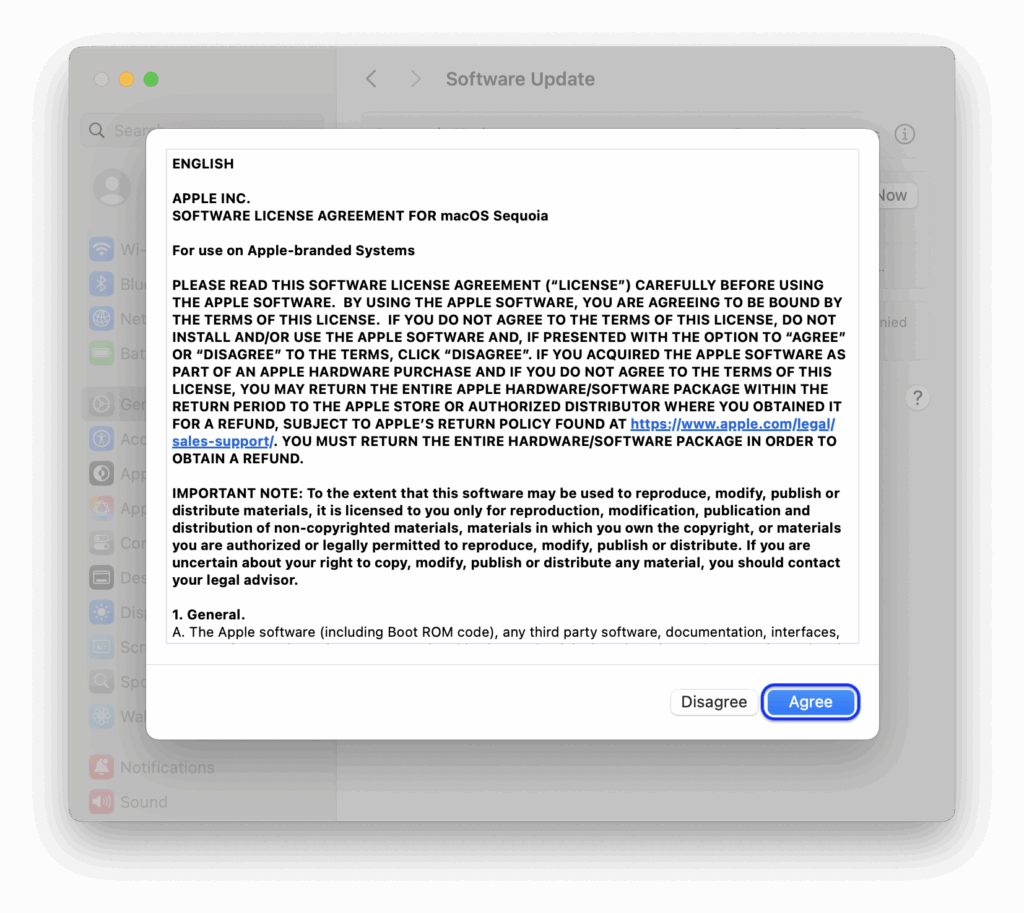
- Click Agree on the Software License Agreement.
- Enter the password
appleto update the software.
Your computer will restart after the update is completed.

- Enter the password
appleat the login screen.
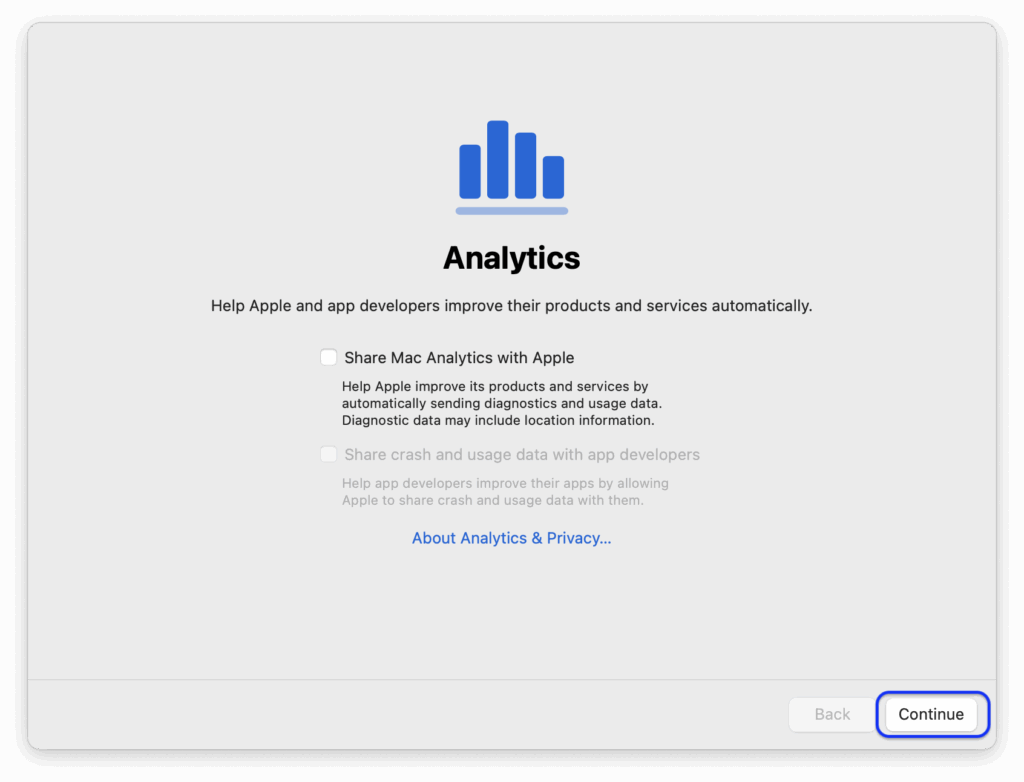
- Select Continue on Analytics.
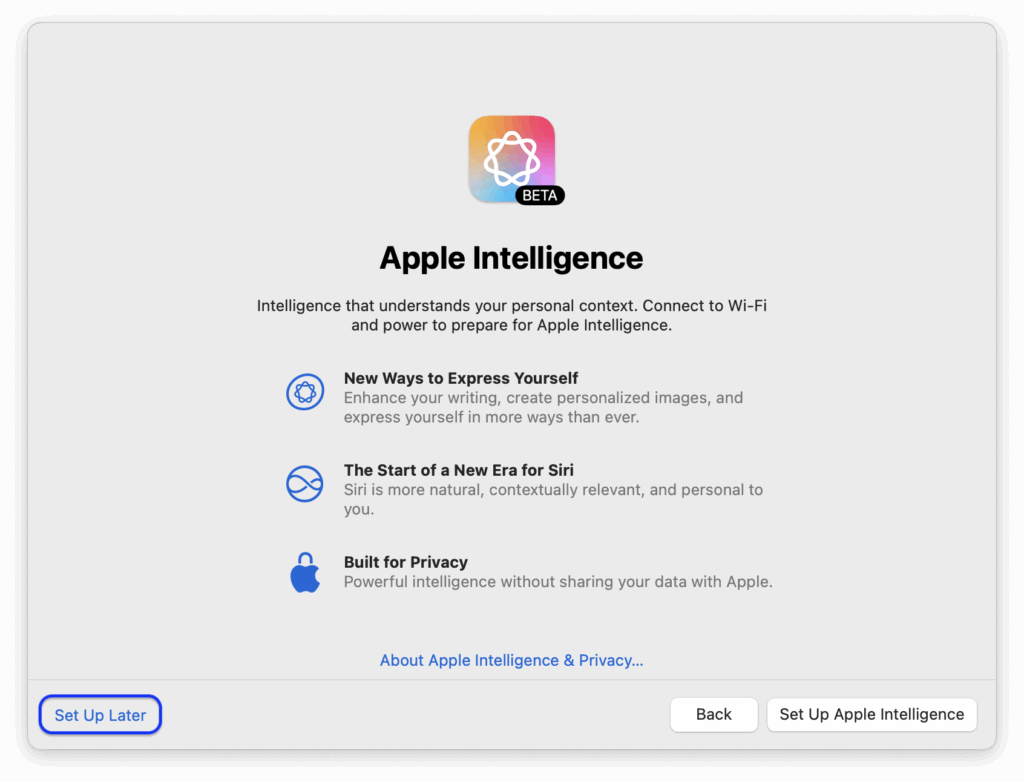
- Select Set Up Later for Apple Intelligence.
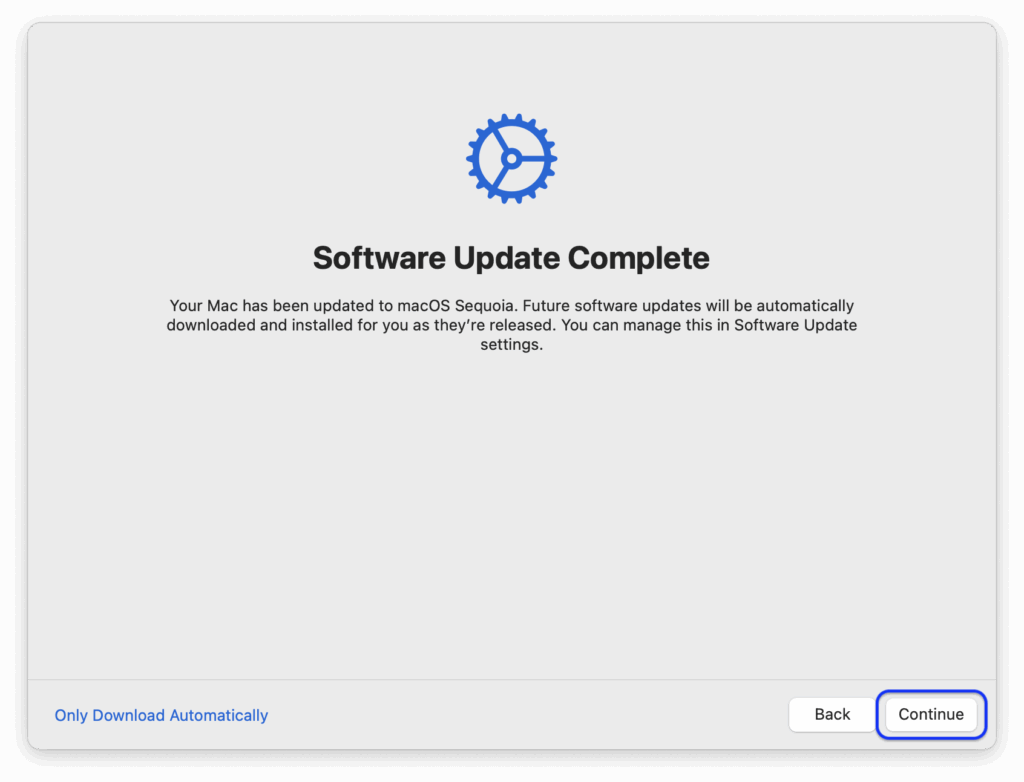
- Select Continue for Software Update Complete.
- Click Continue to log in.

Install Software Licenses
Install software licenses using provided license files.
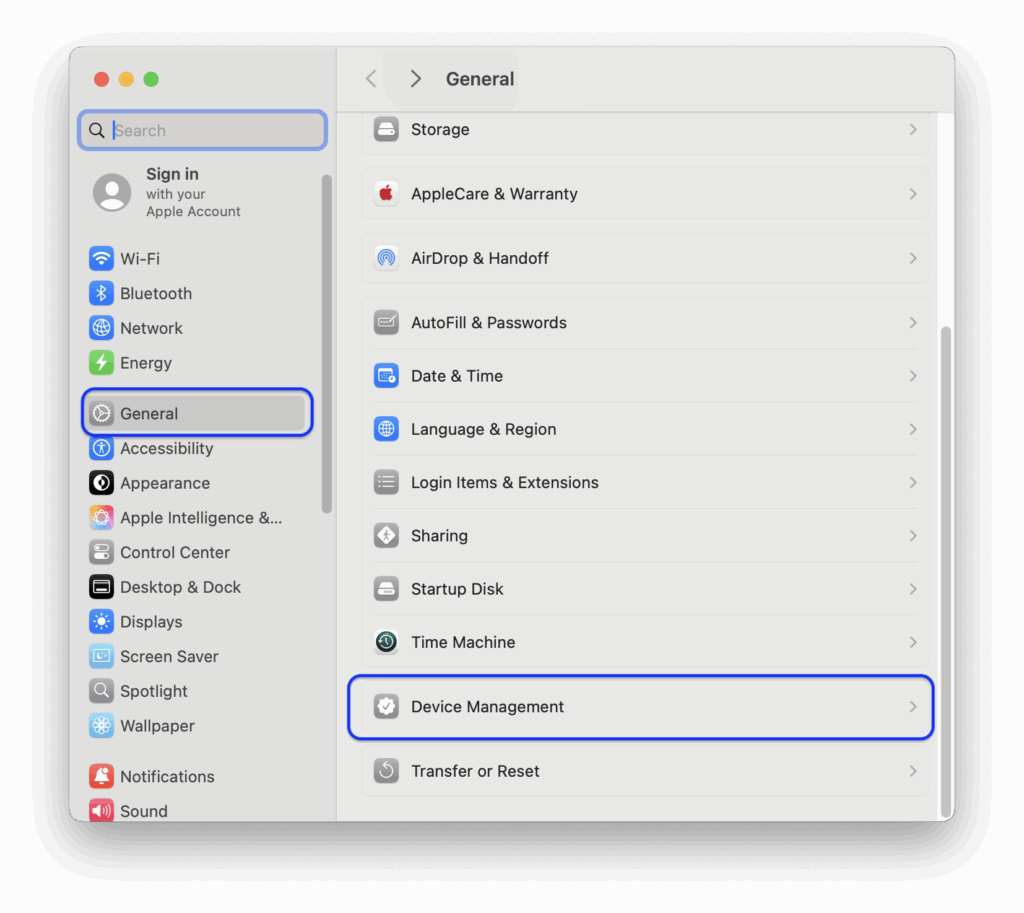
- Go to Apple Menu and select System Settings.
- Select General > Device Management
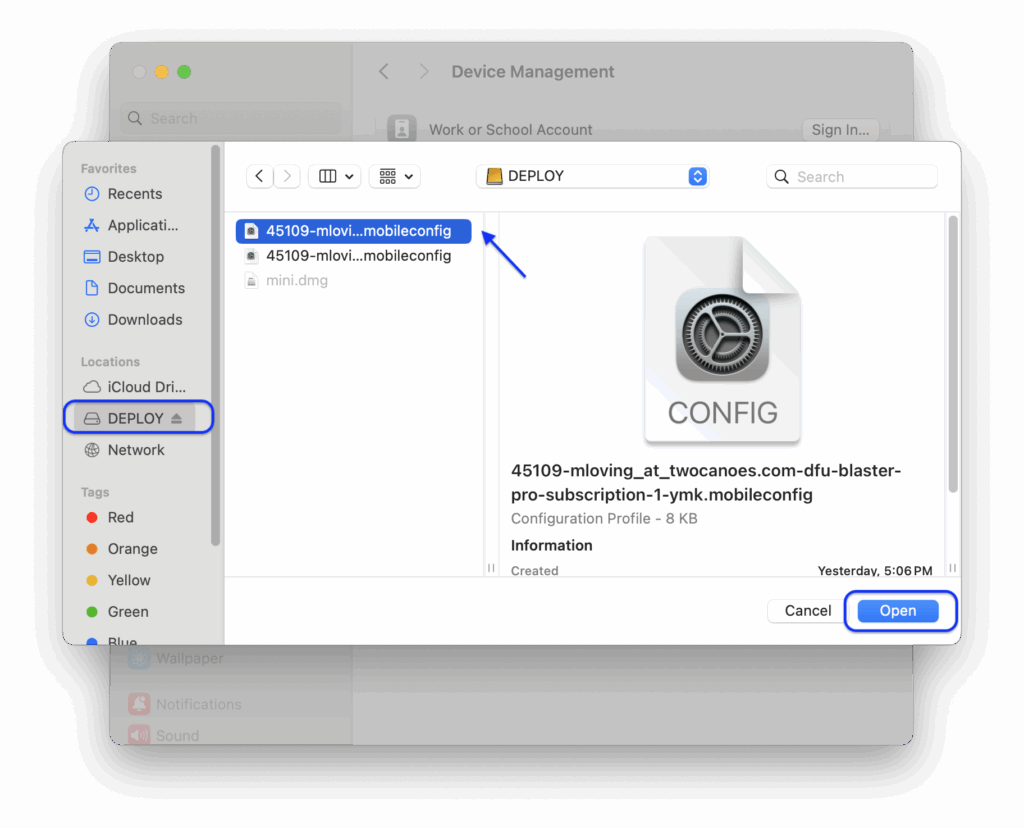
- Click the “+” button to add the license profiles.

- In the left hand column, select the DEPLOY drive under Locations.
- Select the first license key and click Open.
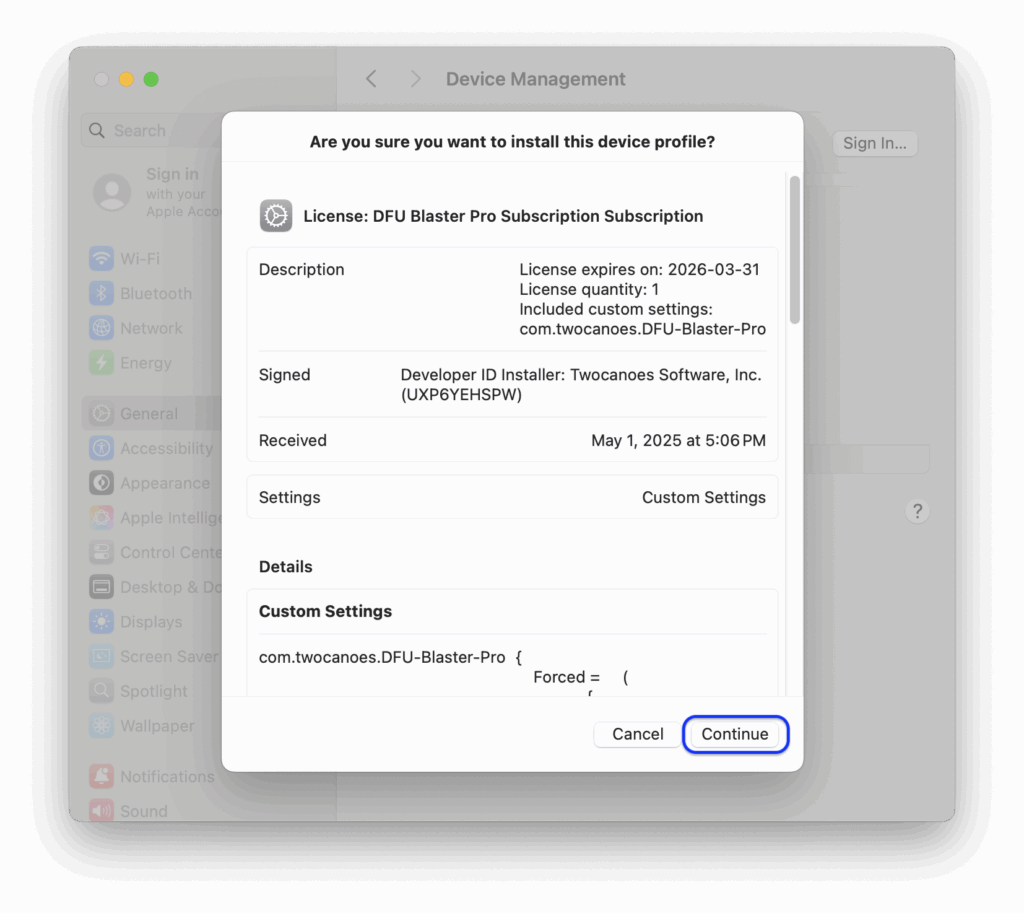
- Click Continue to accept the installation.
- Click Install to install the license
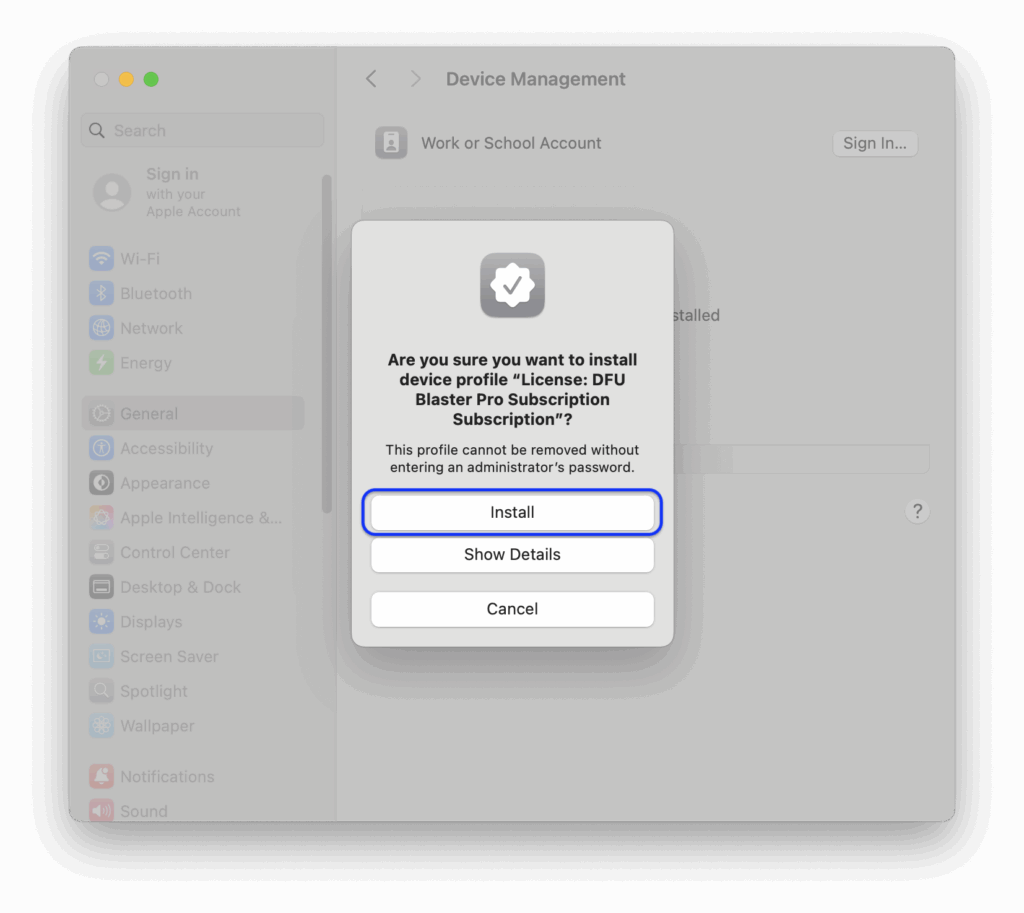
- Enter in the password
appleto install the license key. - Click the “+” button and select the second license key and click Open.
- Click Continue to accept the installation.
- Click Install to install the license.
- Quit System Settings by select Quit from the System Settings menu.
- Eject the USB flash drive by right clicking on the DEPLOY icon on Desktop and selecting Eject “Deploy”.

- Remove the USB flash drive from the back of the Mac mini.
Set Up Dock
To make it easy to launch commonly used applications, the apps can be made available in the Dock.
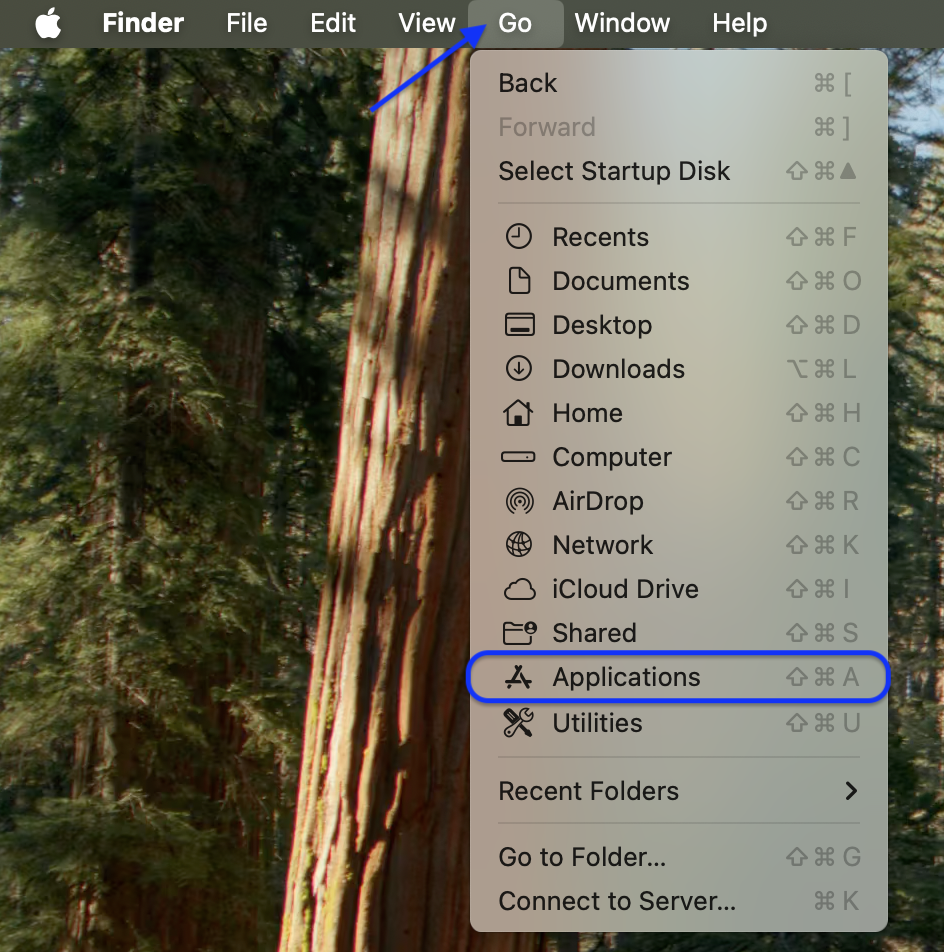
- Click the Finder icon on the left side of the Dock.

- From the Go menu, select Applications.
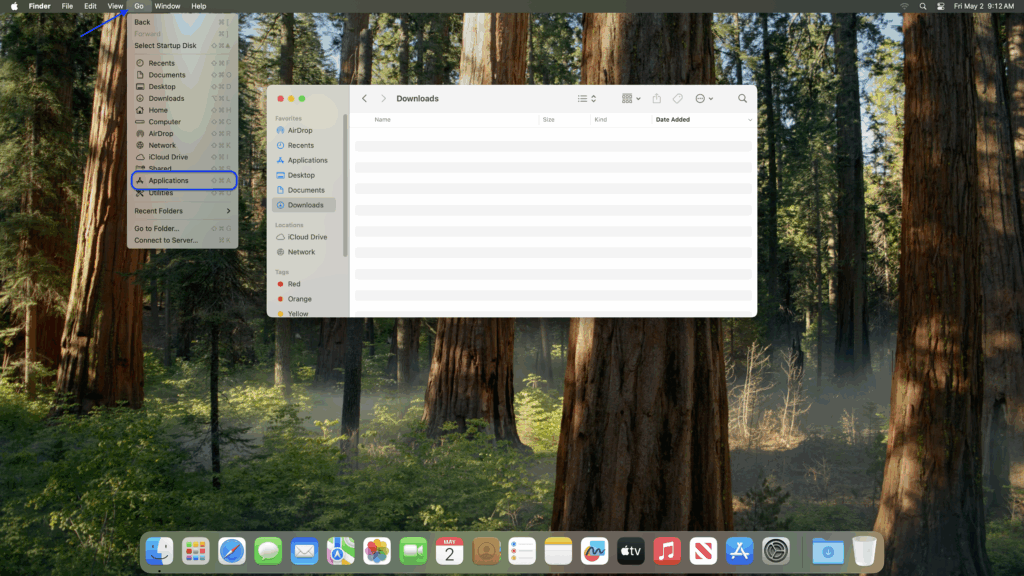
- Drag the DFU Blaster icon from the Applications folder to the left side of the Dock and to the right of the Finder icon.
- Drag the MDS icon from the Applications folder to the left side of the Dock and to the right of the Finder icon.

Install Apple Configurator
Apple Configurator is required to be installed for DFU Blaster to restore Apple Silicon Macs. Apple Configurator is only available on the Apple App Store.

- Go to the Apple menu and select App Store.
- Click Continue.
- Click Continue to accept notifications.

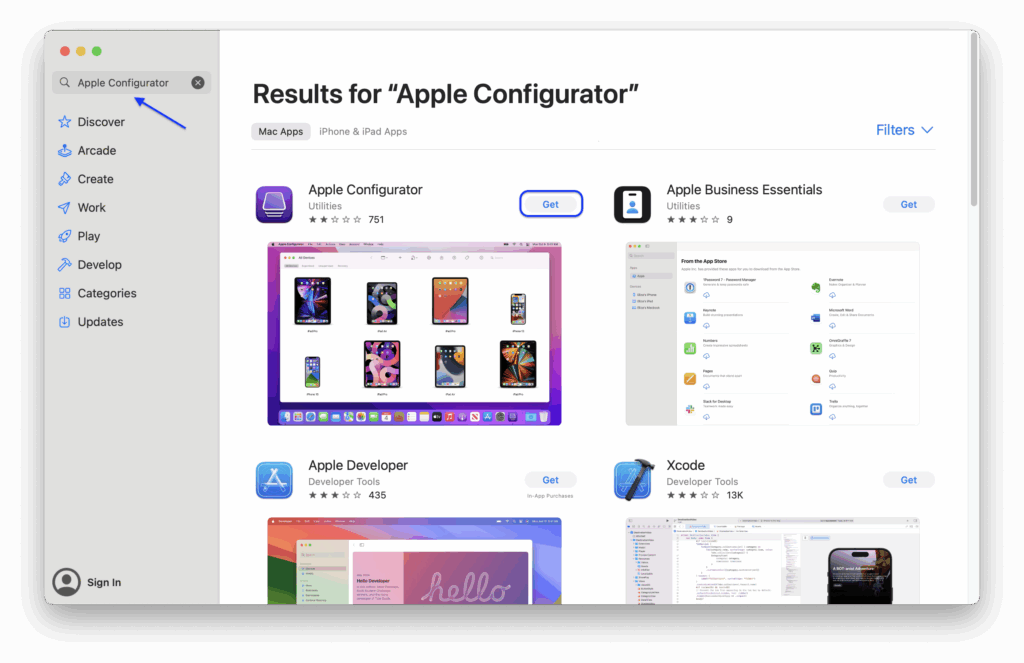
- In the search bar in the upper left, enter “Apple Configurator” and press return.
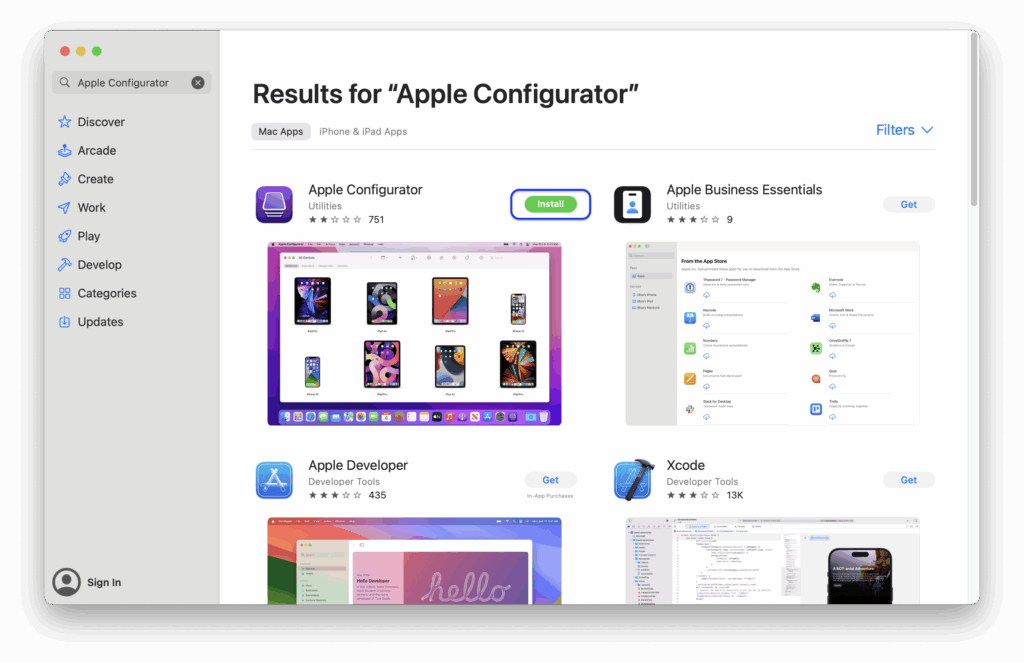
- Click Get next to the Apple Configurator app, and then click the Install button.
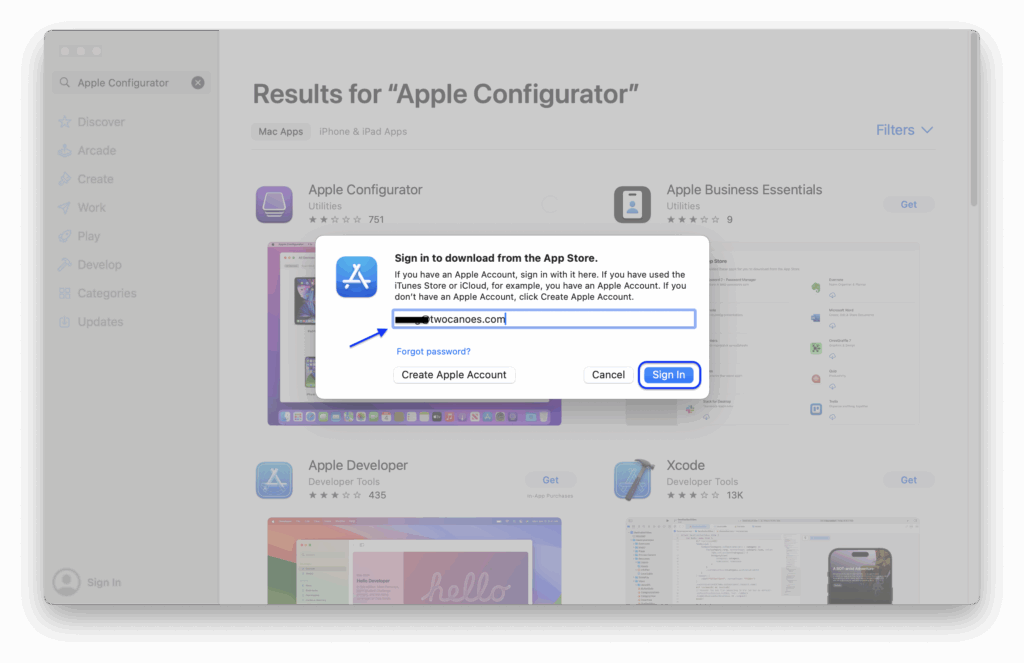
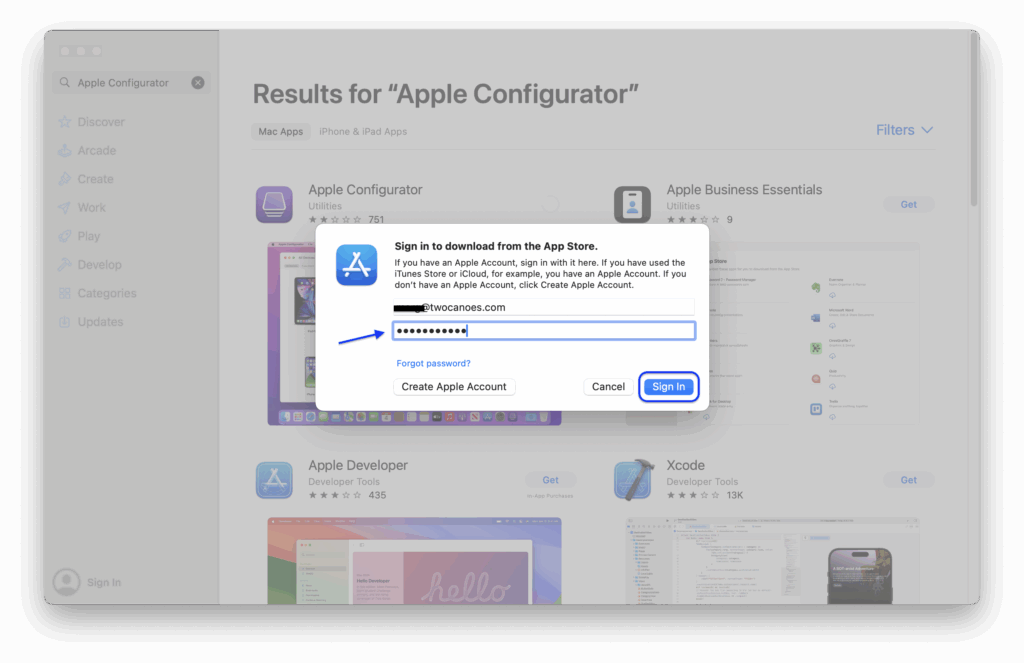
- Enter in your Apple ID and click Sign In.
- Enter in the Apple ID password and click Sign In.
- Enter in the two-factor code sent to your device associated with the Apple ID. Click Continue.
- Click Install to start installing the app.
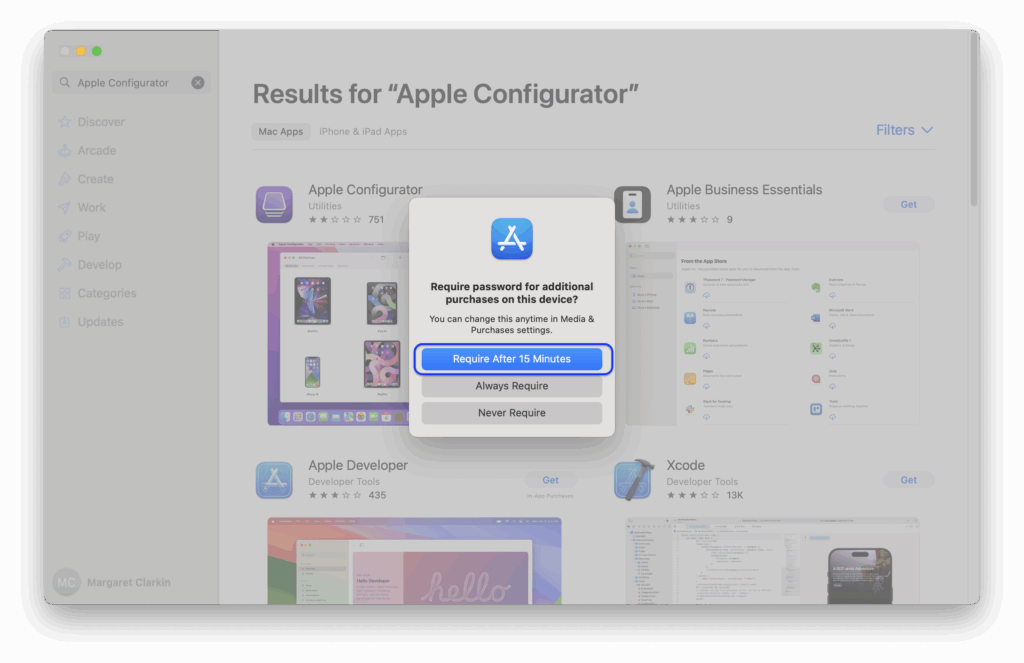
- Select “Require After 15 Minutes” when prompted for “Require password for additional purchases on this device?”.

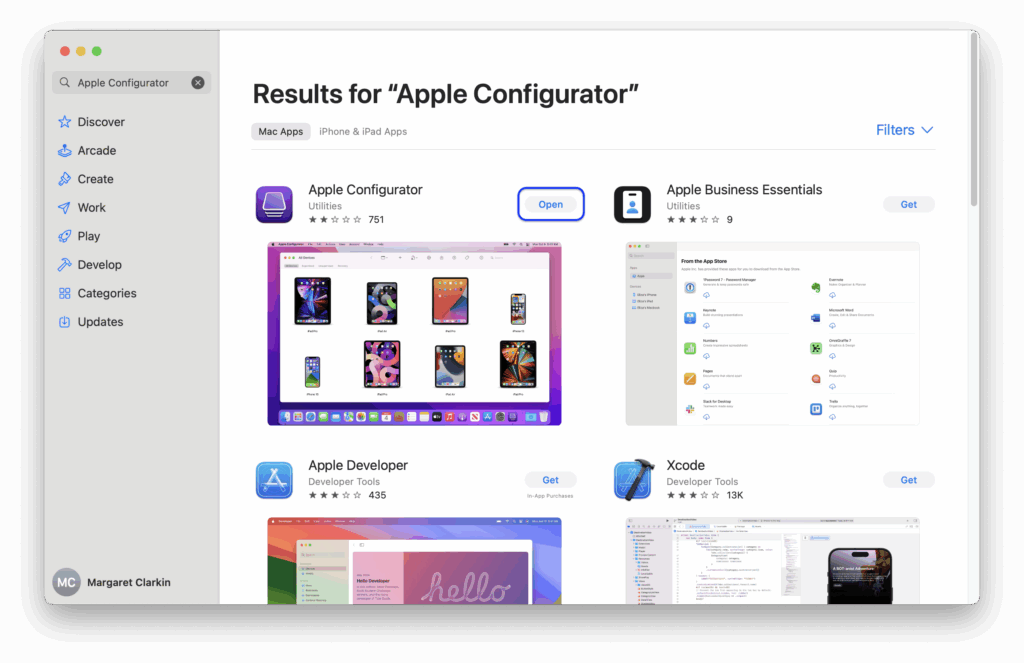
- After the Apple Configurator is installed, click Open to open the app.
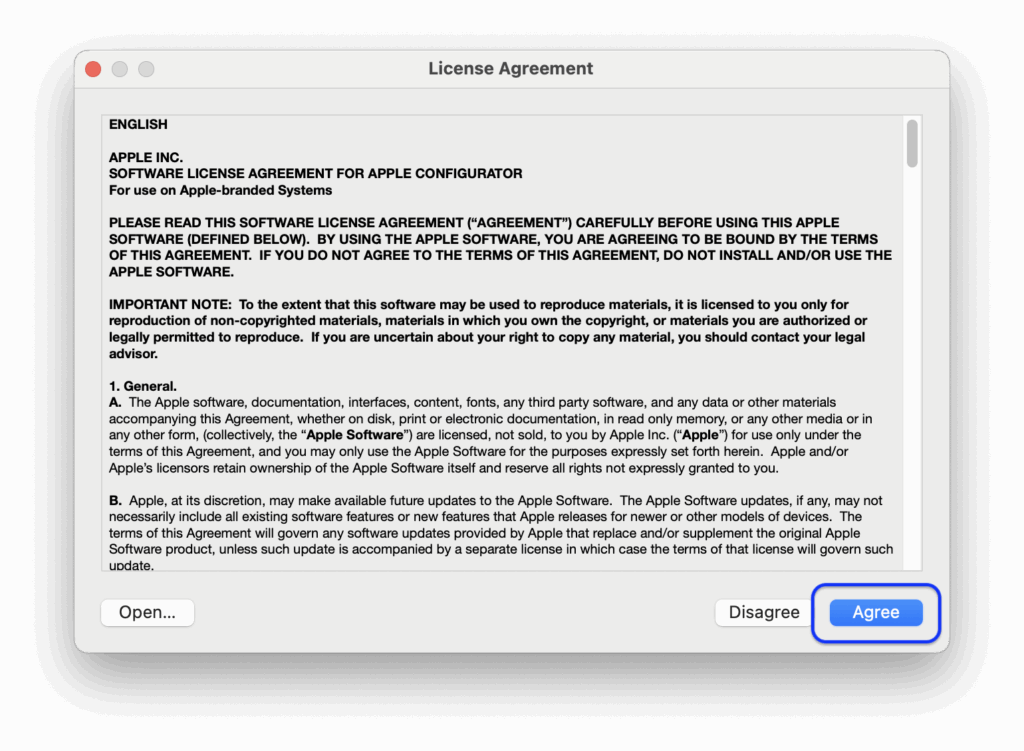
- Click Agree to agree to the software license.
- Click Get Started.
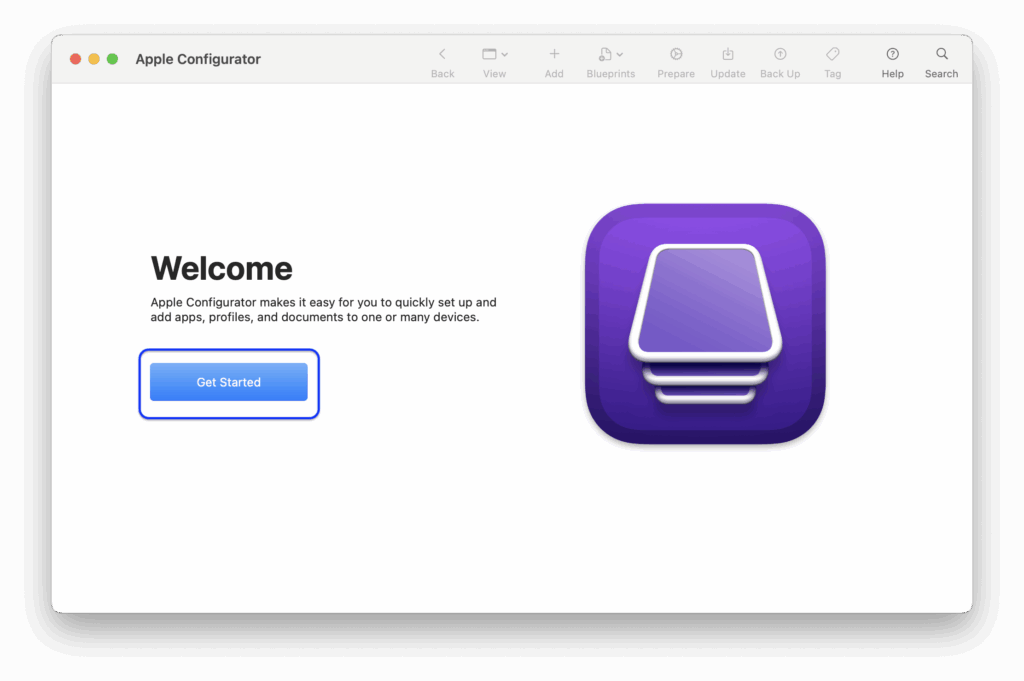
- Quit Apple Configurator by selecting Quit from the Apple Configurator menu.
Download macOS
When restoring Macs, Apple Silicon Macs require a firmware file (“ipsw”). Apple Intel Macs require a software installer package. The instructions below show how to download both types of macOS distributions.
Download macOS Firmware IPSW
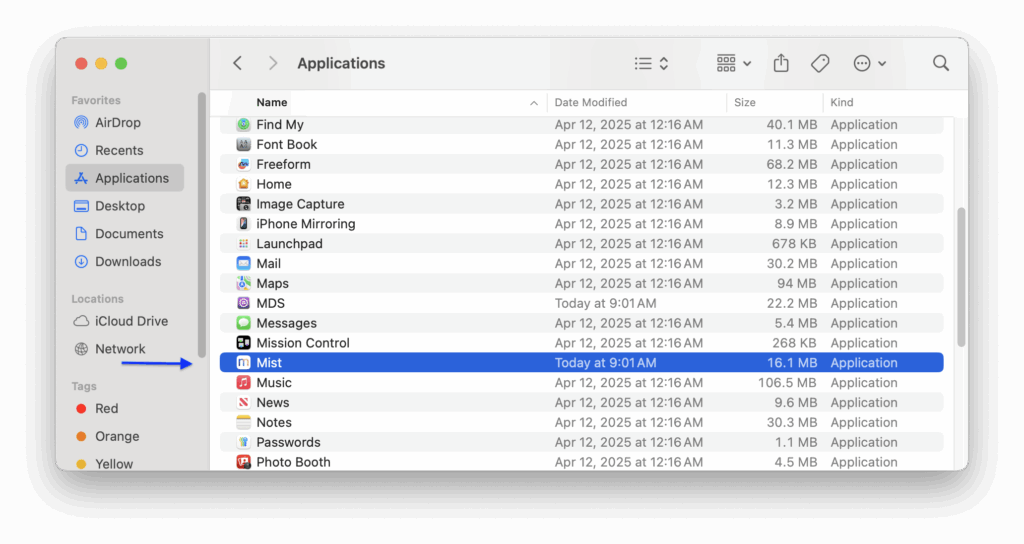
- Click the Finder icon on the left side of the Dock.
- From the Go menu, select Applications.
- Open Mist by double-clicking on the app icon.

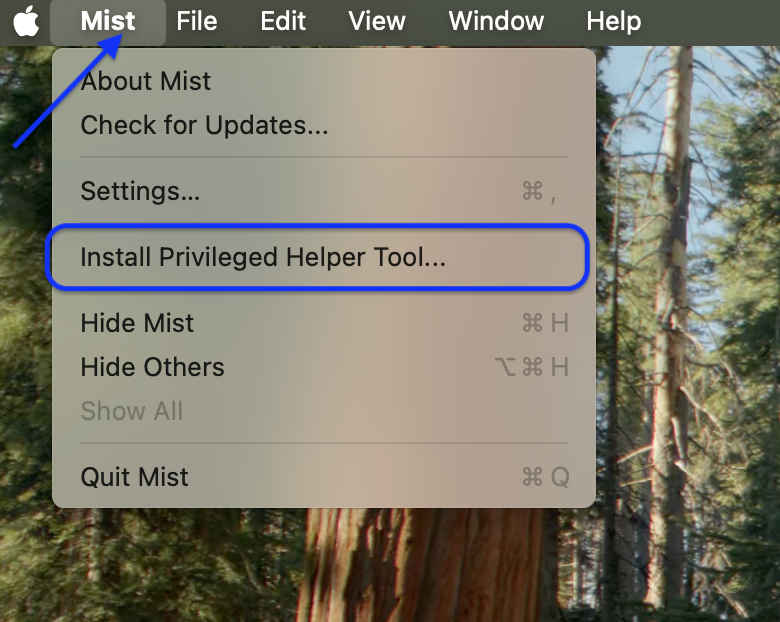
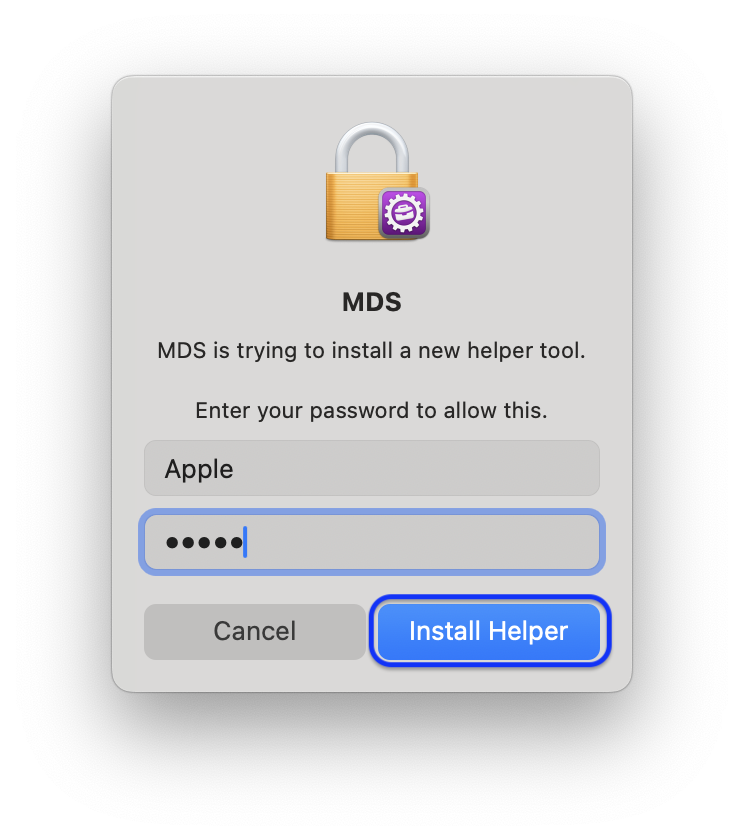
- From the Mist menu, select Install Privileged Helper Tool…
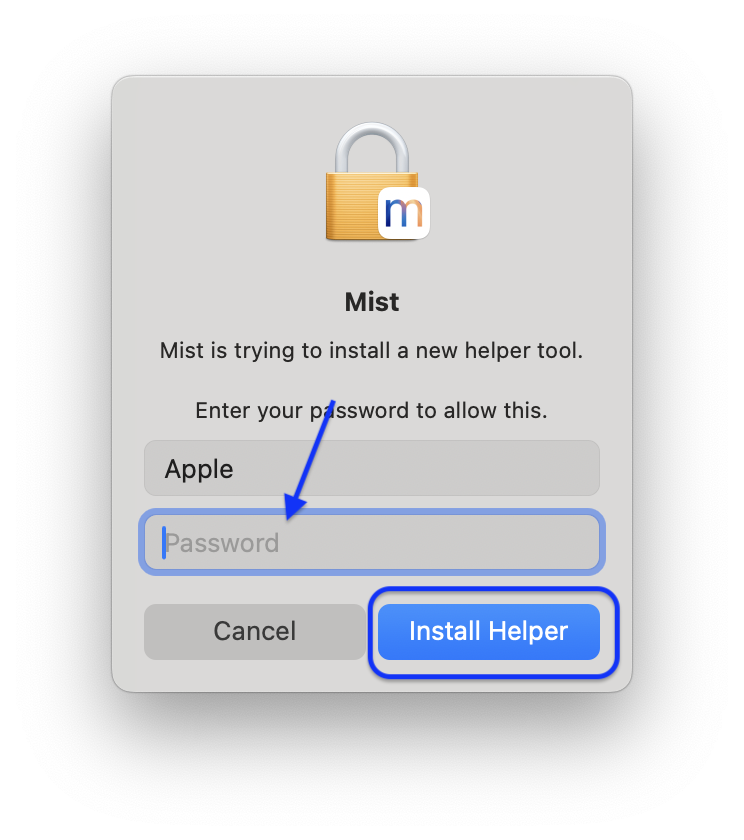
- Enter in the password of
appleand click Install Helper.
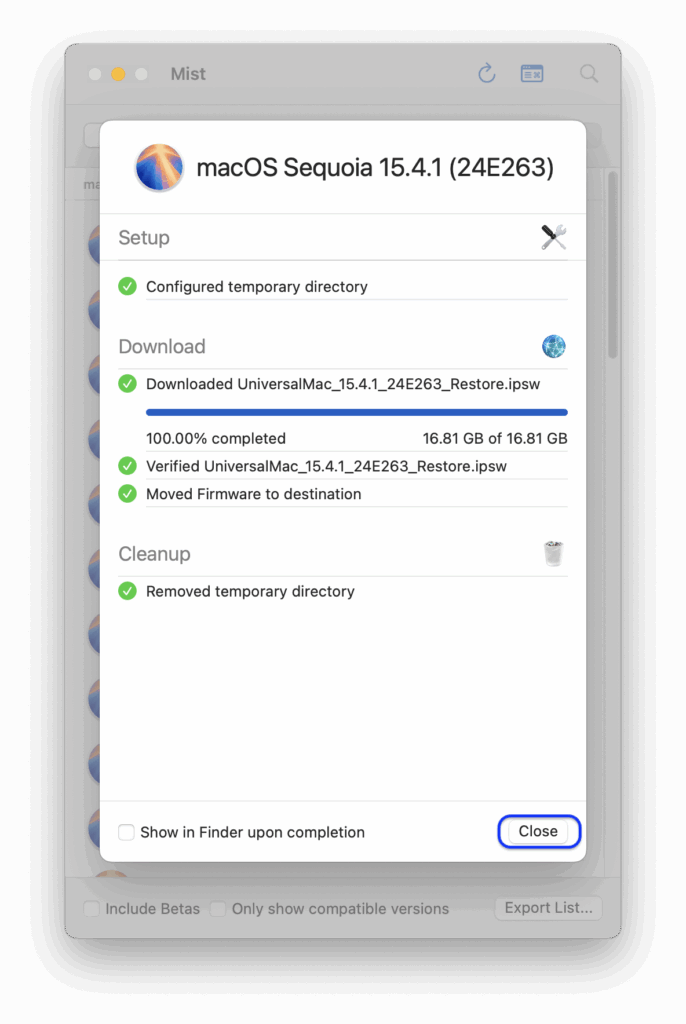
- In the Firmwares tab, select the macOS version to be installed. Unless instructed otherwise, select the top most item / most recent item in the list. If there are multiple items with the same name (for example, 15.1.1), do not download that version and go to the next one on the list. Download by clicking the down arrow in a blue circle next to the version name.

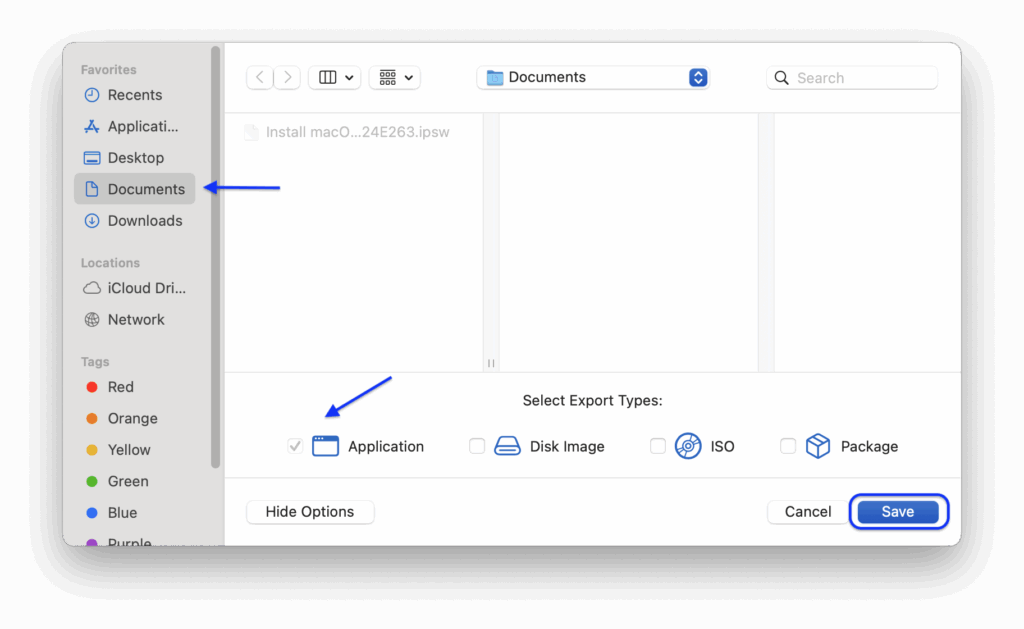
- Click Save to save to the Documents Folder.
- Once completed, click the close button.
Download macOS Installer for Intel Machines
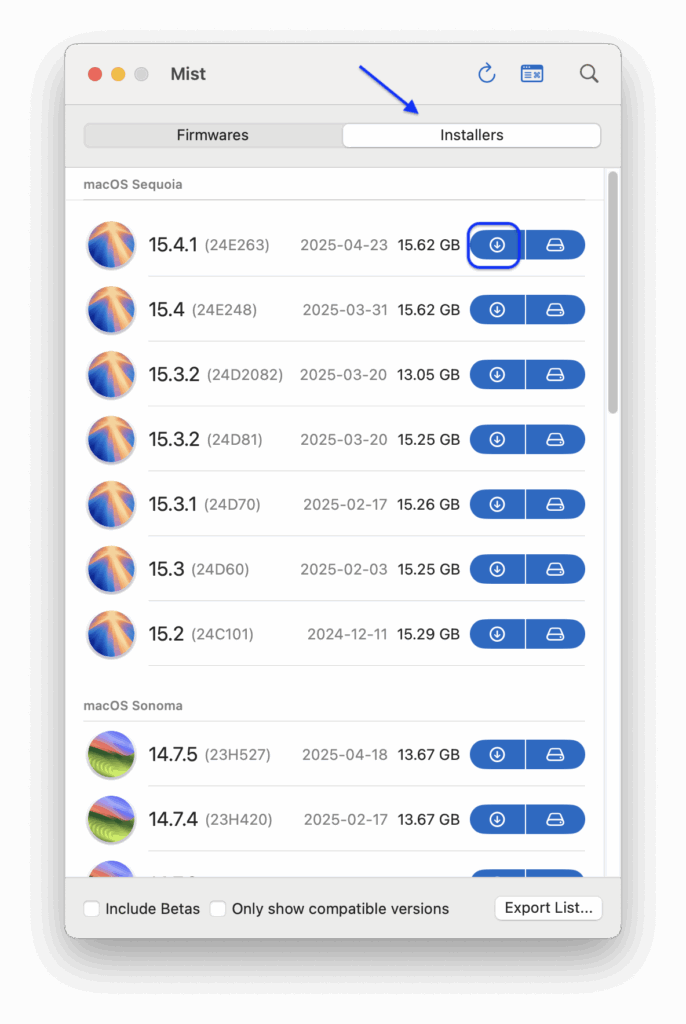
- In Mist, select the Installers tab, select the macOS version to be installed. Unless instructed otherwise, select the top most item / most recent item in the list. If there are multiple items with the same name (for example, 15.1.1), do not download that version and go to the next one on the list. Download by clicking the down arrow in a blue circle next to the version name.
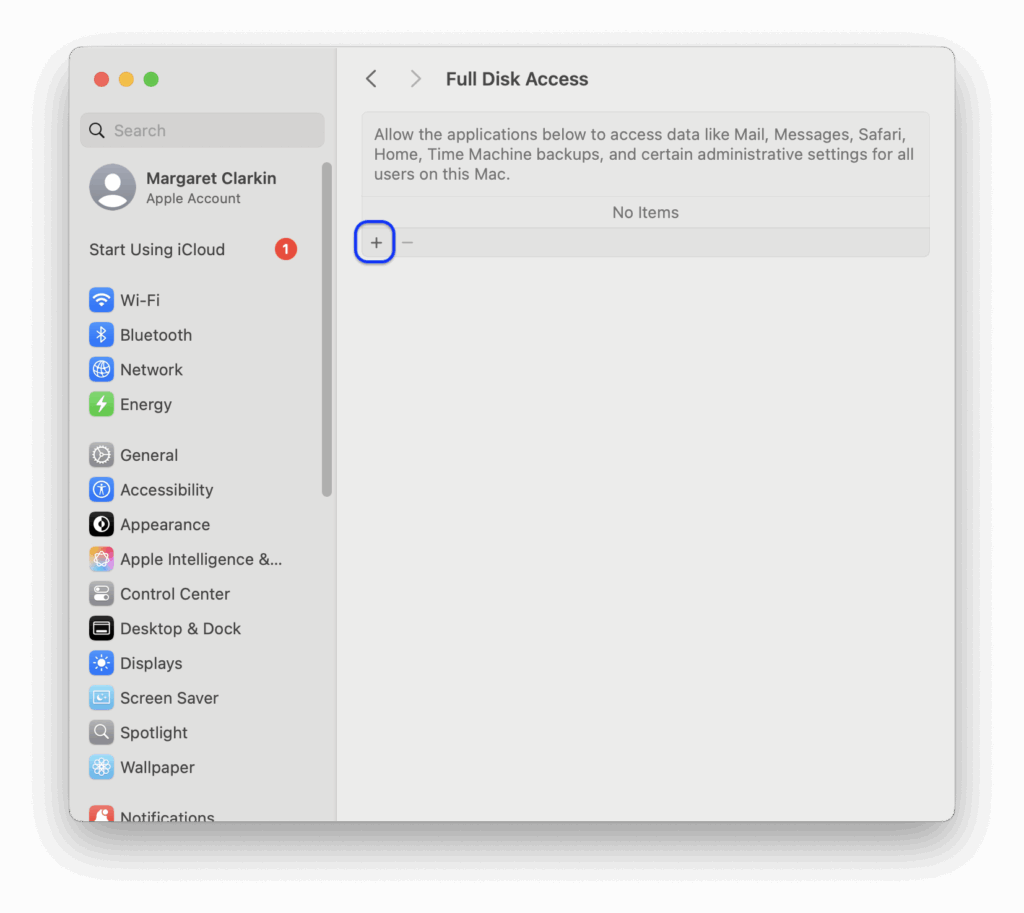
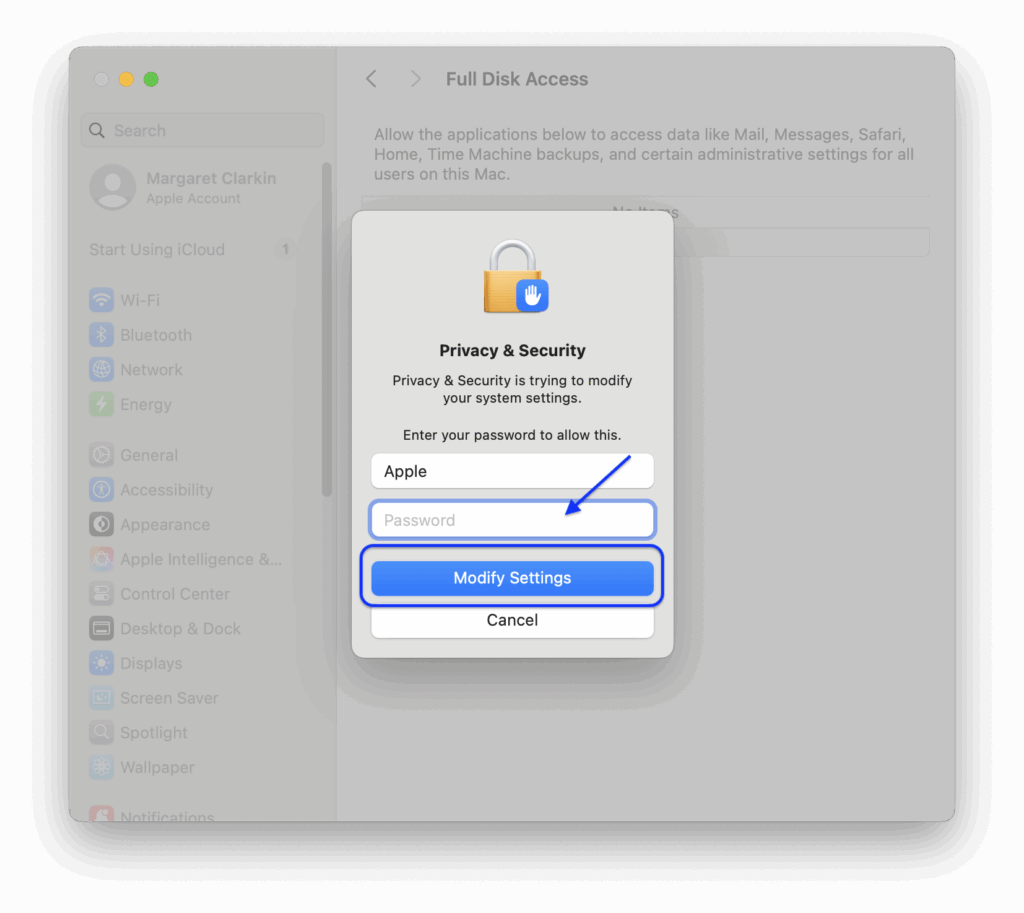
- When prompted for Full Disk Access, click Allow…
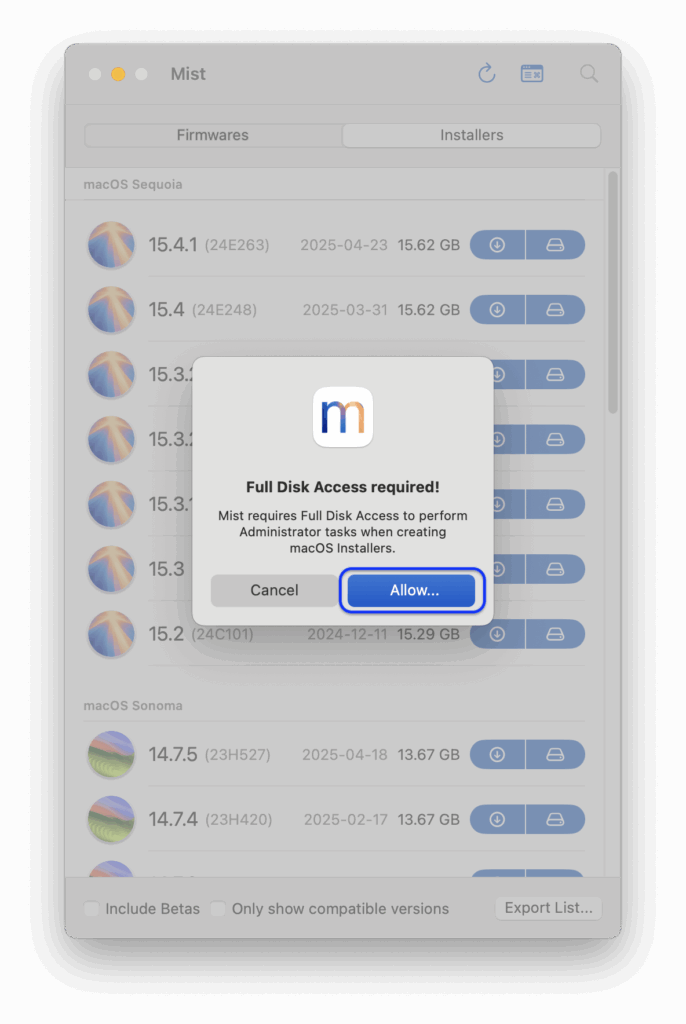
- Full Disk Access will open. Click the “+” button and enter in the password of
apple. - Click Modify Settings.
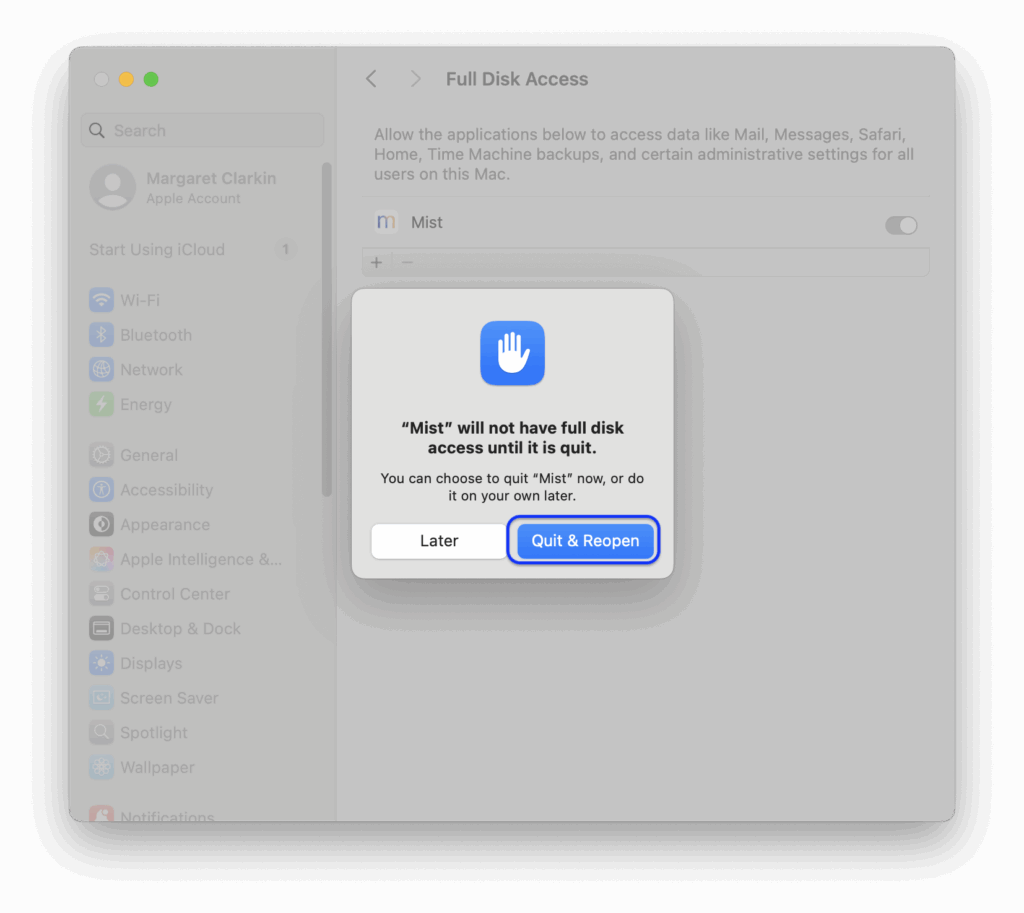
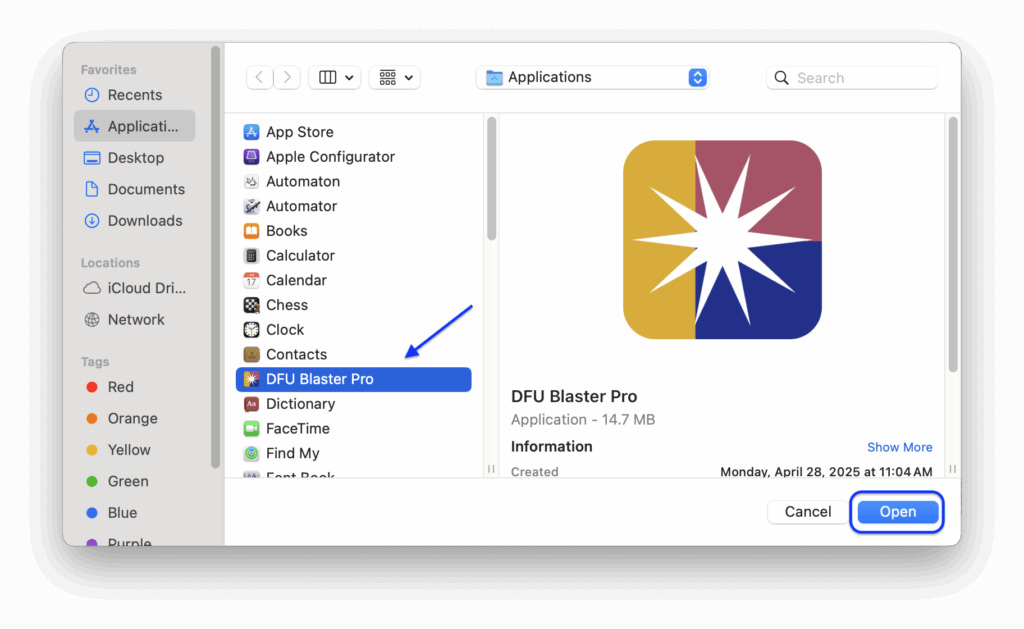
- Select Applications in the left column under Favorites. Select Mist and click Open.
- Click Quit & Reopen. Mist will quit and start up.
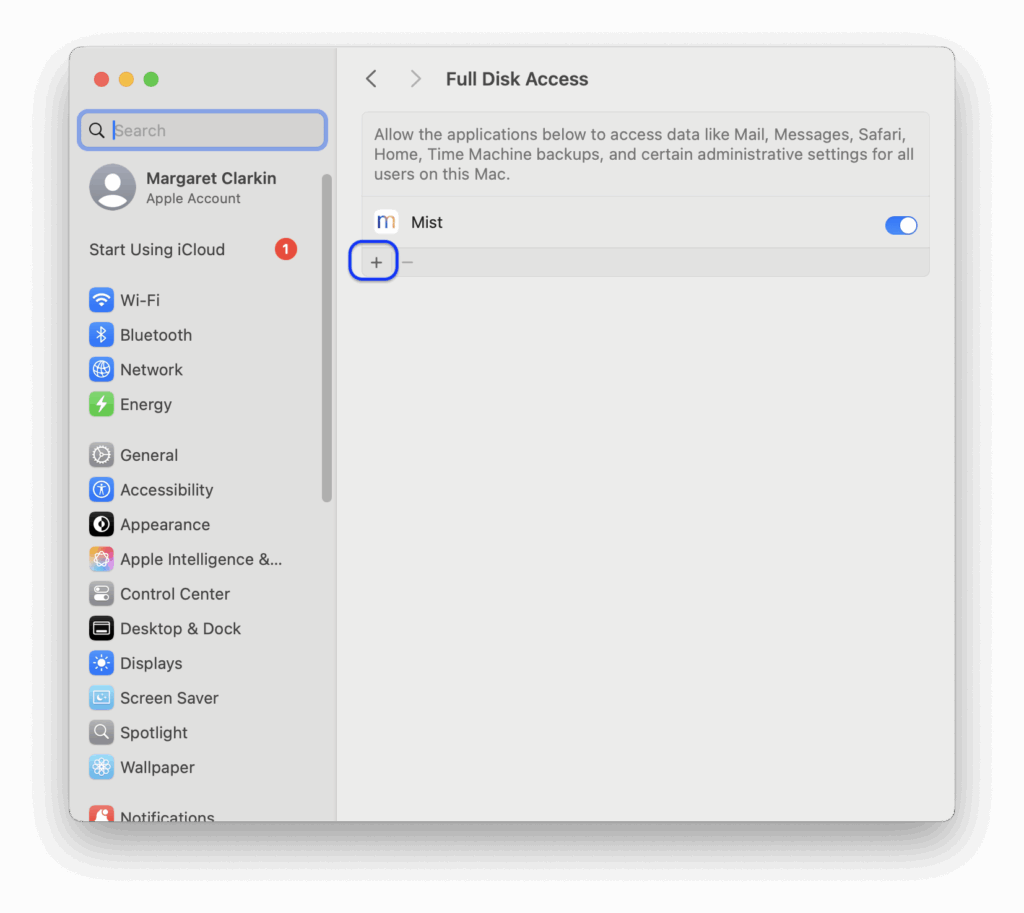
- Select the “+” icon and select “DFU Blaster Pro”.
- Go back to Mist, select the Installers tab, and select the macOS version to be installed. Unless instructed otherwise, select the top most item / most recent item in the list. If there are multiple items with the same name (for example, 15.1.1), do not download that version and go to the next one on the list. Download by clicking the down arrow in a blue circle next to the version name.
- Click Save to save to the Documents Folder. Do not change the default settings and leave the export type as “Application”.
- Once completed, click the Close button.
- Quit Mist by selecting Quit from the Mist Application menu.
Set Up DFU Blaster Pro
DFU Blaster Pro is used to put Apple Silicon Macs into restore mode (“DFU”), wipe and restore macOS on the target devices.
- Open DFU Blaster by clicking on the DFU Blaster icon on the left side of the dock.
- Click the gear in the upper right corner to open Options for DFU Blaster.
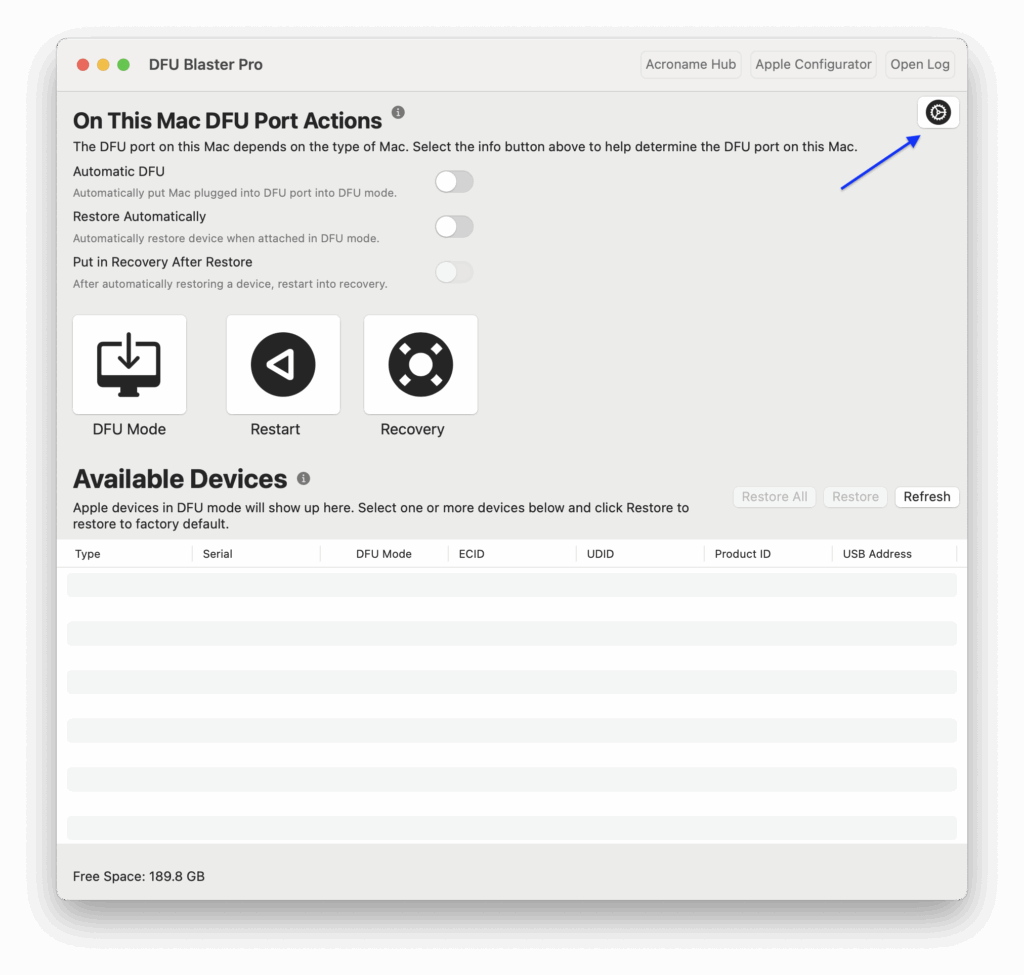
- Select the “Use Custom IPSW” checkbox and click the Select Path button.
- Select the OS firmware from the Documents folder and click Open.
- Click OK to close the Options sheet.

Set Up Acroname Hub
- Plug the power supply into the wall and into the back of the Acroname Hub. Verify that the blue light on the power supply turns on.
- For the USB-C cables labeled 1 to 5, plug in each cable to the corresponding port on the hub. For example, the cable labeled “1” plugs into port 1 on the front of the Acroname hub.
- Connect the cable labeled “0” from the Acroname Hub to a USB-C port on the back of the Mac mini.
Set Up MDS
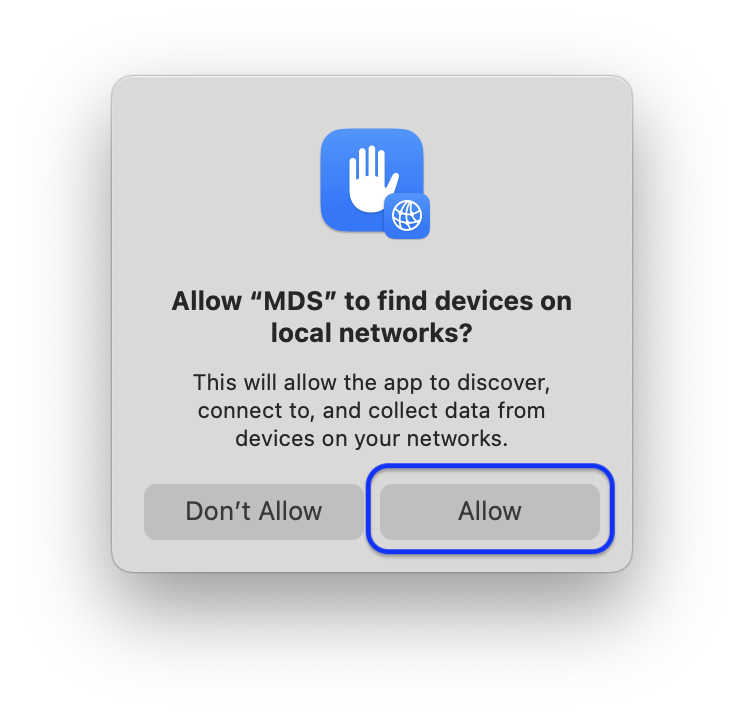
- Open MDS by clicking the MDS icon on the left side of the Dock.

- Click Allow to allow MDS to find devices on the local network.
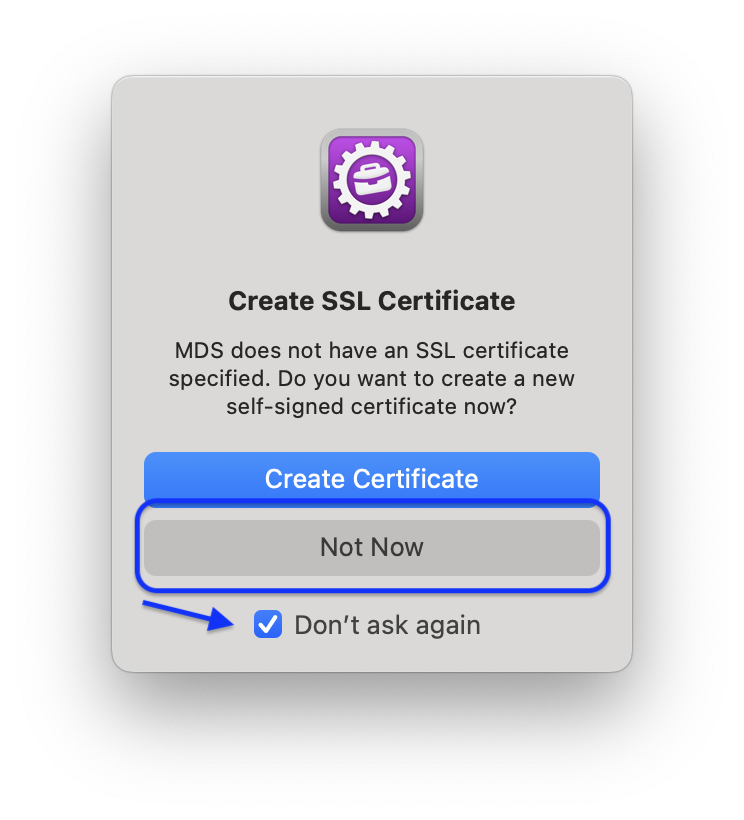
- When prompted for Create SSL Certificate, select Don’t Ask Again and click Not Now.
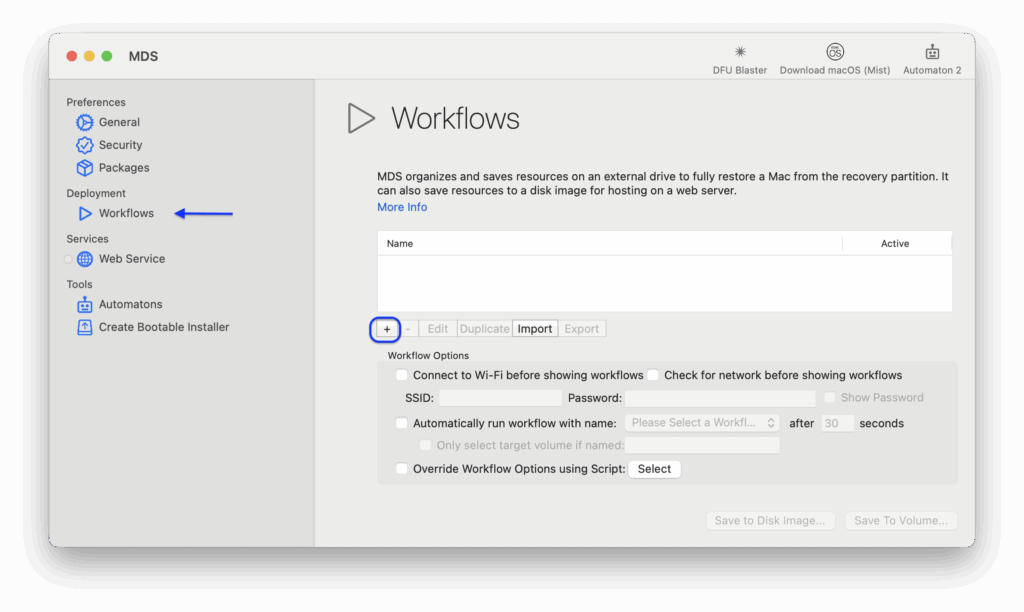
- Add a workflow by clicking the “+” button as shown below.
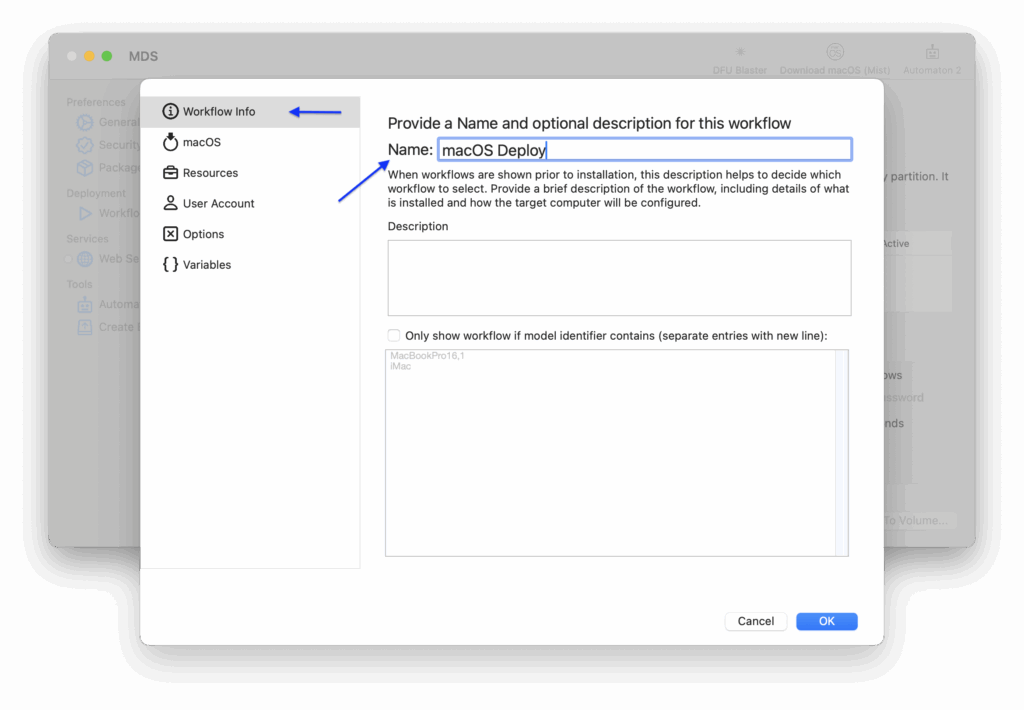
- Name the workflow “macOS Deploy” on the Workflow Info tab.
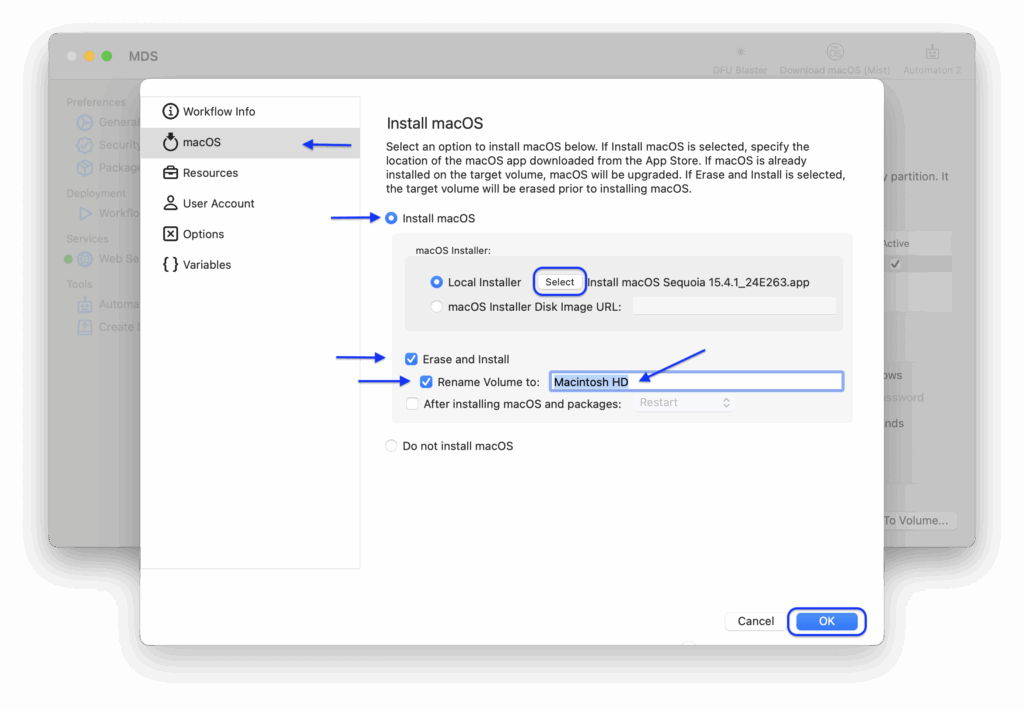
- Select the macOS tab and select install macOS.
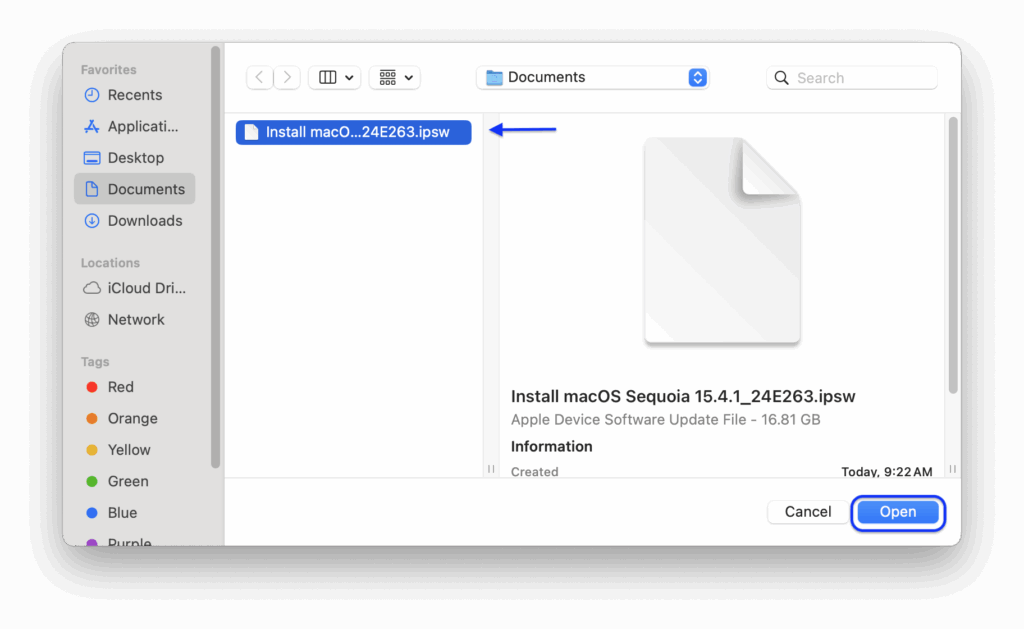
- Select Local Installer and click the Select button.
- Select the macOS Application installer from the Documents folder and click Open.
- Select Erase and Install.
- Select “Rename Volume to:” and enter in “Macintosh HD” without the quotes.
- Click OK.
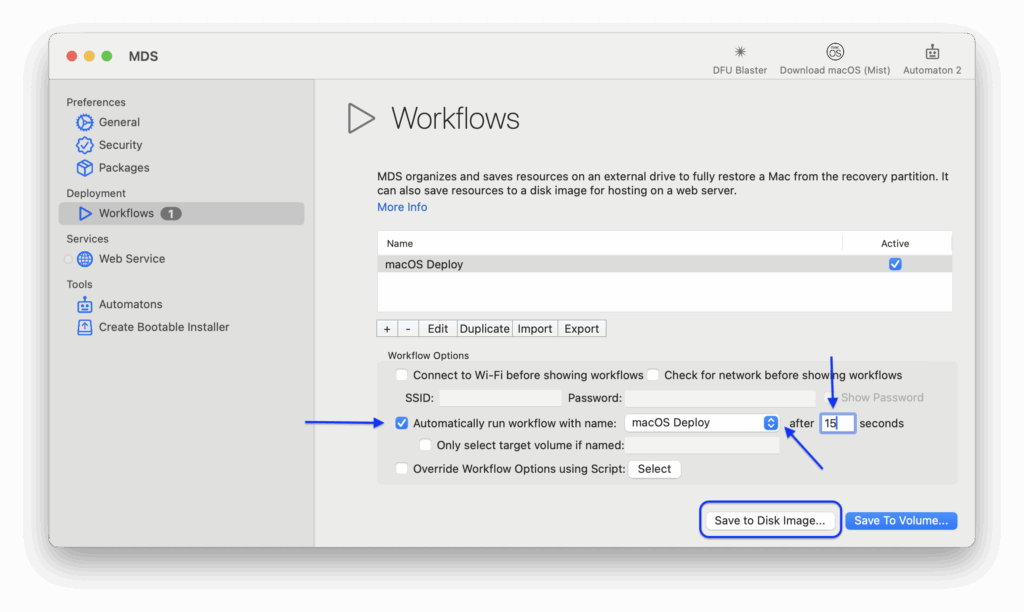
- On the Workflows screen, select “Automatically run workflow with name:” and select “macOS Deploy”.
- Change the “after” from 30 seconds to 5 seconds.
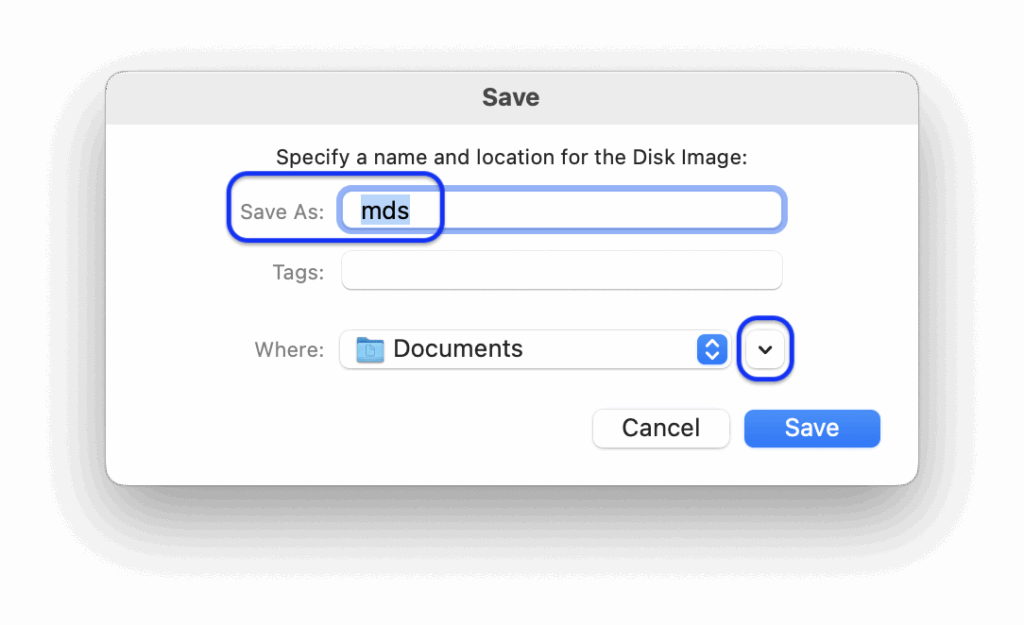
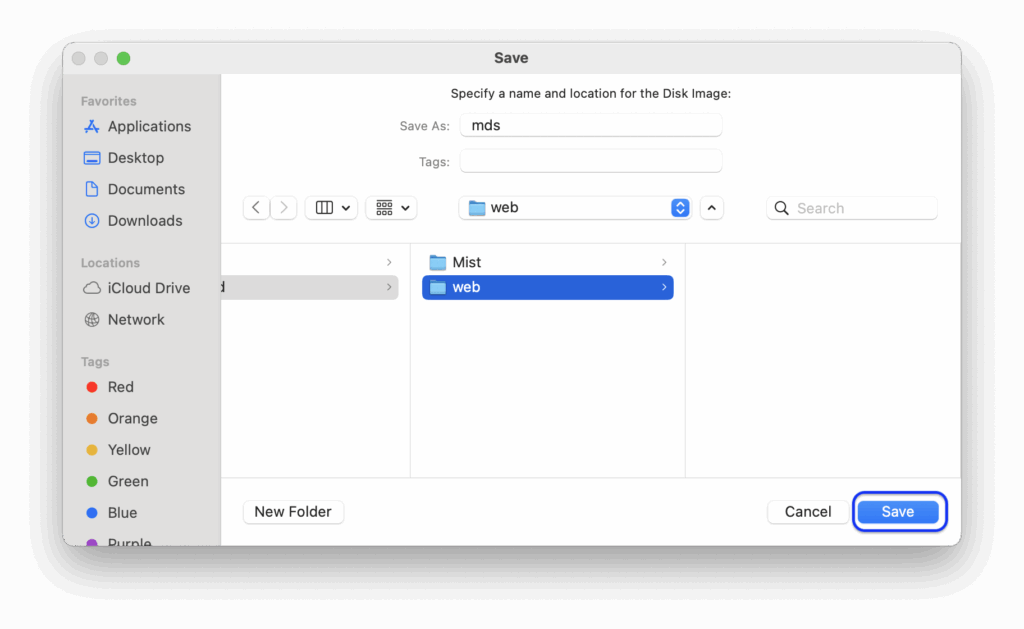
- Click “Save To Disk Image…” and enter in the name “mds”. DO NOT CLICK SAVE YET.
- Click the single down arrow next to the navigation pulldown to expand the window.
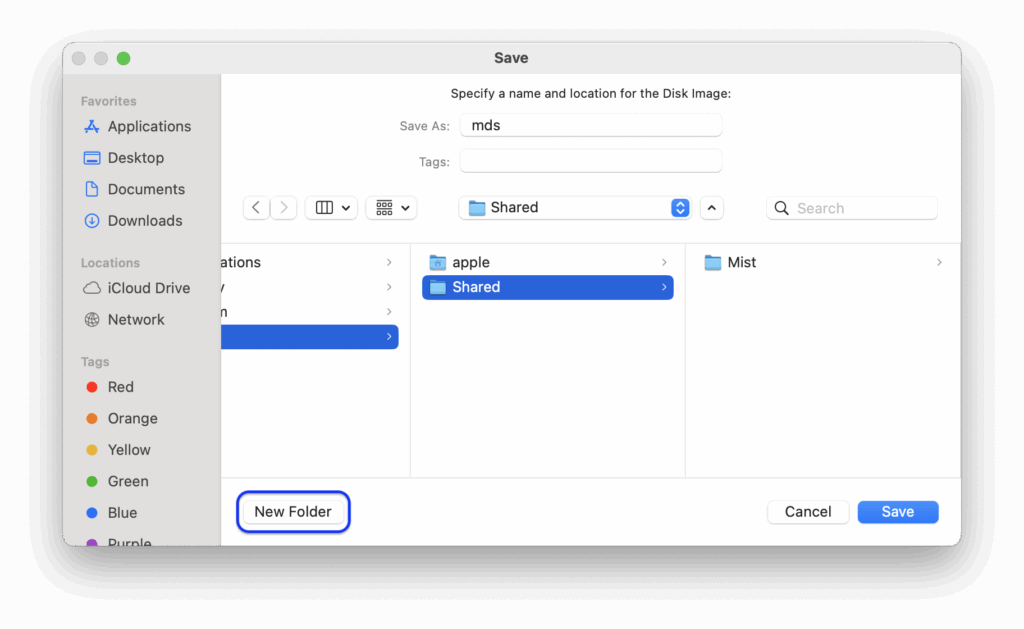
- Click Documents and select Users.

- Select Shared.
- Click New Folder.
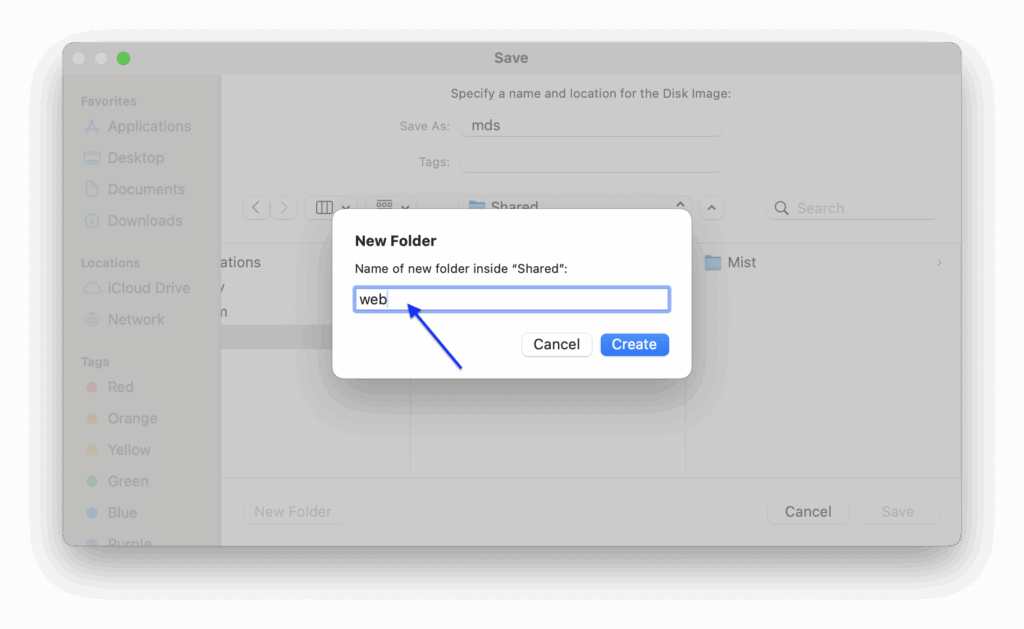
- Give the new folder a name of “web”.
- Click Create.
- Click Save.
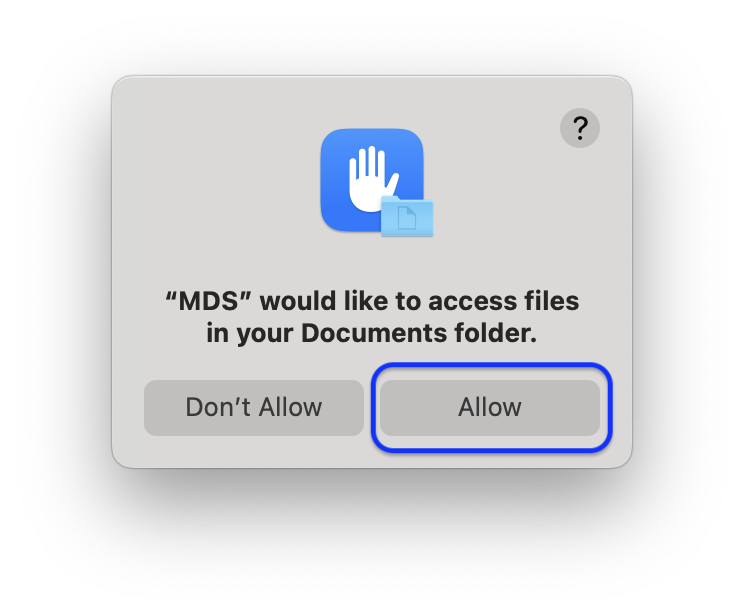
- Click Allow when prompted for access to files in your documents folder.
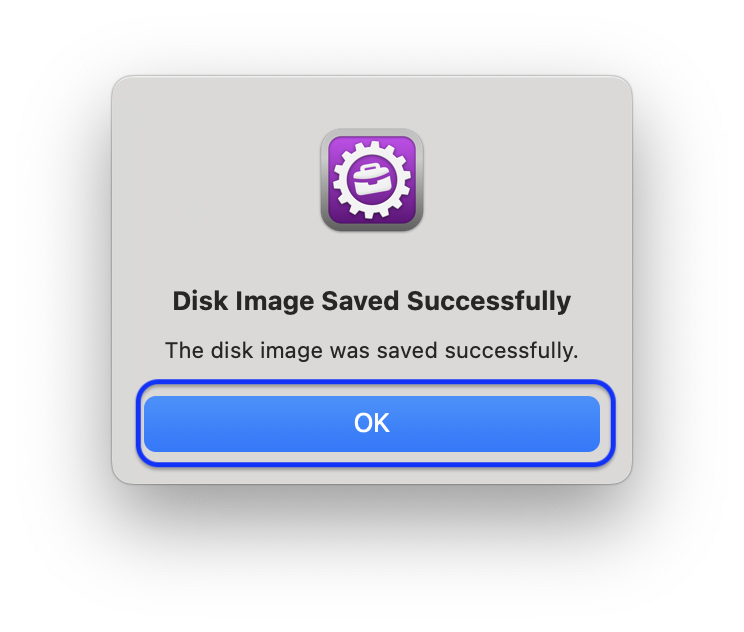
- After the image is saved, click OK at the confirmation dialog.
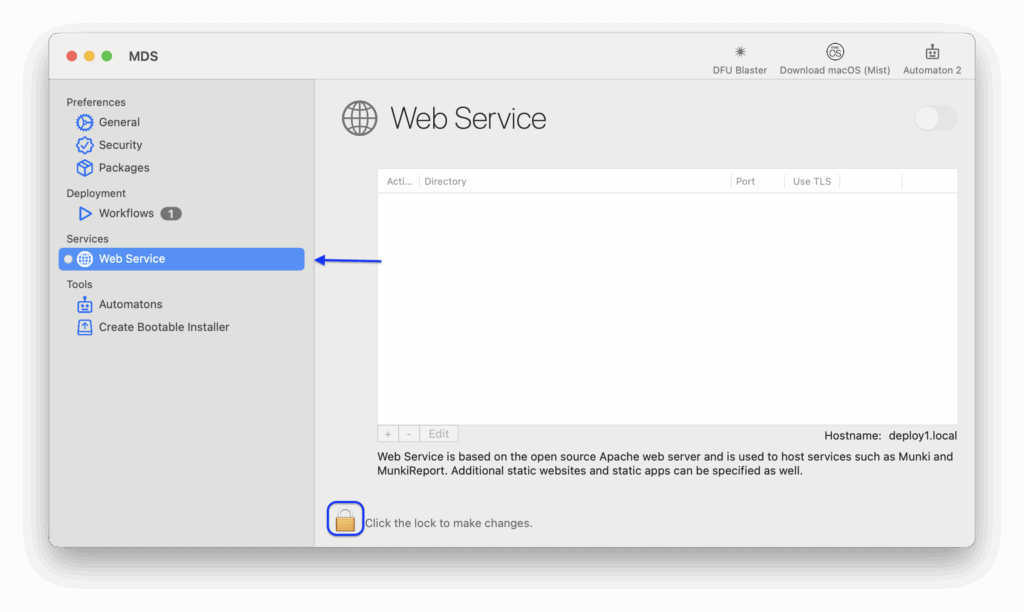
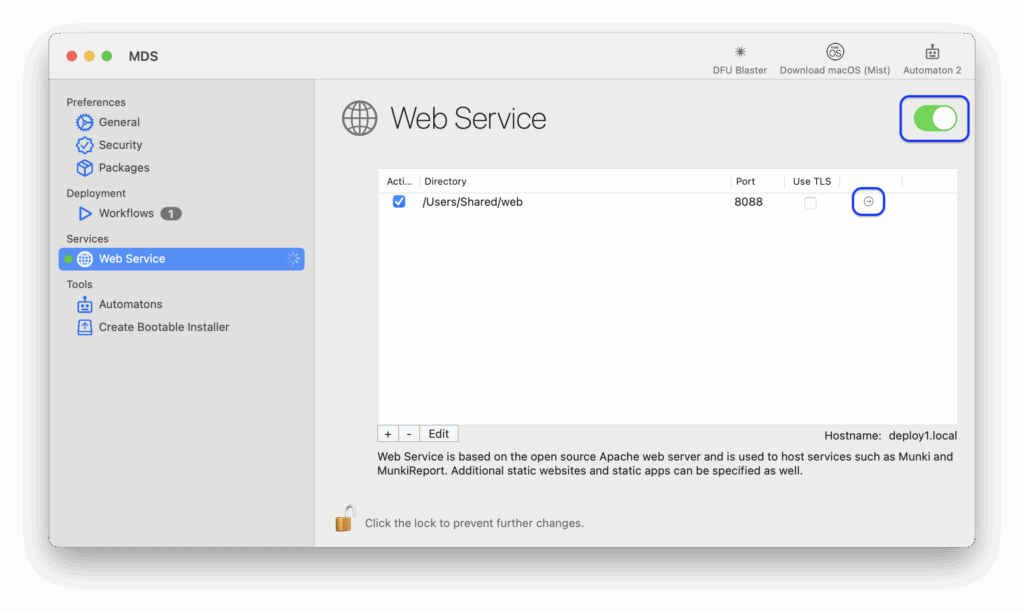
- Under Services, select Web Service.
- Click the lock icon at the bottom of the window.
- Enter in the password of
appleand click OK. - Enter in the password of
appleto install the helper tool and select Install Helper.

- Click “+” to add a web folder.

- Select the Select Folder button.
- Make sure the web folder is selected and click Open.
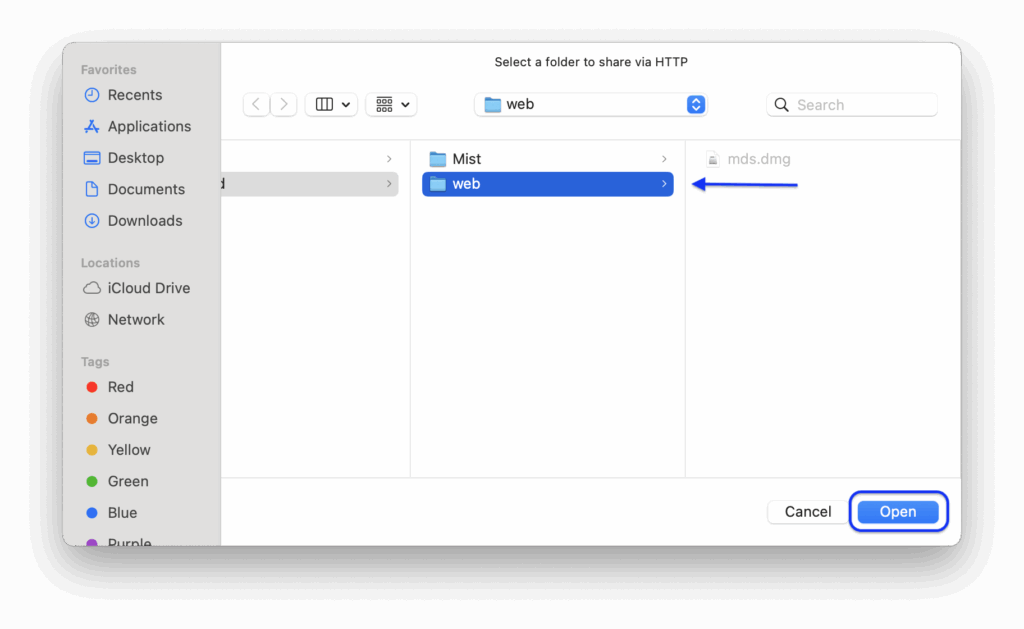
- Click OK to dismiss the web folder setup.
- Click the slider icon in the upper right to turn on web services.
- Click the arrow next to
/Users/Shared/webto open the web folder to verify web services are running. You should see a “deploy.dmg” listed on a page titled “Index of /”.

- Quit Safari by select Quit from the Safari application menu.
- Quit MDS by select Quit from the MDS application menu.
Set Up Automaton
- Click the Finder icon on the left side of the Dock.
- From the Go menu, select Applications.
- Open Automaton by double clicking the app icon.

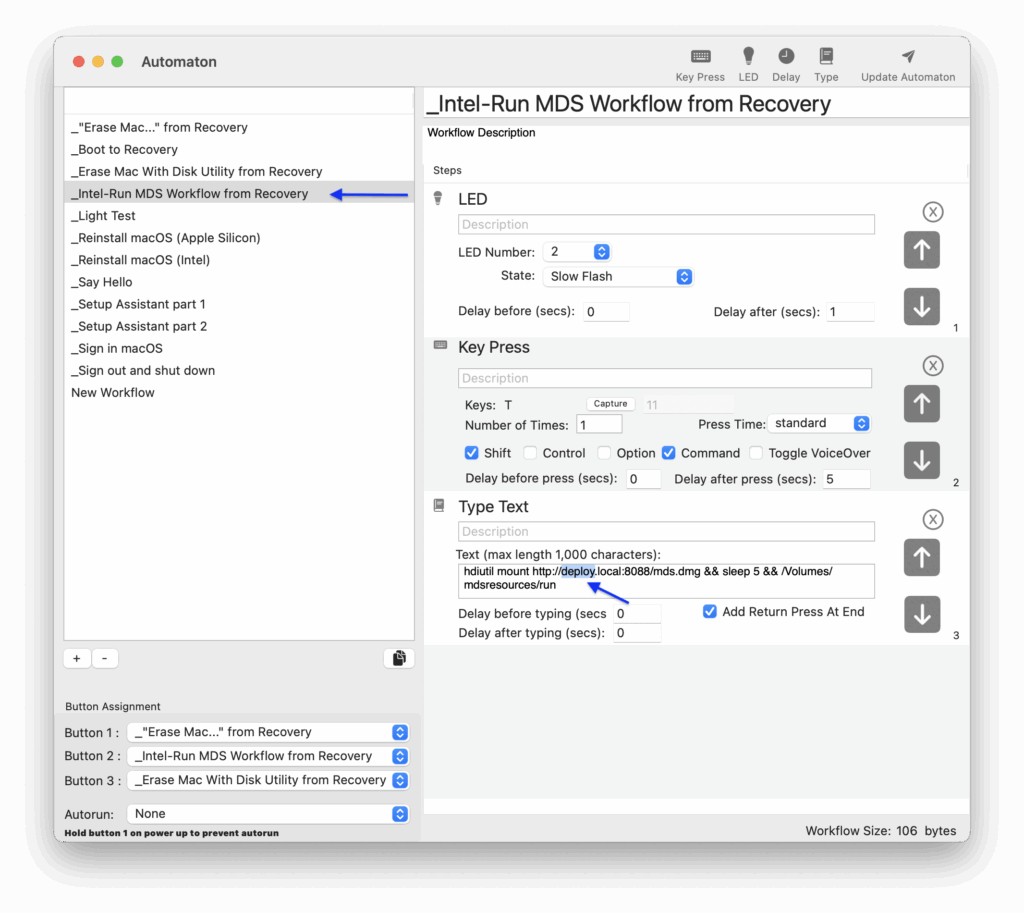
- Select the “_Intel-Run MDS Workflow from Recovery” and under the “Type Text” step, update the url from
http://deploy.local:8088to match the computer name. For example, if the computer name isdeploy1.local, the url will start withhttp://deploy1.local:8088.
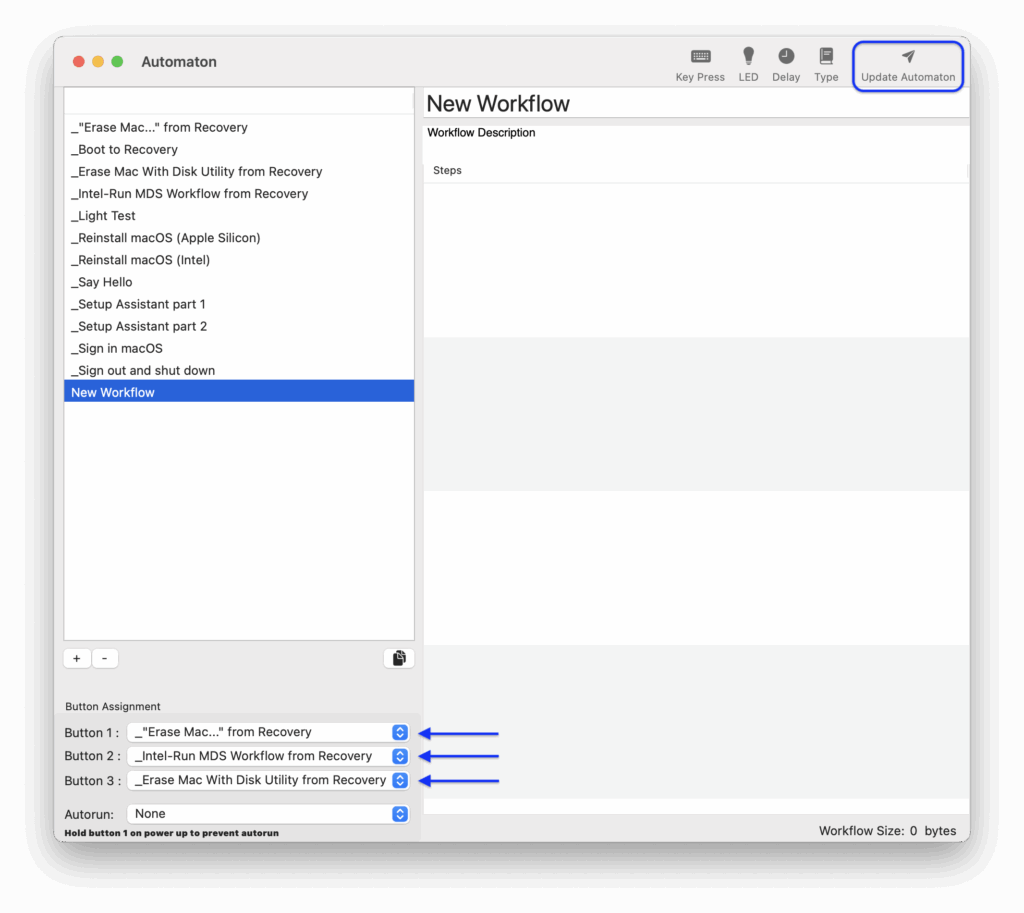
- Assign buttons to workflows in the lower left corner by selecting the following workflows:
Button 1: _Boot to Recovery
Button 2: _Intel-Run MDS Workflow from Recovery
Button 3: _”Erase Mac…” from Recovery

- Insert the Automaton into the back of the Mac mini.
- Click Quit when prompted for Keyboard Setup Assistant.

- Select Update Automaton.
- Click Update.

- If you are prompted to update the firmware, click Update Firmware, then Flash and OK. Then repeat steps 7 to 9.
- Remove the Automaton and repeat for any additional Automatons by repeating steps 6 – 10.
- Quit Automaton app by select Quit from the Automaton application menu.