XCreds Setup with Azure OIDC
Download the example Azure mobileconfig file.
- In Azure Portal go to
App Registrations, clickNew registration, and give the registration a name. UnderRedirect URIselectPublic client/native (mobile & desktop)and enter a value ofhttps://127.0.0.1/xcreds. Then selectRegister.
Make sure the type is Mobile.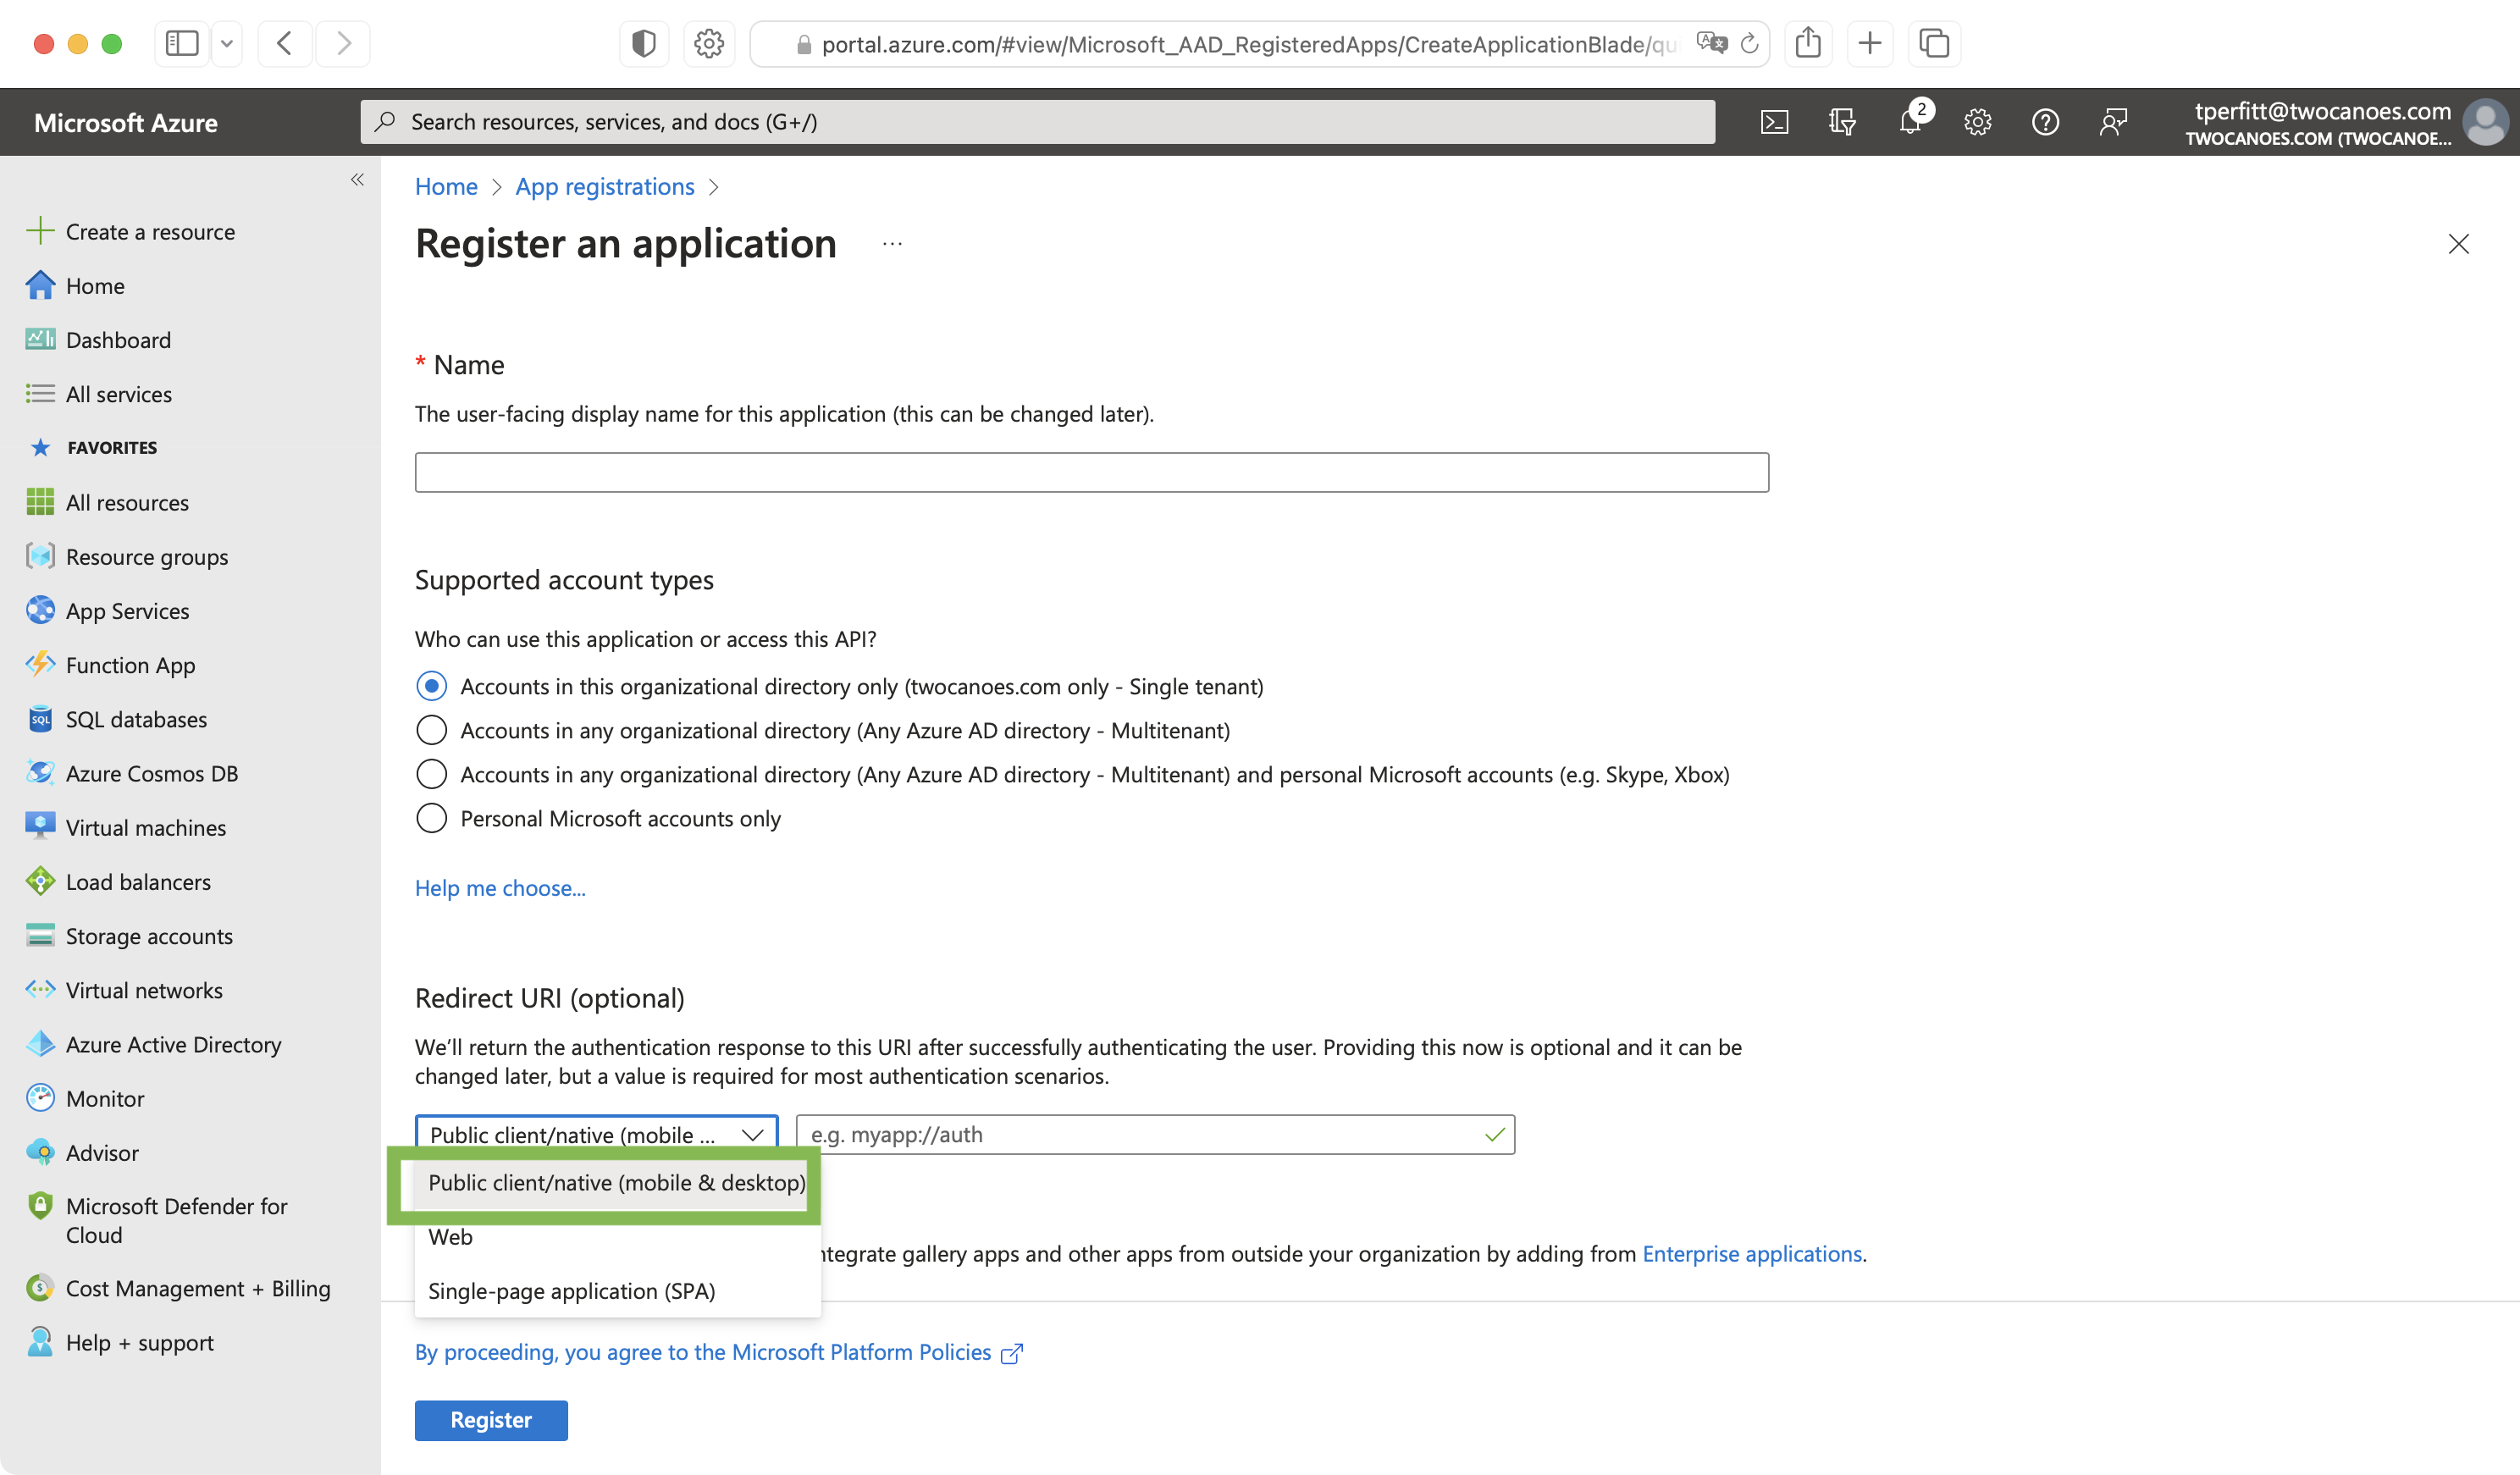
- Once the app is created, note the Application (client) ID.
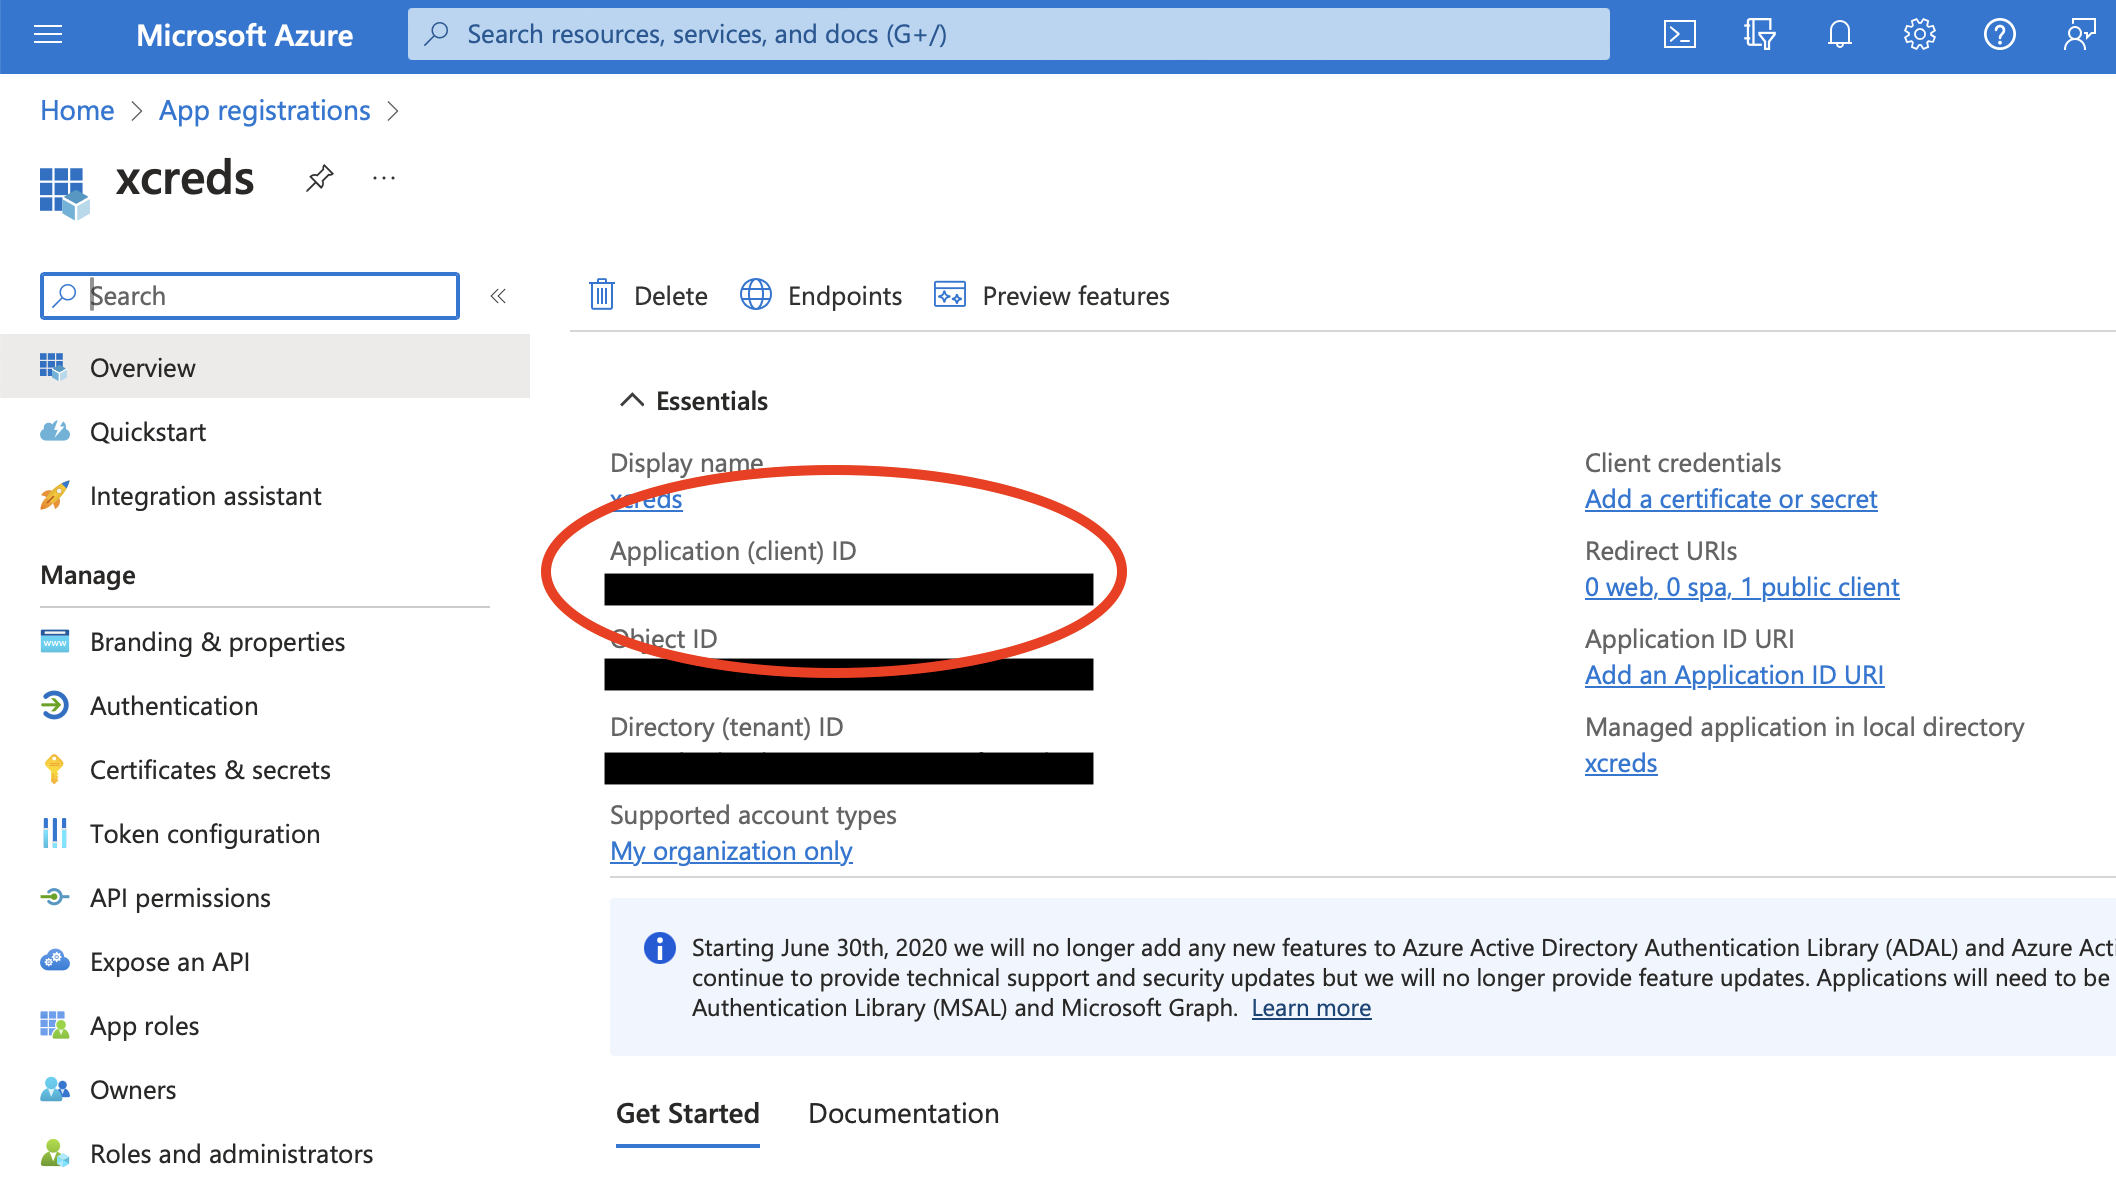
- Open the downloaded example Azure mobileconfig file in a text editor. Edit the contents and update the client ID to match the Application (client) ID from above.
- Install this configuration profile and approve the profile in System Settings.
- To avoid requiring users being shown a permissions warning screen the first time they sign in, go to
API permissionsfor the app registration. UnderConfigured permissionsclick the button forGrant admin consent for <domain>, and then confirm.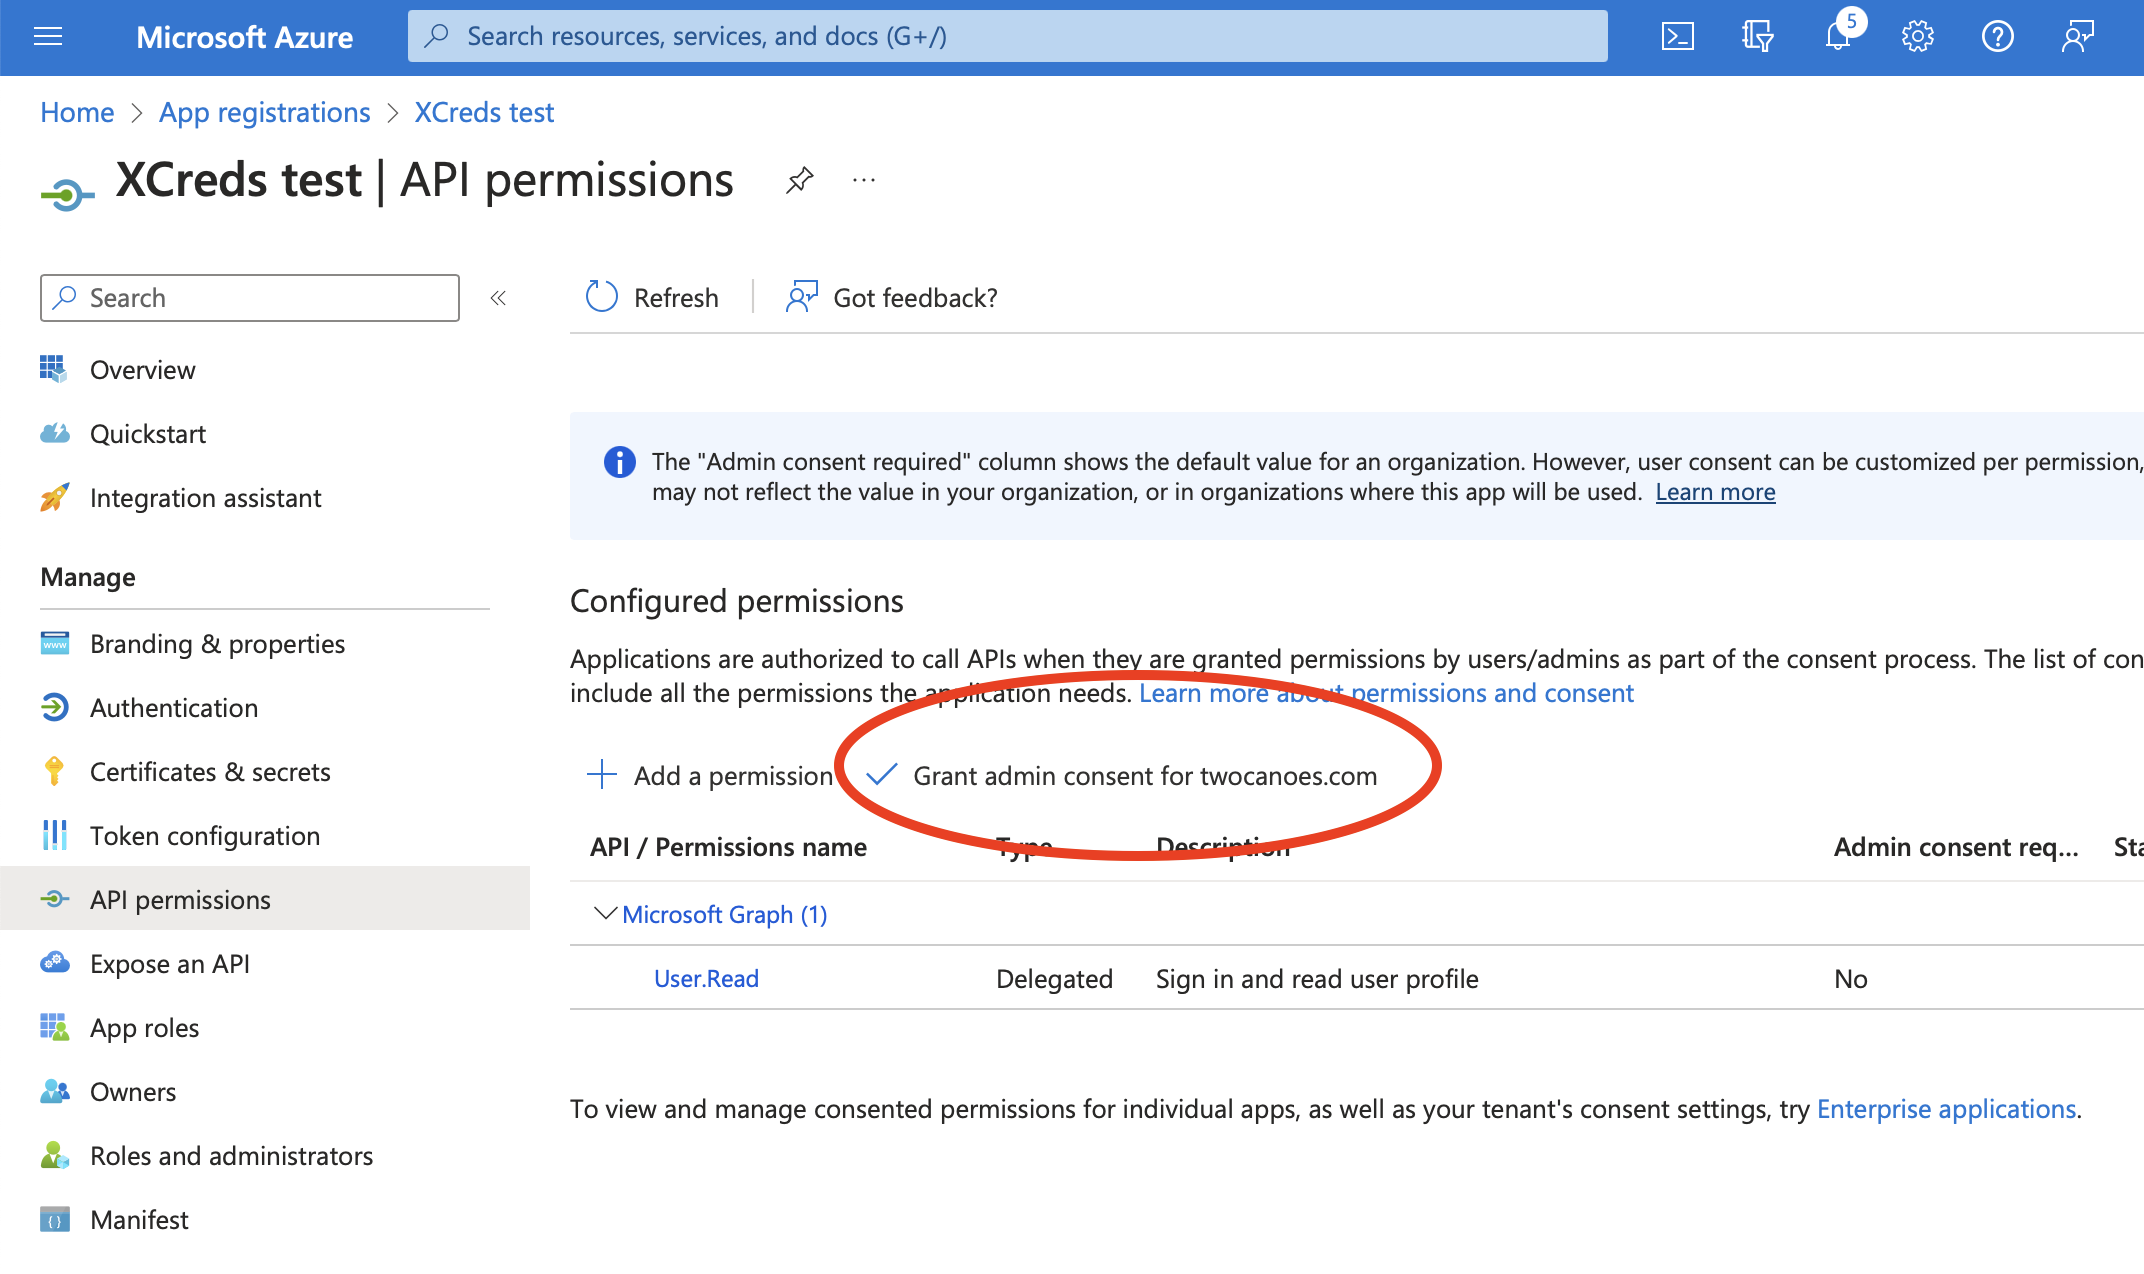
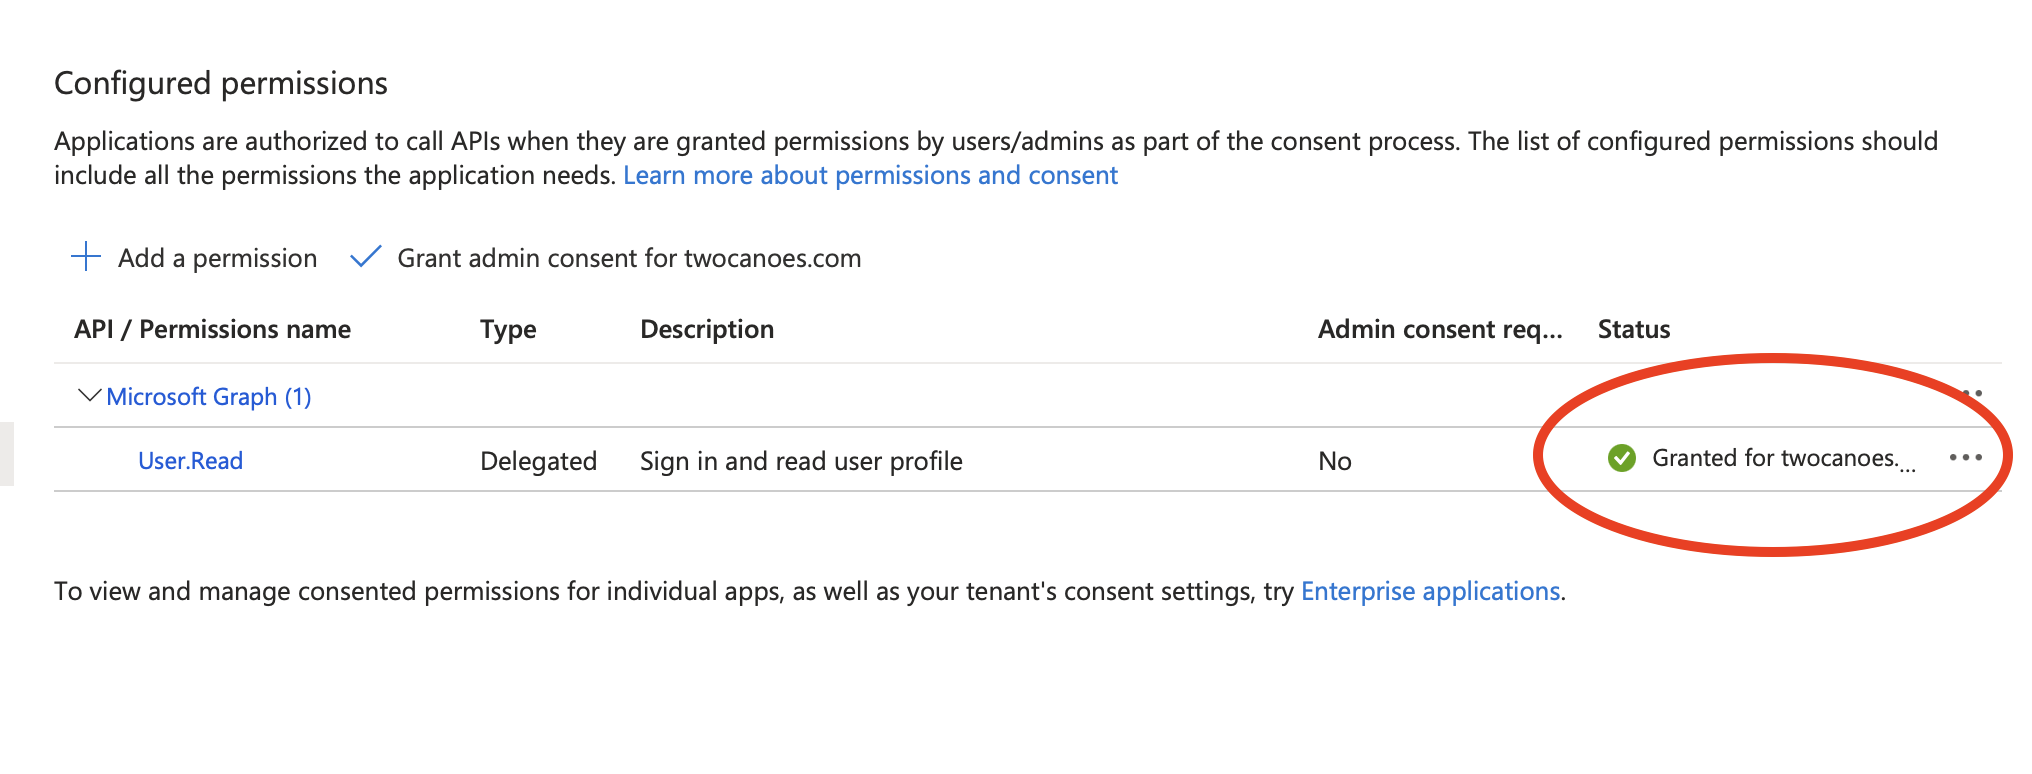
- Check that API permissions status now shows as granted.
- Install the XCreds app.
- Log out and you should now be able to log in with your Azure credentials.
- You can also launch the XCreds app and it will stay running to check for password changes.