Deploying macOS and Windows 10 Using Winclone Pro and MDS
Note: Please use MDS 1.5 or later and Winclone Pro 7.3.3 or later.
MDS is a free, efficient way to deploy macOS, packages, and scripts to modern Macs. Winclone Pro creates standard macOS packages that partition and install Windows 10. Using MDS, you can quickly deploy Dual Boot Macs, setting up both the Mac partition and the Windows 10 partition.
Create a Winclone Package
The first step is to create a Windows 10 package using Winclone Pro. This process is outlined in detail in the Creating, Customizing and Deploying Winclone Packages Using Winclone 7 Pro article. Follow that article and return here once the package has been created.
Prepare MDS
MDS creates all the resources for installing macOS, packages, and scripts on an external drive or a disk image that can be uploaded to a web server or file share. One of the packages should be a Winclone package so that after macOS is installed, the Winclone package will automatically be installed, creating and restoring the Boot Camp partition. Once these resources have been created, the target Mac is booted to the recovery partition and the resources are used to restore both macOS and the Winclone package from the external drive or a web/file server.
- Download MDS from the MDS page and install in macOS on an admin computer.
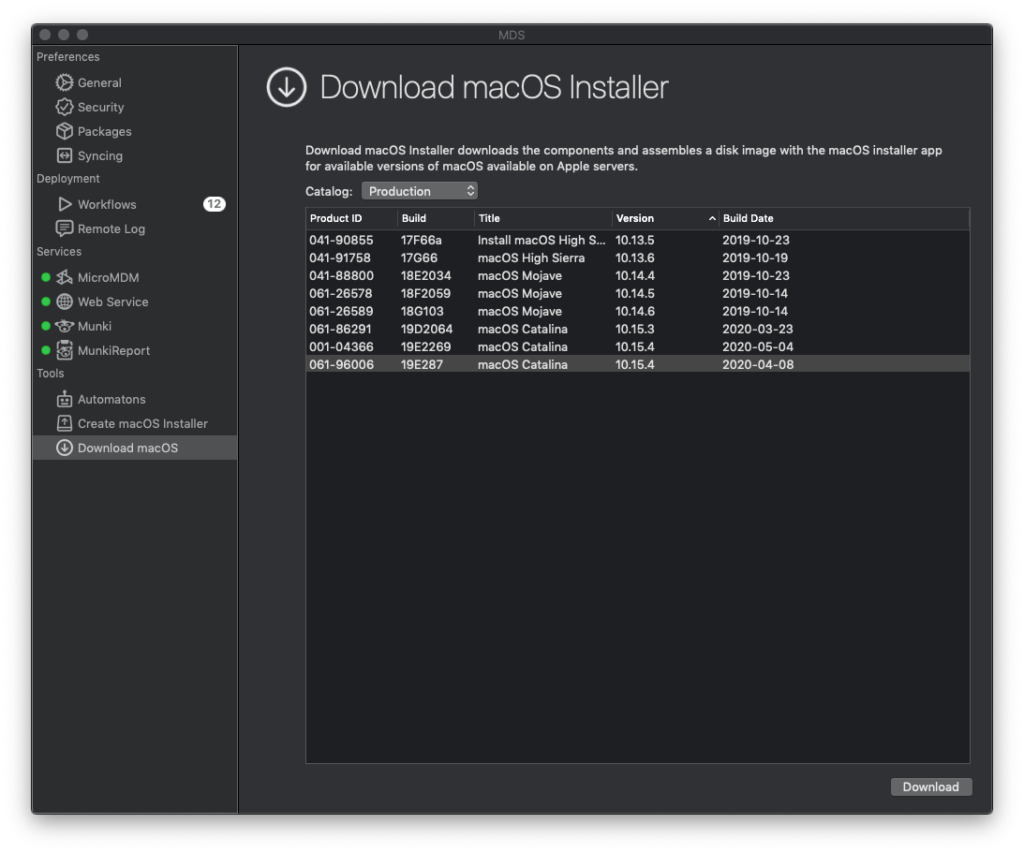
- Download a macOS installer using the “Download macOS” panel in MDS.
Create a folder named “Packages” on your desktop. Put the Winclone package in that folder.
Open MDS and go to Workflows. Click “+” to create a new workflow. Name the workflow “Dual Boot Macs” and select the following settings:
- Install macOS: Checked
- macOS Installer: Select the “.sparseimage”, “.app”, or disk image that contains the macOS installer.
- Erase and Install: Checked
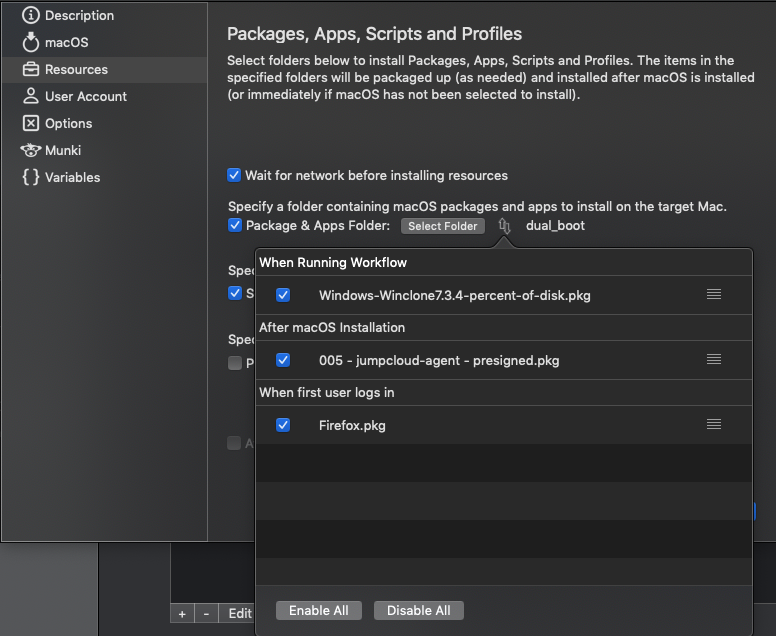
- Packages & Apps Folder: Checked and select the folder on the desktop called “Packages” that has the Winclone package in it.
- Set the Winclone package to install “When Running Workflow”.
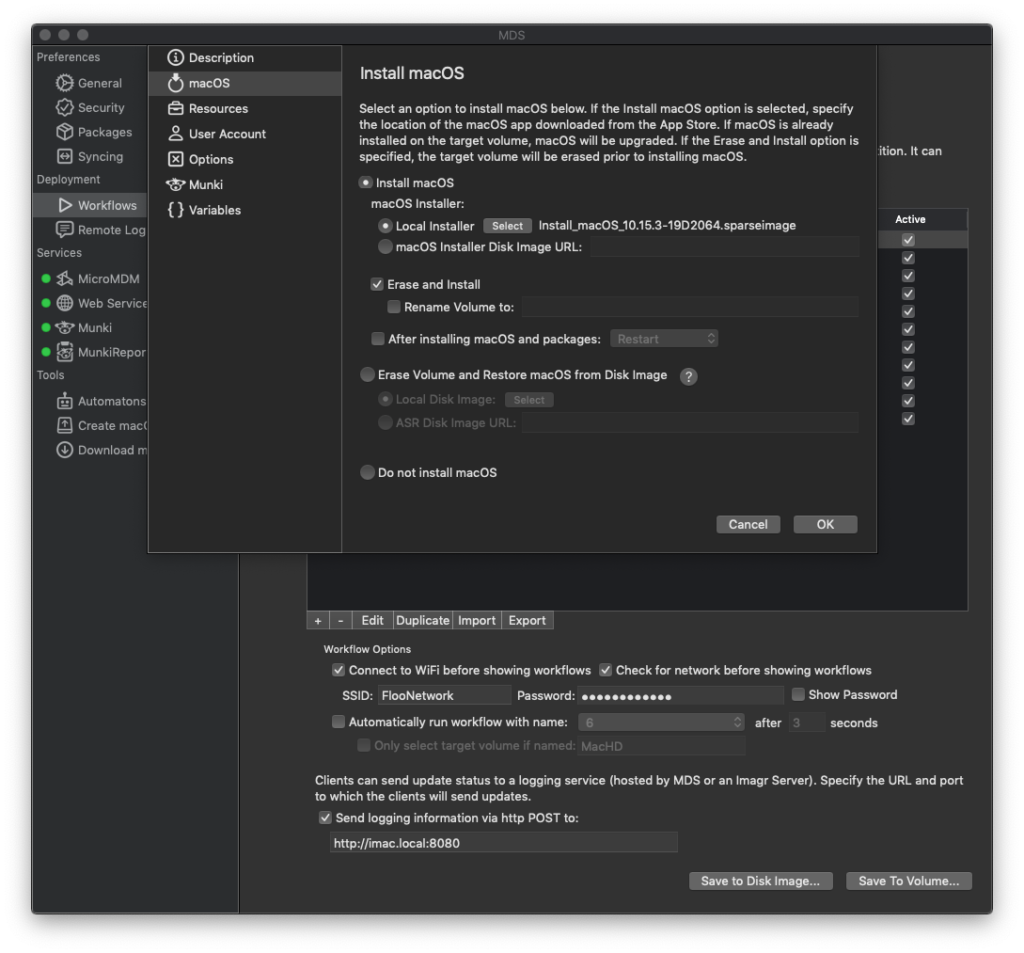
Click OK to close the Workflow sheet
Click Save to Volume and insert a HFS+ formatted external volume. For this example, the external volume is named “mds”. Click Open. The MDS resources will now be saved to the external volume.
Deploying the Dual Boot Mac
The external volume is now ready to be used to completely set up a Mac. On a new Mac, boot to the recovery partition by restarting and holding down Command-R to boot to the recovery partition.
Once the Mac has booted to the recovery partition, select Terminal from the Utilities menu.
Launch the workflow selector by running the following command (if the external volume is not named “mds”, change “mds” to the name of your external volume):
/Volumes/mds/run
The workflow selector, Imagr, is now launched. Select the target volume (the volume that will erase, macOS installed on it, and split up to make a Boot Camp partition).

Click “Run Workflow” to begin to erase the volume, restore macOS and install the Winclone package.
For advanced setups like automating the process using an MDS automaton or using a disk image on a web or file server, see the MDS Admin Guide.
You can also add in additional packages to the Packages folder and save the new resources to the external volume: the new packages will be installed after macOS has been installed. The packages can include software, client management software, or a package to enroll in an MDM service.